LED Strip holder - Ender 3 (Pro)
thingiverse
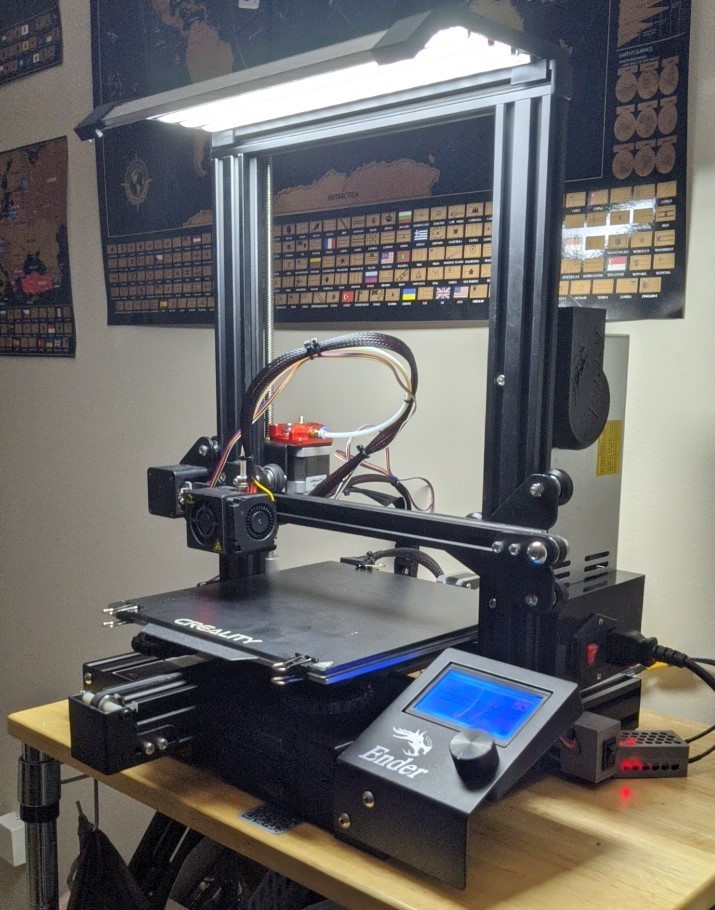
**I made a custom section with all updates on this item.** This is my first big project. The LED lights are connected to 3d printer psu and my holders probably will not be suitable for running a wire from power outlet. Anyway I'll try to explain everything I did and I'll start with a list of items I used: * [LED Aluminum Channels](https://www.amazon.com/Muzata-Aluminum-Mounting-Installations-Diffuser/dp/B01M09PBYX/ "Title") Bought them from Amazon, kinda expensive but I used them for other projects too. * [Buck Converter](https://www.amazon.com/gp/product/B06XZ1DKF2/ "Title") This might be optional, at this point you need to decide if you want to connect your LED to the 3D printer PSU and if your what's the voltage of your psu (maybe it has 12v outlet) and also you need to know which LED light you're using to understand if you need to step down the voltage from psu. * [LED lights](https://www.amazon.com/gp/product/B00HSF65MC/ "Title") I used these cheap ones 12V LED, so that I needed to decrease the voltage from psu. * [Wires (14 AWG and 22 AWG)](https://www.amazon.com/gp/product/B00QTCBZ4I/ "Title") 14 AWG to connect PSU to buck converter and 22 AWG to connect lights. I might be wrong on these parameters, but I checked everywhere and I think that should work (hey, I'm still alive yay). 14 AWG wires I had from other projects, 22 AWG I bought from amazon * Rocker Switch, if you don't want to keep them running all the time * [Fully DIY: XT60 connectors](https://www.amazon.com/gp/product/B074PN6N4K/ "Title") * Or you can buy XT60 splitter, on Amazon there are plenty of them. *All the links here are not affiliate, I don't get profit from this, just my shopping list with items that worked * **Comment 1: holder-1.stl is left holder, holder-2.stl is right and is upside down, just turn it 180 (Sorry!) ** *Here's the plan:* 1.I made XT60 splitter by soldering connectors and 14 AWG wires. 2.Connected buck converter with XT60 and plugged it into splitter, then dialed it with multimeter and it's done. 3. I cut my aluminum channels, approximately 12 inches each. In holders there's some room for error, so they don't have to be perfect. 4. Print holders, right holder has a small hole for wires. **Both holders has enough place for wires, just don't slide channels all the way (see the picture).** 5. Slide channels in holders. That's a tough one, I messed up so bad with measurements and it's really tight. 6. At this point I soldered lights together, you just need to cut as much as you can fit in channel and for my led strip it was 5 segments with 3 leds on each segment. 7. Run wires from lights through right holder's hole and then solder it with switch and buck converter. Actually I didn't solder them, I was too lazy to unscrew the psu from printer and I ran the wires behind, then soldered them. 8. I guess that's it, holders will snap in place on extrusion, and yeah, they're tight fit as well. I'll try to add more info and switch box stl, if you have questions, please feel free to ask.
With this file you will be able to print LED Strip holder - Ender 3 (Pro) with your 3D printer. Click on the button and save the file on your computer to work, edit or customize your design. You can also find more 3D designs for printers on LED Strip holder - Ender 3 (Pro).