Lee Breech Lock Quick Release Hand Press Mount
thingiverse
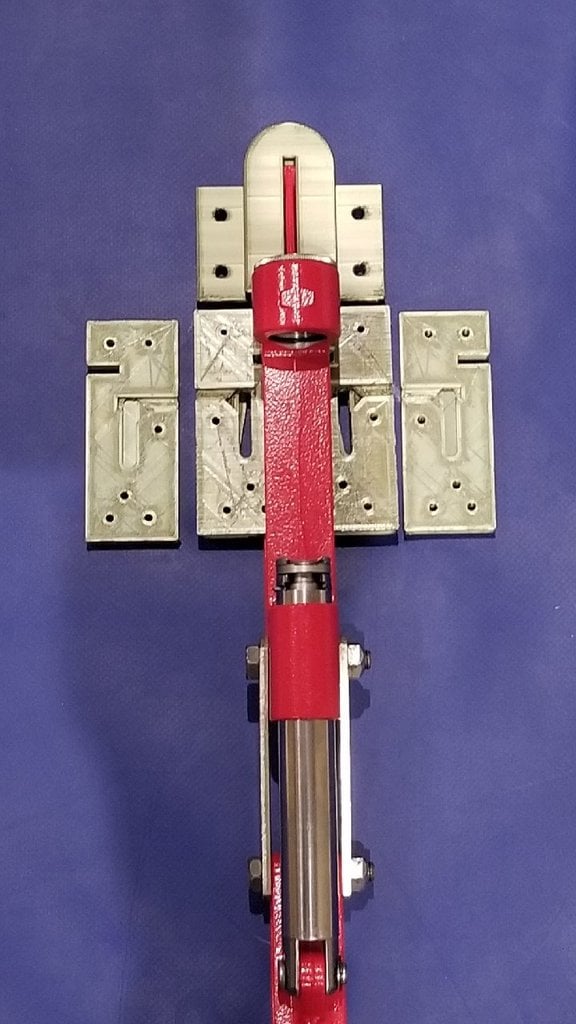
**VERSION 2.0 is up** This is a bench side quick-release mount for a Lee Breech Lock hand press. Allows to operate the press in mounted position (better for priming and especially powder charging) and quickly detach to operate in hand-held position. **OpenSCAD SOURCE FILES are included to facilitate tweaking to your particular material / set-up / available accessories** **Parameter experimentation WILL be needed to ensure reliable set-up and operation. Be ready to reprint a couple of times with tweaked parameters to ensure proper fit, especially in the dovetail and lock tightener area.** ***DISCLAIMER: Ammo reloading is inherently a risky activity. Failure to adhere to safety procedures and/or reliable reloading manuals may result in property damage, injury or even death. Proceed at your own risk! I have no control over your actions, and I am not responsible for any result of your use of these models - including damage to you, your firearm or your reloading equipment. PROCEED AT YOUR OWN RISK!*** PARTS: 1. Upper holder 2. Base plate 3. Bottom slide part (x2 - left & right) 4. Top slide part (x2 - left & right) EXTRA ACCESSORIES NEEDED: - 2x IKEA S-shaped allen wrenches for lock arms (you'll have a lot lying around if you assembled a bunch of IKEA), or similar-shaped objects - 4x flat head screws (to mount base plate part) - 4x washer head screws (to mount upper part, can also use flat head but will be less sturdy) - an assortment of M3 screws and nuts (4x M3x20 and 6x M3x8...16 (to assemble top and bottom slide parts together). PRINTING INSTRUCTIONS: See below. ASSEMBLY AND OPERATING INSTRUCTUONS: 1. Slide the upper part onto the press die side handle as shown in the photos, as far up as it would go. Mark hole positions, drill and attach the upper part with the press in it (if it falls out on its own, it's too loose - tweak tolerance and reprint). 2. Temporarily attach the top and bottom slide parts together using one M3 screw (each side). Slide the dovetails to the base plate, squeeze slide sides together so that the press handle is held between the slide sides and the base. Mark the base plate position. Remove slide, mark base plate mounting holes, drill and attach. (Screws should not protrude above the base plate; if it happens, chamfer the holes or tweak and reprint.) 3. Now assemble the slide top and bottom *with IKEA keys held between the top and the bottom part* using M3x12 screws for the top/bottom holes, M3x12...16 for middle hole, and M3x18 (M3x20 can be used with an extra nut or 2-3 washers) for the intermediate "stopper" holes, all held by M3 nuts. Tighten all screws all the way to sink the nuts in. Then *loosen* the M3x18's so that it does not protrude below the slide bottom surface. (If any other screw protrudes, use a shorter screw or use a washer or file it down. If the nut protrudes, tweak and reprint.) 4. Insert the slides into the base plate dovetails, then tighten the M3x18 screws to prevent the slide from getting all the way out. 5. To release the press, rotate IKEA keys upwards 90 degrees to unlock, move slide sides outwards, then pull the press down from the upper part. 6. To lock the press, stick it into the upper part, then squeeze slide inwards until you can rotate IKEA keys 90 degrees down to lock/tighten. (NOTE: if keys don't rotate, you may be squeezing too tight - the last 1mm or so of slide movement may be actuated by the keys rotation; the exact action depends on TIGHT vs base_th)
With this file you will be able to print Lee Breech Lock Quick Release Hand Press Mount with your 3D printer. Click on the button and save the file on your computer to work, edit or customize your design. You can also find more 3D designs for printers on Lee Breech Lock Quick Release Hand Press Mount.