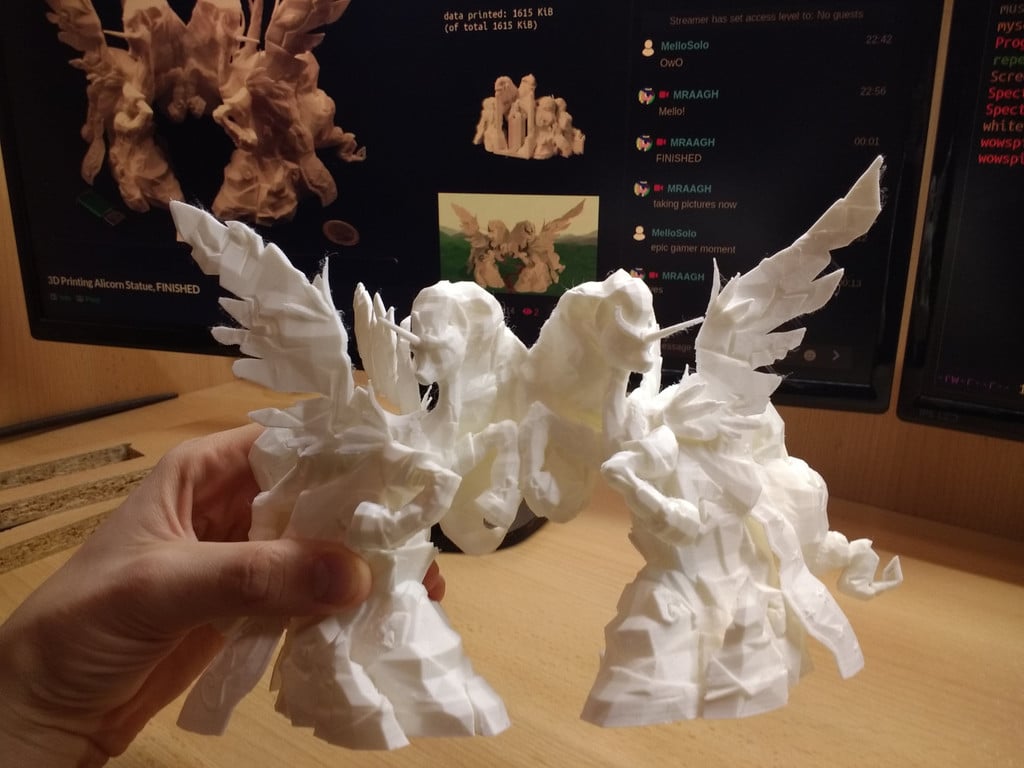
Legends of Equestria Alicorn Statue
thingiverse
This is a modified version of a model from [Legends of Equestria](https://legendsofequestria.com) Find this on [DeviantArt](https://www.deviantart.com/mraagh/art/3D-Printed-Alicorn-Statue-from-LoE-846162793) Find this on [my website](https://mazie.rocks/a/loestatue.html) Stopmotion video: https://youtu.be/uH-YoRytt70 Animation: https://youtu.be/SCzuEviPV_o # GUIDE: Here are my recommendations about how to print this, based on experience. ## MAIN.STL: - Use brim. - Use custom supports in support.stl. Do not use automatic supports! - Enable z-hopping. - Use infill. I've tried to keep support towers to a minimum, because they add a lot of printing time. Still, some are required to support the hooves, tails and the heads. The heads are the only part that requires support on top of the model itself, other supports are above build plate. I added a custom support structure model which you should use. It was designed for Ultimaker Cura but should work in other slicers too. Bed adhesion is very important because the main part is made up of many smaller segments which print in parallel. To ensure they don't detach and misalign, I added a structure of tines in main.stl. I don't think it can be printed without these. You cut the tines off with wirecutters. Definitely use a wide and thick brim (to do this, increase initial layer thickness). Definitely enable z-hopping for the main part, otherwise it crashes into something during the printing process. Infill is important. I used 20%. Tip: after printing, cut off 1mm at the bottom of each cape. Otherwise you will get annoying sounds when the cape slides on a surface. This part took 54 hours for me. ## WINGS: - Use brim. - No supports. - Enable z-hopping. - Use lower nozzle temperature. - Use lower speed. - Print two wings at the same time. - Cut off rafts with wirecutters. I added a raft and stability structure which firmly attach to the model. The bed attachment is still unreliable. Thus, z-hopping should be used to prevent unnecessary horizontal forces. Because of the small cross section, melting is a problem. You should lower temperature and speed and print multiple wings at once, so they give each other time to cool down. You attach wing 1 and wing 4 by pushing them with a finger. Be careful not to break the feathers. You attach wing 2 and wing 3 by placing a screwdriver into a slot at the inner side of the wing and pushing it in. The wing attachments are very tight. Once attached, it is impossible to take them off without breaking them in the process. ## HOOVES: - Use brim. - No supports. - Use infill. Easiest part to print. You can print both at once. ## HORNS: Horns are separate to make them replacable. Note: there are 2 different horns. The longer one belongs to the right alicorn. You need to print a lot of horns at once, otherwise they will melt. You remove them from the raft by cutting the horn with wirecutters. Horn tip doesn't print okay because it is too thin. Solution 1: print horns.stl and measure the height of the tallest horn with calipers. Divide 25 mm (1 inch) by your measurement, and multiply by 100%. The result is the scale that you need to put on the horn model to make it print correctly. Make sure to only scale vertically, not in all directions! Solution 2: print horns_for_manual_sculpting.stl instead. Then use sandpaper to sharpen the horns. I have not tried this but I think it would work. Solution 3: use painted toothpicks as horns instead of printing them. # How I made this model: The model from the game is not suitable for printing. These are the modifications I made: - Closed all surfaces with holes in them - Removed all internal caves and unnecessary gaps - Extended floating details to touch the body with no gaps - Removed some tiny/floating details that can't be printed - Removed some of the cracks because they were risky to print - Reshaped manes, hooves, tails, wings and clothes to have steeper overhangs - Ensured neighboring objects have overlap where possible - Made bridges perfectly horizontal where possible - Moved parts around to make space for supports - Split wings, horns and some of the hooves to separate printable objects - Extended capes to touch the ground - Made the distinct parts touch together early in the printing process. An exception is one of the 4 capes, so I gave it an additional stability structure. - Removed details on feathers and made them thicker - Custom build adhesion and support structures
With this file you will be able to print Legends of Equestria Alicorn Statue with your 3D printer. Click on the button and save the file on your computer to work, edit or customize your design. You can also find more 3D designs for printers on Legends of Equestria Alicorn Statue.