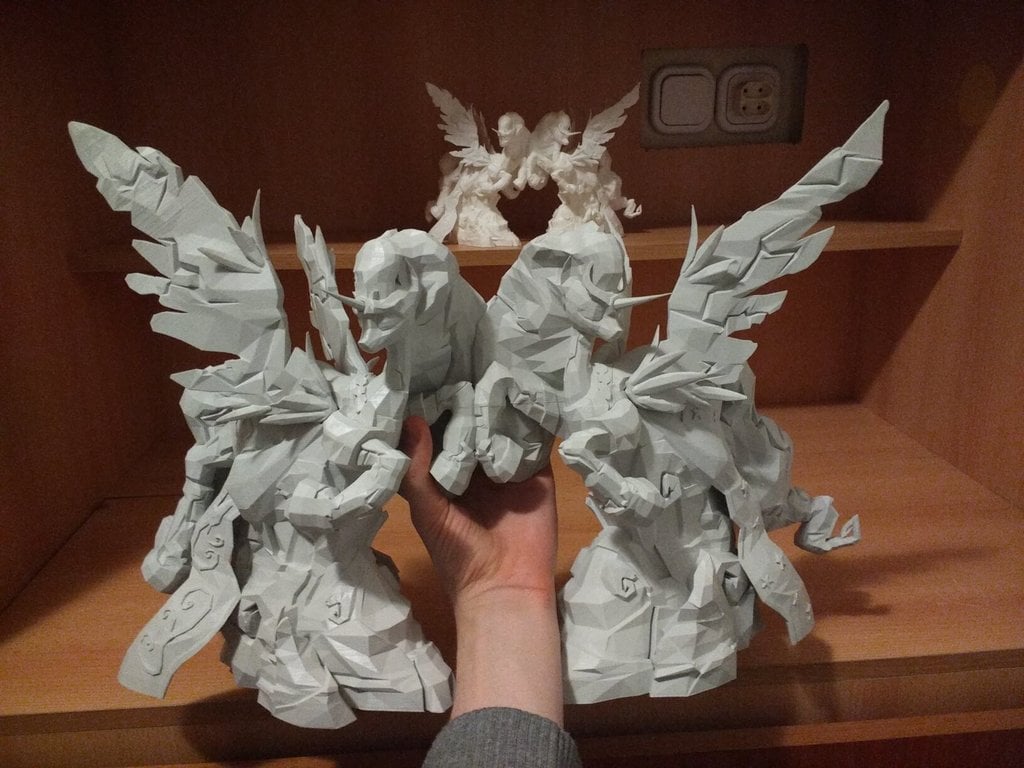
Legends of Equestria Alicorn Statue (larger)
thingiverse
This is a modified version of a model from [Legends of Equestria](https://legendsofequestria.com). [Smaller version (fewer parts)](https://www.thingiverse.com/thing:4491775) [Turntable!](https://mazie.rocks/files/alicornstatuebig/) [Download all files!](https://mazie.rocks/files/alicornstatuebig.zip) [This on Deviantart!](https://www.deviantart.com/mraagh/art/Larger-3D-Printed-Alicorn-Statue-from-LoE-923993562) [This on my website!](https://mazie.rocks/a/loestatuebig.html) [Commission me!](https://ponyprinter.com) # GUIDE: Here are my recommendations about how to print this, based on experience. ## LEFT.STL, RIGHT.STL, HEADS.STL, MANES.STL: - Use brim. - Use custom supports. Do not use automatic supports! - Enable z-hopping. - Use infill. I have tried to keep support towers to a minimum, because they add a lot of printing time. Still, some are required to support the hooves, tails and the heads. All supports start on the build plate. I added a custom support structure model which you should use. It was designed for Ultimaker Cura but should work in other slicers too. There is a helpful alignment square on the support structure model and on the printed model. There is no support structure for manes.stl because there is already a built-in support in the model itself. You need to cut it off using wirecutters. Bed adhesion is very important because the main part is made up of many smaller segments which print in parallel. To ensure they don't detach and misalign, I added a structure of tines. I don't think it can be printed without these, at least not on glass. You cut the tines off with wirecutters. Definitely use a wide and thick brim (to do this, increase initial layer thickness). Tip: after printing, cut off 1mm at the bottom of each cape. Because it is better if the cape does not touch the surface the statue stands on. ## WINGS: - Use brim. - No supports. - Enable z-hopping. - Use lower nozzle temperature. - Use lower speed. - Cut off rafts with wirecutters. I added a raft and stability structure which firmly attach to the model. Wings are printed together in pairs to prevent melting (they give each other time to cool down) By default, the wings attach to the main model very tightly. Too tightly to be able to be detached later! You should sand down the attachment surface until it fits perfectly. ## HOOVES: - No brim. - No supports. - Use infill. Easiest part to print. You can print both at once. ## HORNS: - Print many at once (use horns.stl which has 4). - Disable z-hopping. - Use a high quality filament. - Use the highest temperature where it still does not string. - The horns are supposed to be as sharp as possible. Use a knife. You need to print a lot of horns at once, otherwise they will melt. You remove them from the raft by cutting the horn with wirecutters (not cutting the raft). You should disable z-hopping to prevent stringing. There is a "bug" in Cura which causes it to string anyway whenever progressing to the next layer. So I added two useless towers at the edge, and all the strings can go between them. After printing the horns, use knives and sandpaper to make them fit in and to sharpen the tips. It is difficult and many of them may break. But it is easy to print more. Note: if you have low quality filament that does not stick to itself very firmly, sharpening horns with a knife might be impossible. Get better filament! And maybe increase nozzle temperature.
With this file you will be able to print Legends of Equestria Alicorn Statue (larger) with your 3D printer. Click on the button and save the file on your computer to work, edit or customize your design. You can also find more 3D designs for printers on Legends of Equestria Alicorn Statue (larger).