LEGO Duplo compatible wheel with roller bearing
prusaprinters
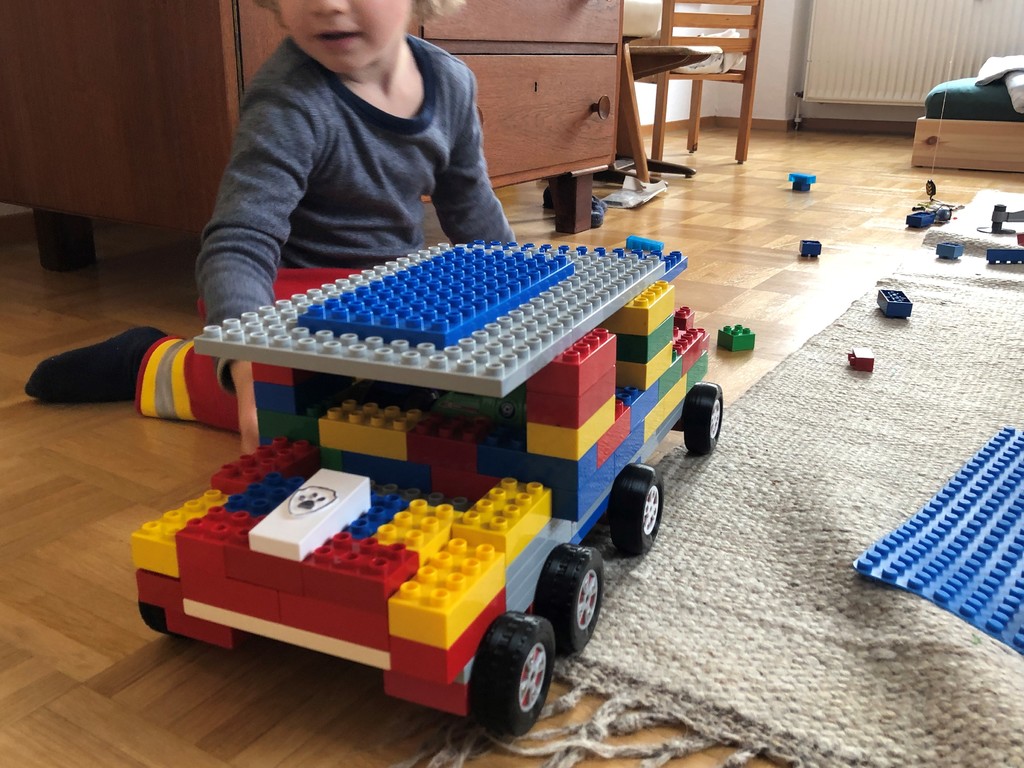
<p>When my son started playing with his LEGO Duplos, I immediately noticed one major isse: there are no proper wheels! Just stupid squeaky tiny wheels. So I designed larger wheels with 60mm diameter made of PETG and TPU or silicone rubber with a roller bearing.</p><p>Long story short, the wheels now have an appropriate size and they do not squeak at all. One minor issue is that they roll so well, that the cars he builds with it sometimes smash into the wall at full speed since there is really no friction at all. They are his favorite Duplo part for quite a long time now.</p><p><strong>Parts</strong><br>To assemble the wheel you will need in addition to the printed parts:<br>1x M4x30 screw, preferably hexagon socket head screw (bit shorter will also be fine)<br>1x M4 nut<br>4x M3x16 screws (flat head/ countersunk)<br>1x 13x5x4 bearing (13mm diameter, 5mm thick, 4mm axle diameter)<br>If you do not want to buy a roller bearing, you can also try the printed version but this will not be so nice and I wouldn't recommend it. The bearings are really cheap with <1€ in a decent quality.</p><p>If you want those nice silicone rubber wheels<br>2 part RTV curing silicone rubber (I used Trollfactory TFC Silikon Kautschuk Typ 3 HB and silicone colors)<br>M5x40 screw (or longer), preferably hexagon socket screw<br>M5 washer and nut<br>M6 screw of any length</p><p><strong>Printing</strong></p><p><i>Part1: The wheel assembly</i></p><ul><li>Print the parts 1-5. You can play with the color and hatching patterns, it looks great if the rims have a different color or texture.</li><li>Press bearing into wheel body (1)</li><li>insert M4x30 screw</li><li>push the wheel insert (2) into place</li><li>place the rim (3) and fasten the 4x M3x16 screws</li><li>slide the spacer (4) as shown in the picutre over the screw. The wide part should stick out</li><li>insert the M4 nut into the wheel mount (5)</li></ul><p>fasten the M4 axle screw in the wheel mount <i>Part2: The tyre</i></p><p>Print either one of the tyres in TPU and push them onto the wheel assembly.<br>-> Finished, enjoy! <i>Optional part3: silicone tyre mold</i><br>The instructions are quite long but the process is really fast. This is something you can do in 15 minutes</p><p>Print the mold for the left or the right tyre and the insert. I recommend using PETG since it doesn't stick to anything.</p><ul><li>push the M5 screw from the bottom into the mold part until the screw head sits nicely in the opening</li><li>push the insert over the screw and make sure the alignment pins are in the right position</li><li>secure the insert with the M5 washer and nut</li><li>prepare a bit of water with dish liquid, mix and pour into mold. Let dry over night, don't heat it</li><li>mix the silicone thoroughly and add silicone color if you want. You can use my silicone mixing cup kit if you want: <a href="https://www.thingiverse.com/thing:4299390">mixing cup</a></li><li>pour the silicone into the mold and bump it a bit on the table to release air bubbles</li><li>scrape excessive silicone from the top, place mold on a level surface and let it cure</li><li>don't clean silicone spills or residues from cup, spatula or table while liquid, just let it cure. You can remove it easily in the cured state, it is a really nice material</li><li>after the silicone is fully cured, remove excessive silicone from the top of the mold with a knife or just use your fingers.</li><li>remove the M5 screw, nut and washer and screw the M6 screw into the insert from the top</li><li>place mold in warm water and pull the insert out using the head of the M6 screw. Plyers come in handy at this point.</li><li>in the water bath, remove the tyre from the mold, you can use a spatula of a screwdriver. Be careful not to damage the mold.</li><li>push tyre over the wheel.</li></ul><p>enjoy! <i>Optional part4: plastic roller bearing</i></p><p>print the parts 9&10 together and make sure they are centered over each other in the slicer. I recommend printing with PETG since this material has least friction</p><ul><li>only print one bearing set at a time and print it seperately from the other parts. This improves quality.</li><li>print with high resolution, I used 70µm and elephant foot compensation in PrusaSlicer</li><li>if you can't get the roller bearing to break free, reduce the flow rate in the slicer. I also used maximum retract to reduce "blobs"</li><li>adding a bit of vegetable oil will work wonders</li></ul><p> </p><p>Update: I added the step files so you can modify the design as needed</p><p>Category: Toys & Games</p>
With this file you will be able to print LEGO Duplo compatible wheel with roller bearing with your 3D printer. Click on the button and save the file on your computer to work, edit or customize your design. You can also find more 3D designs for printers on LEGO Duplo compatible wheel with roller bearing.