LEGO Inspired Connected LED Lamp
thingiverse
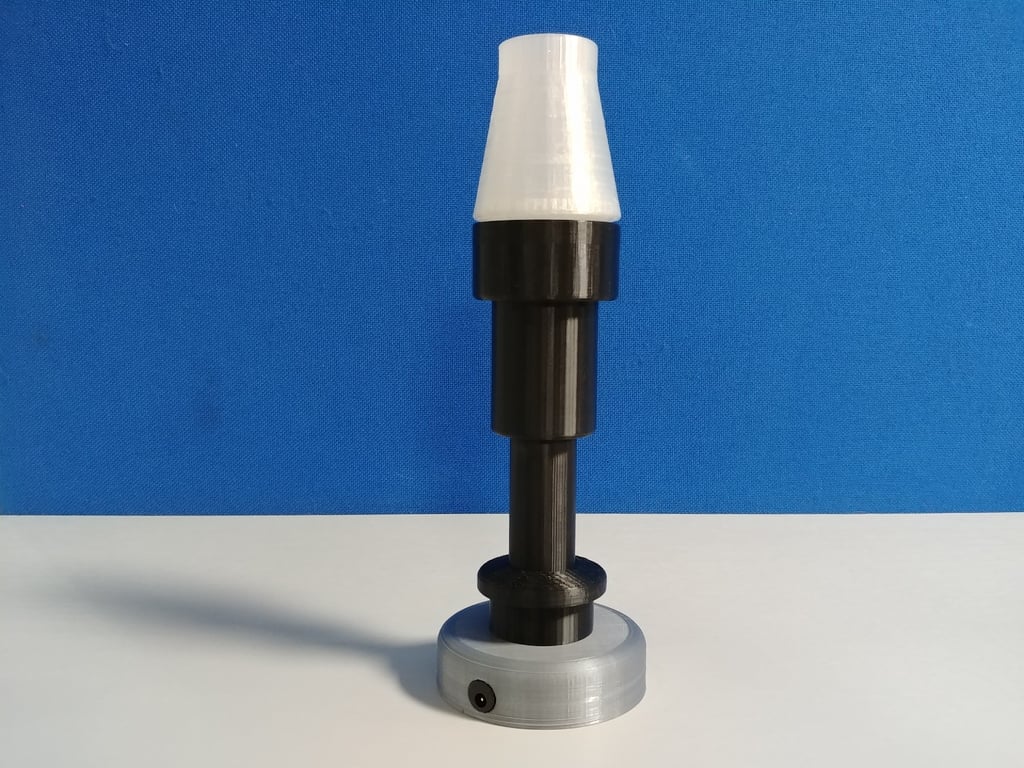
I designed this lamp in Fusion 360 as a learning exercise, and I decided to go with a LEGO theme. The column is modeled after the LEGO Castle Items Torch without the windswept flame, and my lampshade is modelled after the 4589 LEGO cone. The flame lampshade was made by Gianfranco Crevani and must be printed at 116% scale in order to fit. Here's Gianfranco's project page for the flame: https://www.thingiverse.com/thing:1366940. The Lamp is powered by a NodeMCU v1.0, and it's running the McLighting project in the video. This lighting project for the ESP8266 is written by Tobias Blum, and has many interesting features. Here's the McLighting project page: https://github.com/toblum/McLighting. Required Hardware (Links are examples- use your preferred supplier) 1 x NodeMCU v1.0 1 x Buck Converter 1 x 12-bit WS2812 LED Ring 1 x DC Power Socket 1 x Male+Female JST 2-pin with Flying Leads (or similar) 1 x 5x20mm Inline Fuse Holder 1 x 5x20mm 500mA Glass Fuse 1 x 470Ω resistor 2 x 1N4001 Silicon Rectifier Diodes (or similar) 3 x 3x16mm Screws 4 x Small Cable Ties Heatshrink Hot-melt Glue Build Guidance • All 3D printed parts apart from the lamp base bottom require supports. • The 3x16mm screws should simply screw into the base without any drilling. 3x12mm screws should also work. M3 countersunk machine screws could also be used here, but the holes in the base may require tapping. • The use of JST or other wire-to-wire connector is recommended to make removal of the internal bracket quick and easy • Hot-melt glue works well to secure the Lamp column to the lamp base, and also the LED ring to the internal bracket. • The silicon rectifier diodes on the NodeMCU supply rails drop the input voltage to ~3.6V, which is within the range allowed (it's the maximum). This setup allows the device to control the 5V WS2812's directly. DO NOT use schottky diodes here- you want at least 0.7V drop per diode.
With this file you will be able to print LEGO Inspired Connected LED Lamp with your 3D printer. Click on the button and save the file on your computer to work, edit or customize your design. You can also find more 3D designs for printers on LEGO Inspired Connected LED Lamp.