Lehre für PINDA/SPINDA
prusaprinters
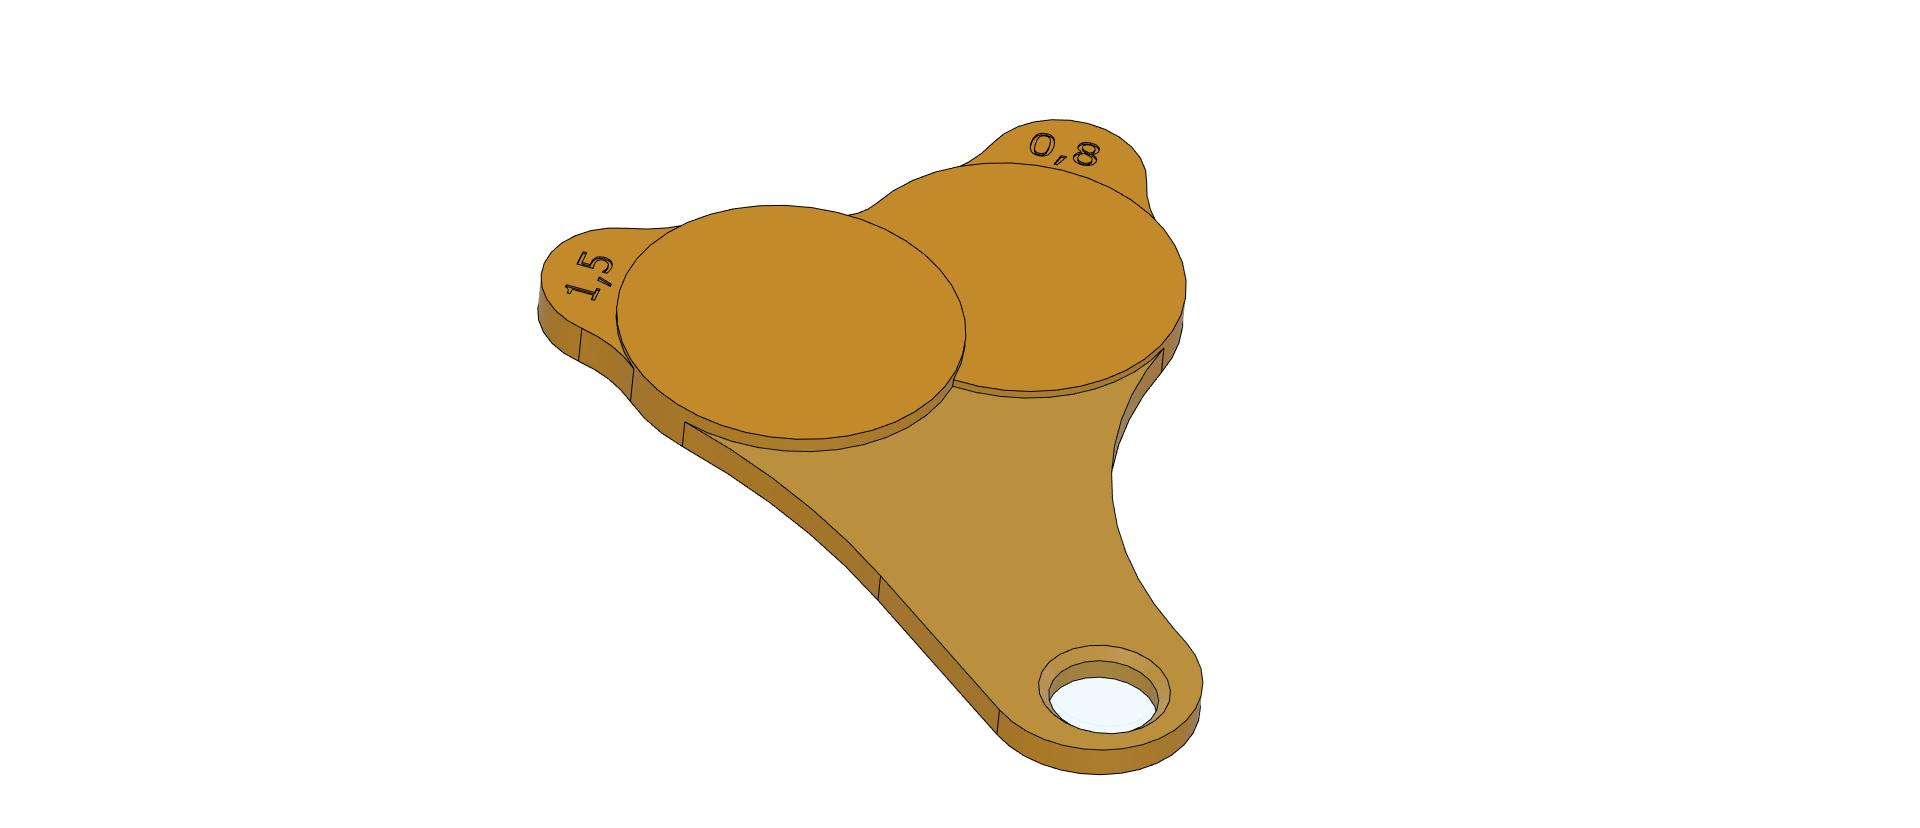
<p>Prusa empfiehlt die PINDA mit einer Kreditkarte einzustellen, was mir nicht so gefällt,<br/> da man mit der Düse an das Druckbrett fahren muss und diesen beschädigen könnte.</p> <ol> <li>warten bis gereinigte Düse abgekühlt ist.</li> <li>Drucker ausschalten.</li> <li>PINDA/MINDA - SPINDA/SMINDA lockern und etwas nach oben schieben.</li> <li>Z-Achse händisch auf der Trapezspindel nach unten drehen, bis die Düse den unteren<br/> Teil der Lehre berührt (siehe Bilder).</li> <li>PINDA/MINDA - SPINDA/SMINDA nach unten schieben, bis sie die Lehre berührt.</li> <li>PINDA/MINDA - SPINDA/SMINDA anschrauben.</li> </ol> <p>Die Super-PINDA (neu) benötigt einen Abstand zur Düse von 1,5mm, das ältere Model nur 0,8mm</p> <h3>Print instructions</h3><p>1st. Layerhöhe: 0,2mm<br/> Layerhöhe: 0,1mm</p> <p>Material: Exdrudr PLA NX2 (military green)</p>
With this file you will be able to print Lehre für PINDA/SPINDA with your 3D printer. Click on the button and save the file on your computer to work, edit or customize your design. You can also find more 3D designs for printers on Lehre für PINDA/SPINDA.