Lever for Virpil Joysticks
prusaprinters
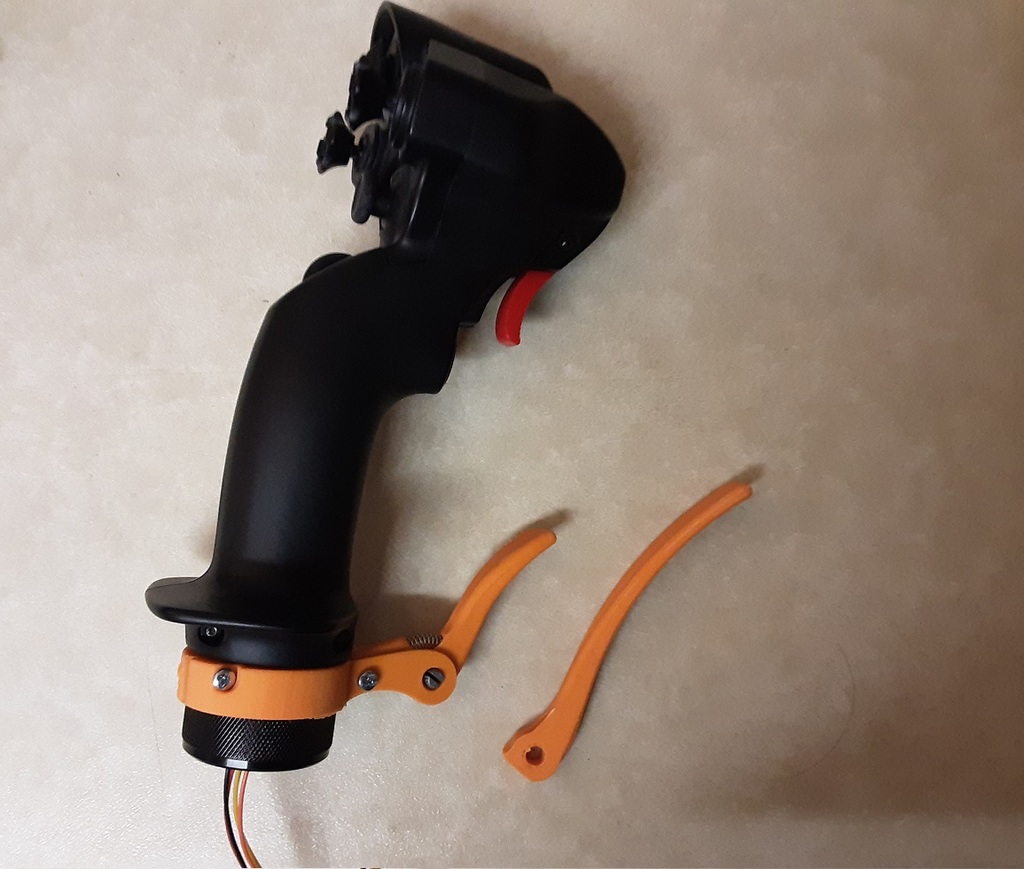
<h3><strong>Like to support my work. Comment for improvement.</strong></h3><p>With the DCS module Mi-24 being released, I wanted the matching joystick. I added the missing brake lever to the WarBRD joystick, with a little bit less un-ergonomic design.</p><h3><strong>Materials:</strong></h3><ul><li>M3x 10mm bolt + nut.</li><li>M3x 16mm bolt + nut.</li><li>rotary potentiometer.</li><li>5-pin JST PH male connector plugged into the base.</li><li>Optional compression spring (5mm in diameter, 20mm in length and 0.8mm wire diameter).</li></ul><h3><strong>Assembly:</strong></h3><ol><li>The pictures are worth 1000 words.</li><li>Plug the potentiometer wires either:<ul><li>in an Arduino Leonardo/Pro Micro, get the joystick library and follow the examples in <a href="https://www.arduino.cc/en/Tutorial/BuiltInExamples">Arduino tutorial chapter 3</a>.</li><li>in the Virpil base at your own risk.<ul><li>When the wiring is done and the grip is connected, open the Virpil's configuration's tool, define 2 new axis (double click on a free axis) and calibrate them. That's it. Just take your time, it's very easy.</li></ul></li></ul></li></ol><h3><strong>Known Issues and Planned Solutions:</strong></h3><ul><li>Works with the grip's twist axis.</li><li>Now with an optional secondary lever.</li></ul>
With this file you will be able to print Lever for Virpil Joysticks with your 3D printer. Click on the button and save the file on your computer to work, edit or customize your design. You can also find more 3D designs for printers on Lever for Virpil Joysticks.