Lewihe Play 3D LASER cutter/engraver mount
thingiverse
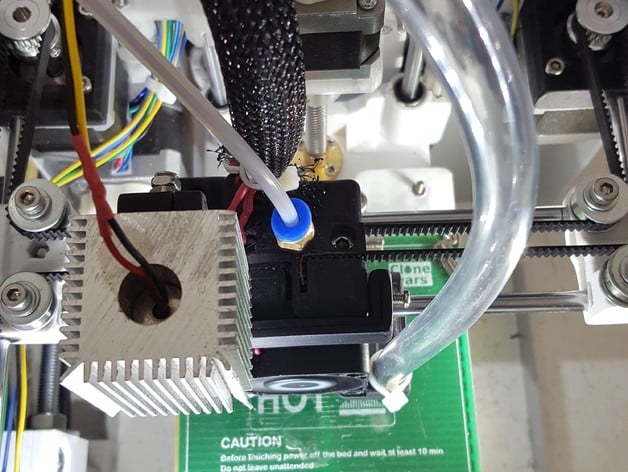
Someone told me this wasn't possible and as I hate that words, I had to make them see. Like I have done on some of my other printers (for example: http://www.thingiverse.com/thing:971820), this is time for the tiny Play3D (why not?) to have his own laser mount. I usually put on top a 1W/2W 445nm blue laser firmware controlled by the M03/M05 Gcodes on arduino pin44. Some people just uses the fan connection since it is also PWM, but I don't like it because this removes operativity of the printer. I customized my own Marlin firmware for the Play3D and others: Laser controls from menus, laser security options, laser power scaling, auxiliar laser pins for laser fans, etc. I implemented even a filament counter on screen without any hardware, just using Marlin's internal extruder steps. Once installed the adapter (Yes! the PINK part! I'm sure you see it;-)), the bed dimensions for the engraver/cutter are decreased by 20/40mm depending on the size of your laser module or your bed's size/position. Part1 will act as trigger for the XEndstop now, instead of the main X-carriage. Drill holes on the part1 to attach your laser module, I didn't design any holes in that part because there are like thousands laser modules out there. So, adapt the FreeCAD design to your will, or drill the part1 as I said. Two option available, you should start for the design with pat1, part2, and alternate part3, that should be enough. If you feel you need a sturdier attachment then print part3, part4 and part5 and mount the full design, it also should be more precise. Use M3 screws & nuts to fix all parts and you are done. Check model/bed limits when you generate GCode for the engraver to assure it fits in your bed. Protect your bed from the laser as it could heat/destroy some parts of your printer or even your eyes. If you have worked with lasers sure you got it. USE ALWAYS EYE PROTECTION LASER GLASSES. Lasers are not toys, and you will need both of your eyes to build your next printer. You have been warned. This design didn't need to be pretty or cool, it is just a proof of concept of adding a quick fit laser mount to a perfectly working machine without removing or modifiying any of its components/parts. You can add/remove it keeping your printer always in a working state. The laser will only be an addition that decreases your bed area, But cutting/engraving is coooool, trust me... Parts 3/4/5 are optional if you can firmly attach part1/2 to the X-carriage in some other way of your choice. You could also use 1/2 and 3Alternative parts only. Other parts of the X-Carriage shown in the pics are my customized variants for the printer, but it should work also in the Lewihe's original design as part dimensions have been kept the same. This design does't use LM6UU bearings as it is intended to be removed/attached without dismantling ANY part of your working printer. You can use inkscape and the excellent jtechphotonics.com free engraver gcode generator. HINT: Just focus your laser at Z=10mm+ height of the thing you are going to engrave, aim manually the laser to the origin point and start to send gcode without homing anything. Check always X/Y limits before start, and never leave alone a working laser. Use adequate glasses suitable for the wavelength of your laser, and be sure you operate it in a ventilated area as some compound's vapors could be toxic or could irritate eyes or respiratory tract. Don't allow kids to be anywhere near the machine when the laser is working. I'm sorry to be so insistent, but more than 20 years operating lasers force me to warn you. Mounting instructions: Be sure you can run smoothly part1/2 mounting and that part3 alternate grips strong enough the X carriage. Try to move the whole X-carriage and check there isn't any backlash. Unmount the part1, and install the laser module checking from time to time that it doesn't touch any printer part when X/Y moving the nozzle. Mount the whole thing again and check your laser module works. You can even print, just check out you have 20mm les of Xbed and the nozzle will start to print 20mm to the right from where it started previously. Then do your electronics/firmare/software job for the laser to cut/engrave, there are lots of awesome tutorials out there. I'll post a video when I have the time. Enjoy. UPDATE (05-JUL-2016): Minor changes, some fillets added to enhance parts. Sources and .STL's updated. UPDATE (06-JUL-2016): Added a nuthole to the right of the part3 alternative to allow for tensioning just in case. Use a short M3 bolt or cut one. This is only to have a better grip to the X-carriage. Added POV rendered pics. Added 30mm and 40mm fan adapters just in case your laser module doesn't have one.
With this file you will be able to print Lewihe Play 3D LASER cutter/engraver mount with your 3D printer. Click on the button and save the file on your computer to work, edit or customize your design. You can also find more 3D designs for printers on Lewihe Play 3D LASER cutter/engraver mount.
