Lian Li (PowerSpec) Lancool 205 Mesh 5.25" CD/DVD/BD Drive Bay Mount
thingiverse
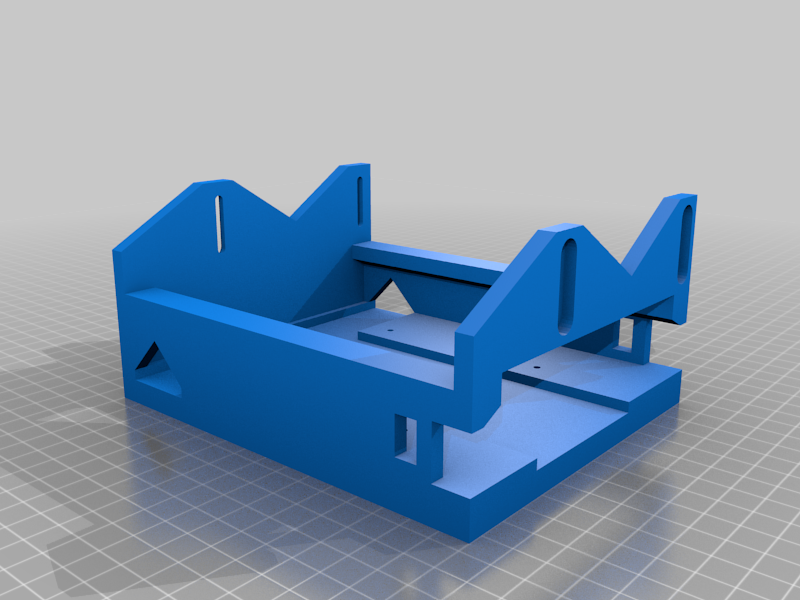
This is a 5.25" drive bay mount for a Lian Li Lancool 205 Mesh case ( https://lian-li.com/product/lancool-205/ ). I got a really good deal on an open-box PowerSpec B940 at Microcenter, but despite the case being significantly larger than my old one, this one has no external drive bays vs. my 10 year old mini tower with 2x 5.25" and 1x 3.5". I still regularly use discs, and didn't want to clutter my desk with an external enclosure. I considered buying a different case and swapping all the parts, but unfortunately in general it seems difficult to find decent cases with 5.25" bays anymore, so I decided to modify this case to take a 5.25" drive. The first thing to note is that the case has an internal enclosure for 2x 3.5" drives. This 3D printed mount replaces that with 1x 5.25" and 1x 3.5" (supporting the original 3.5" drive rails). Since there's no hole for a 5.25" drive, of course this requires some modification to the case. I'd recommend making the modifications before installing any of the computer parts, since you'll be cutting metal, and don't want metal shavings in your electronics. But otherwise, be sure to protect the electronics in some way (plastic, tape, towels, etc). Steps: 1) 3D print this mount. 2) (2D) Print the 5p25_bay_cutout.dxf file. I'd recommend printing onto a label/sticker if you have them, but otherwise regular paper is OK (can attach with tape). Since you'll be cutting several holes, I put 5 copies of the template into the same file. I'd confirm that this size is correct for the drive you're attempting to install. 3) Test fit 5.25" and/or 3.5" drives in the mount to make sure the print turned out correct. 4) Remove original 3.5" enclosure from case. 5) Remove front panel from case (no screws, simply snaps off/on). 6) Cut a clearance hole in frame of case. There is already a large opening, but it's a bit too small to fit a 5.25" drive through. This is where you need to be careful with metal shavings. I used a Dremel to cut the case, but tin snips or similar would likely work. You can use the cutout template printed earlier to help with the hole size. You don't need to cut a lot, and the internal tray is riveted above the hole, so to avoid weakening the case, you don't want to cut into that. This will be hidden from view, so you don't need to worry about perfection with this hole. 7) Test fit the drive mount with the drive poking through the newly expanded front hole. 8) Remove the 5 screws to detach the metal face from the front panel. 9) Cut a clearance hole in the front panel plastic. You want to align the hole with the bottom of the mesh. Again, you can use the cutout template to assist. In general, the hole in the plastic isn't visible, so you don't need a perfect cut, but you don't want to damage the metal mesh, which will remain visible. I used a Dremel to cut the hole. 10) Here's the part you don't want to screw up! Cut the hole in the metal face for the 5.25" drive. You'll want to align the cutout template horizontally centered, and vertically at the top edge of the face. I used a Dremel to cut from the inside, to avoid having it slip and damaging the outside face. I cut just slightly inside the lines of the template, then quickly did a check to ensure I was well centered. I then continued to cut until the hole was properly sized for the drive. I then used a flat metal file to clean up the edges. 11) To hide the exposed (silver) metal around the cut edges, I colored it with a black Sharpie. You could also use paint, etc. to cover this. 12) Reinstall the metal face onto the front panel, and reinstall the front panel onto the case. 13) Install the drive(s) into the mount, ensuring that the 5.25" drive is level and ideally not resting on the front panel (to avoid buzzing/rattling when the drive spins). Connect the cables. 14) Install the 4 thumb screws into the bottom of the mount, adjusting the position so the drive is flush with the front face. That's it! I've only tested it on my PowerSpec branded Lancool 205 Mesh case, but it may be possible to use it with other case models as well.
With this file you will be able to print Lian Li (PowerSpec) Lancool 205 Mesh 5.25" CD/DVD/BD Drive Bay Mount with your 3D printer. Click on the button and save the file on your computer to work, edit or customize your design. You can also find more 3D designs for printers on Lian Li (PowerSpec) Lancool 205 Mesh 5.25" CD/DVD/BD Drive Bay Mount.