Lid for LGB switch drive 1201 & 1206
prusaprinters
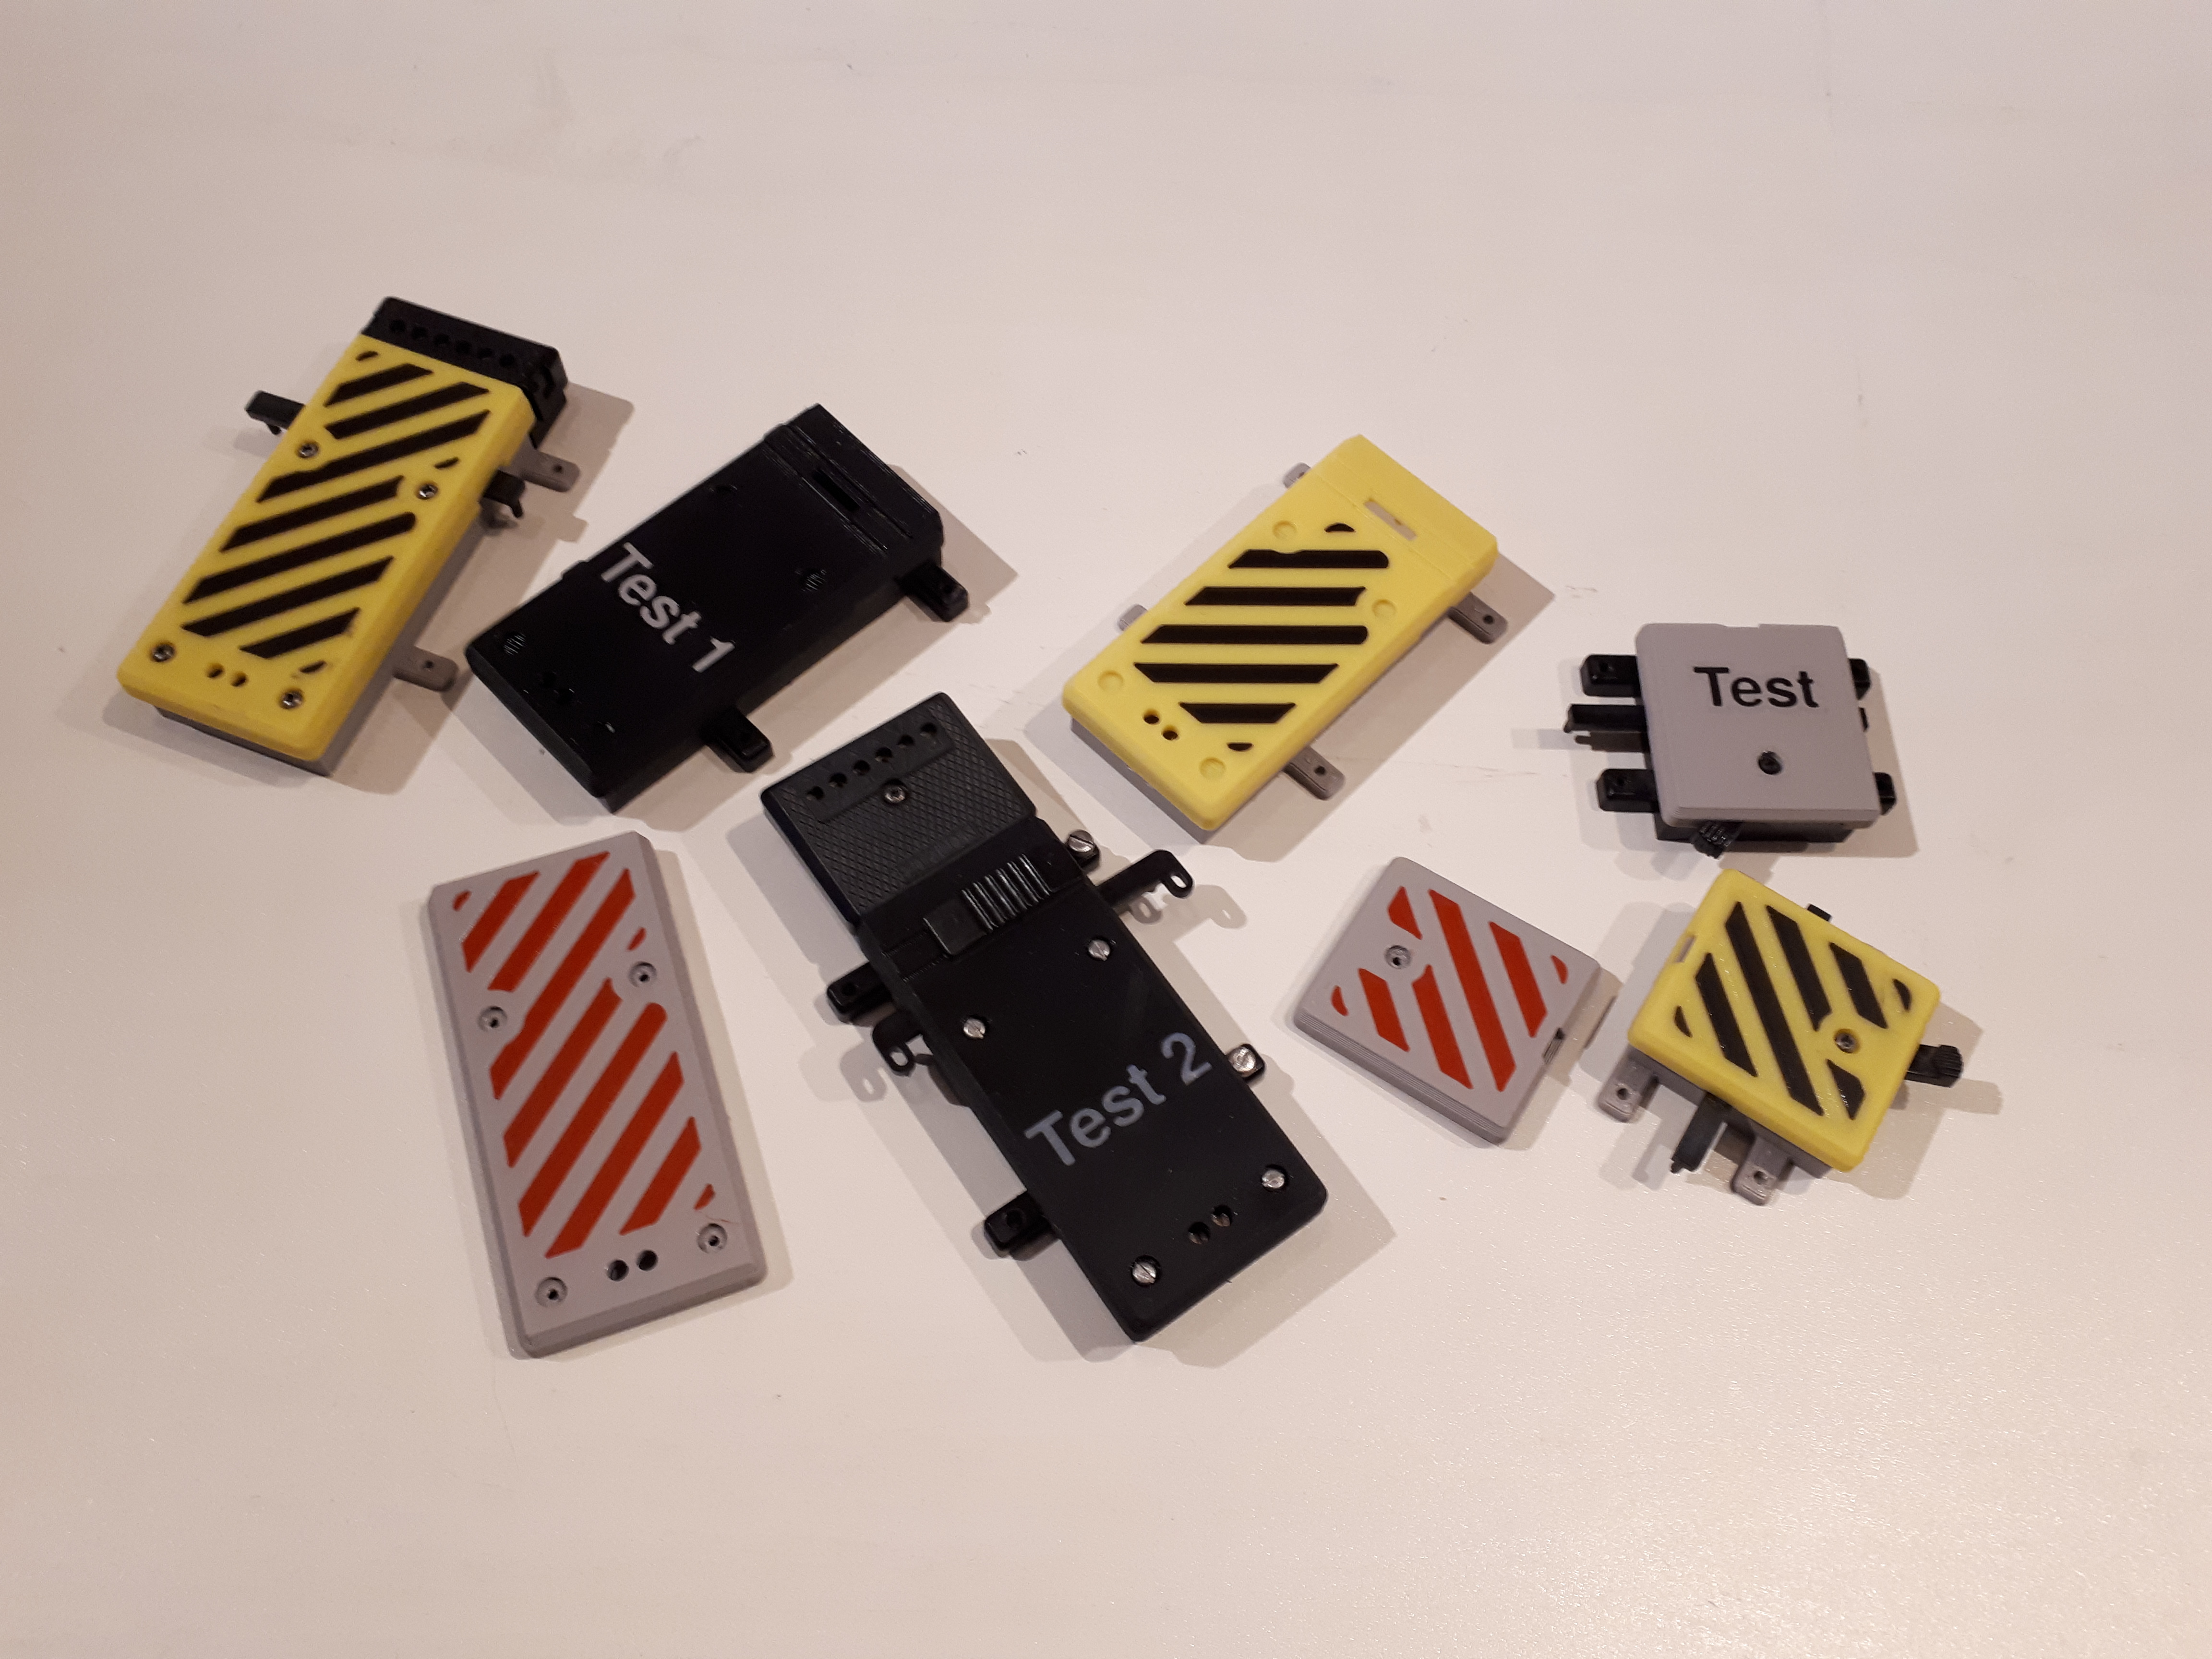
<p>These are replacement parts for LGB switch drive 1201/12010 (electric drive) & 1206/12060 (manual drive).</p><p>These are the lids of the drive mechanisms.<br>Other parts can be found here:<br>- <a href="https://www.printables.com/model/234258-bottom-chassis-for-lgb-switch-drive-1201-1206">Switchdrive bottom chassis</a><br>- <a href="https://www.printables.com/model/274301-junction-box-for-garden-railway">Cable junction box</a></p><p>I needed a way to easily identify a switch. Putting a little sign on the switchdrive was too easy (and the paint faded away after only 1 year), so a designed these lids that replace to original switchdrive lids.</p><p>The lids can be blank, they can have warning stripes, they can have a custom text (with custom orientation) or they can have a completely custom marking (using 2D shapes). The lids are designed to be printed upside down without support.</p><p>The text/striped/markings are designed for manual in-layer color change, as described in <a href="http://schlosshan.eu/blog/2019/03/02/prusa-i3-mk3-real-multicolour-prints-without-mmu/">this blog post</a> (that I found via a model from <a href="https://www.printables.com/social/231673-mrbunsy">mrbunsy</a> - thank you). They are 0.2mm thick (customizable in the SCAD file to fit your layer hight).<br>To print the lids that way you need to:<br>1) import the STL into PrusaSlicer (or whatever slicer you use)<br>2) re-orient to STL so it is upside down<br>3) split the STL into separate objects - be careful that you don't move any of these objects<br>4) assign the text/stripes/markings to extruder 1, assign the main body to extruder 2<br>5) slice & print<br>6) the printer does the first filament change after the priming line - insert the filament color for the text/stripes/markings<br>7) after printing the text/… the printer does the second filament change - insert the color for the lid body<br>8) wait for the print to finish (there should be no further filament changes)<br>9) poke holes in the sacrificial layers in the screw holes (or use screws with a sharp tip)</p><p>The best result comes with dark/black text/stripes/… on a light (e.g. yellow) lid. Light text on dark lid might or might not work. Prusament LightGrey PETG does work, Geeetech White PETG does NOT work. You will have to test your filaments.</p><p>The example STLs come in 3 variants per lid type: plain, with a “Test” text, with stripes<br>The lid types are:<br>- 1206 : manual switchdrive<br>- 1201-V1 : oldest electric switchdrive with manual slide lever and thick slide plane<br>- 1201-V2 : old electric switchdrive with thick slide plane (without manual slider)<br>- 1201-V2 : electric switchdrive with slim slide plane (without manual slider) - this is the current design</p><p>The very old 1201 switchdrive with 3 cable connection is not supported at all.</p><p>You should check your switchdrive which version you have before you print the custom lids. The wrong version might negatively impact the reliability of the switchdrive. See the comparison photo.</p><p>The SCAD file should be self-explanatory (I hope). Just remove the disable marker “*” from the type of lid that you want and optionally set the text and orientation.</p><p>For custom markings use this syntax (example with 1201-V3, works with the other lid types the same way):</p><pre><code class="language-plaintext">lgb1201lid(false, false) { // insert custom marking shape here // circle as simple example circle(d = 10); }</code></pre><p>The SCAD file references the library <i>af-basics.scad</i> which can be found here: <a href="https://www.printables.com/model/175914-openscad-library-for-more-basic-shapes">https://www.printables.com/model/175914-openscad-library-for-more-basic-shapes</a></p><p>The parts are printed in PETG with 0.3mm layer height and 3 perimeters. I lowered the nozzle temp to 220°C after the first layer to reduce stringing. I advice to NOT use PLA because it might (will) deform in direct sunlight.</p>
With this file you will be able to print Lid for LGB switch drive 1201 & 1206 with your 3D printer. Click on the button and save the file on your computer to work, edit or customize your design. You can also find more 3D designs for printers on Lid for LGB switch drive 1201 & 1206.