Life Tracker (0-999)
thingiverse
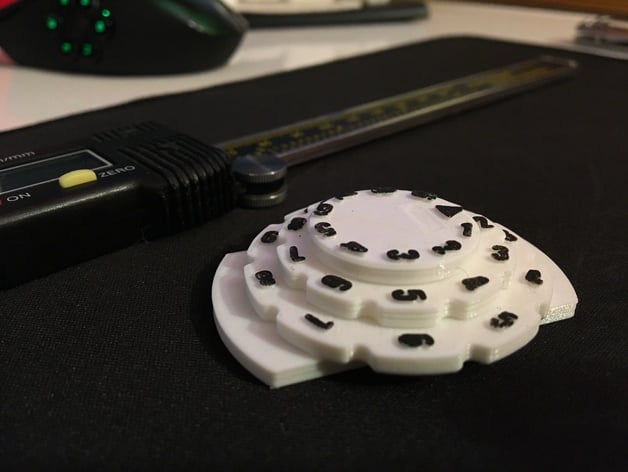
A (0-999) health/score tracker for all of your gaming needs. Designed to be compact (54mm dia., 10mm thick) and easy to use. It can be used to track two stats 0-9 (e.g. elder sign health and sanity) or one stat 0-99 using the arrow on the top fixed plate. Numbers 100-999 can be determined by using the hundreds place as your arrow (sample 312 shown in picture). Designed with internal compliant springs to hold the number wheels in place should you bump the table. UPDATE #1: New "LT" stl files are made with a chamfered base to account for elephant's foot at the base of parts which greatly improves tolerances and removes need for raft. Column width was also increase slightly to create a press fit with components. Glue is no longer required if printer settings are correct. Old files are left in case they work better for your setup. UPDATE #2: Numbers are now rotated so that the value can be read along the side of the tracker. Stationary ring has been made smooth so that it is not mistaken for a movable ring. Base was increased in thickness and width to provide a hand hold. Print Settings Printer: Wanhao i3 Rafts: No Supports: No Resolution: 0.1-0.2mm Infill: 20% Notes: Print: 1x Face Plate 1x Large Ring 1x Small Ring 2x Springs 1x Base Rafts may not be necessary but inside edges of the number wheels come out better when a raft is used. It also helps to ensure that the spring doesn't fuse. Post-Printing Post-Processing Updated: components should press fit together after print and removal of support (I print without any brim or raft on the new stl files.) ((OLD: The assembly is not currently designed to stay together without glue. However, since the springs and cover are stationary, epoxy can be used to cement the assembly together.)) I also recommend using either a sharpie or some modeling paint to make the lettering a separate color to aid readability. (it may also be possible to print the lettering in a separate color filament if you have a dual extruder.) How I Designed This Idea phase This has been a project I have been trying to design for almost a year now but up until the last few months, I haven't had access to any form of rapid prototyping. I wanted a counter that I could use for games to reduce the need to constantly pass around tokens or write on paper. For awhile, I tried to use d-10s to keep track of information but all it took was one bump of the table to lose all your info. And using a phone to keep track of my characters health just felt wrong. I wanted a tracker that was: 1) Reusable 2) Tangible 3) Stable 4) Easily read So I designed a basic counter on SolidWorks, but due to a lack of printing outlet, there is sat. First Prototypes Fast forward a few months, one of my friends got time on a laser cutter at a local shop and offered to print out the Life Tracker for me (Thanks Cody!). The first clear prototype worked great but the lettering was way to small and the spring inside turned out to be too weak and broke within a couple days of use. The second blue prototype was printed with a slightly improved spring design, but the larger spring and lettering led to a very large tracker. After a redesign and switch of material, I ended up with the hardboard version which only had two rotating number wheels with the top fixed. The only problem now: they could all only turn in one direction. Due to the rotational design of the spring, it worked great in one direction but then bound up the mechanism when turning the other way. Laser cut prototypes with final design pictured at bottom New Printer = Rapid Iteration A few weeks after those first prototypes, I finally got my own 3D printer and could spend some time doing rapid iterations. Pictured here are all of the different iteration from the original laser cut design to the final product. For awhile I was working on a double ratchet mechanism to alleviate the one directional binding while still maintaining the satisfying click. This turned out to be a bad decision as the spring almost doubled in size and required very precise manufacturing. Too loose and it wouldn't catch, and too tight and it wouldn't bind. Finally, I had the idea to use a type of linear spring to allow the "tooth" to retract regardless of the direction of turn. After a couple of iterations, I came to the final design presented here. (Shout out to Alluvian for inspiration on the number wheel font and edge redesign, https://www.thingiverse.com/thing:1145914) Evolution of spring and ratchet mechanism Redesign! After testing out the tracker with multiple friends, I noticed everyone instantly held onto the bottom ring and attempted to rotate the stationary ring. Due to the internal mechanism, this caused the top most rings to turn together and it made the counter very difficult to use. It also lead to a large torque being applied to the relatively weak middle column. All not good. So instead of providing each tracker with a tutorial on how to use it as intended, I redesigned it so that the form better matched the function. This meant removing the texture from the top plate so that it wouldn't be tempting to turn. I also made the base plate much thicker and wider so that the user would grab that instead of the large ring which was meant to move. Since I still wanted to keep the overall size of the device small, I also took the time to turn the numbers sideways. This had the added benefit of making the number easy to read from left to right rather than up and down. This redesign can now be downloaded as v2. For those of you who still like the original design, I have left the file just in case. Redesigned counter Future Improvements In the coming months, I hope to tweak the design such that all of the visible components can be laser cut from alternative materials (The hardboard aesthetic would look great alongside any dungeon). This change would also reduce the manufacture time to about 15-30 mins as the springs are really the only part that absolutely needs the flexibility of the printer. ((Completed)): I am also looking into making the whole assembly press fit to remove the need for glue and allow for replacing springs if they end of breaking after extensive use.
With this file you will be able to print Life Tracker (0-999) with your 3D printer. Click on the button and save the file on your computer to work, edit or customize your design. You can also find more 3D designs for printers on Life Tracker (0-999).