Lift-Up Ikea Lack Table
thingiverse
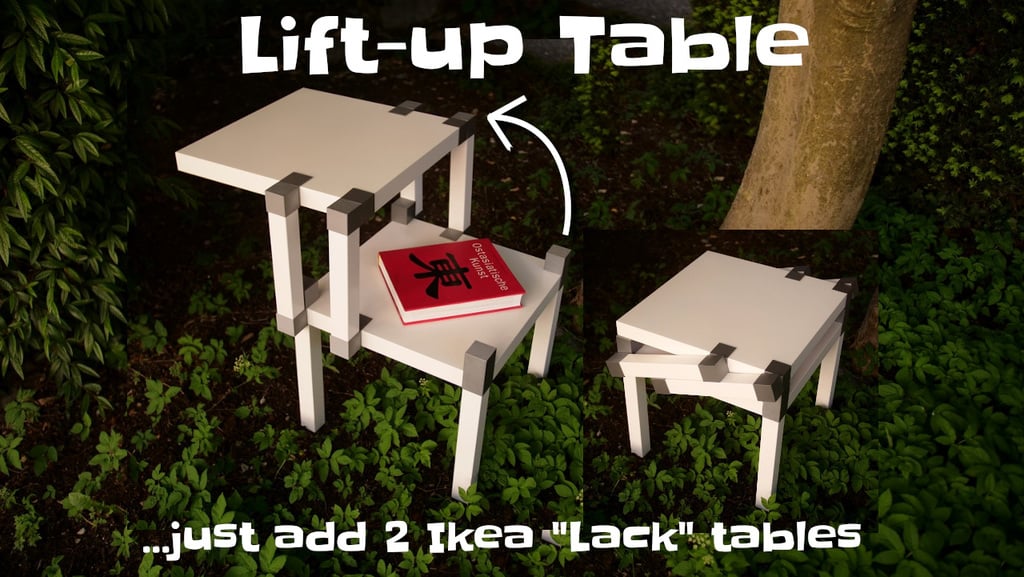
*** I upload new designs now mostly on [PrusaPrinters.org](https://www.prusaprinters.org/social/13788-makkuro/prints). *** If you want to support me, please download and like [this design also on prusaprinters](https://www.printables.com/model/202621-lift-up-ikea-lack-table). If the design gets enough downloads&likes, i might get a spool of filament for free :-). All my latest creations will be available there, as Thingiverse downloads are a bit broken at the moment and also the customizers seems to not work anymore. ***Also the description [there](https://www.printables.com/model/202621-lift-up-ikea-lack-table) is nicer, as it is easier to use inline images, etc.*** ***See it in action:*** --> [Youtube video](https://www.youtube.com/watch?v=LRp-pvZwKWc) ***Description*** You want a fun flip-up coffee table? Need to hide your best books or keep your puzzle / board game undisturbed? Now you can have a morphing table, by mixing Ikea with 3d-printing. The goal of this design was to re-use all of the Ikea parts as they are, and also to use as few extra parts as possible: You only need some glue or 6 small screws and optionally four felt gliders to complete the flip-up table. To reduce the number of additional parts, the 3d printed hinges are self-securing on the Ikea legs, so make sure your printer is well calibrated. ***Needed parts:*** Get two Ikea Lack tables for 9€ each. Then print all parts. Print “Ikea_Lack_Hinge_V4_UpperLowerTableMiddle_Print4” four times, all other parts are needed only once. Also get 4 felt gliders to avoid a hard “bang” when you close the table. You also need 6 small screws (which fit into 3mm screw holes, just to attach the hinges to the tabletops. ***Instructions*** Remove the small added line from "Ikea_Lack_Hinge_V4_UpperLowerTableMiddle_Print4”, it is to ensure that the parts print well.  Put the printed parts on the four legs (no screws needed!). Put the printed corner hinges and printed corners without hinges onto the “bottom table” and screw on the other four legs. Then, attach the two “Ikea_Lack_Hinge_V4_UpperTableCorner” to the top table corners: Fix the corner hinges with small screws (screw holes are 3mm, so use little screws) or with glue. Then, put felt gliders on the bottom of the top table (on 2 corners, there are still holes open, on the other 2 corners there are the corners and screws from the step above). Then, put the top table onto the bottom part. Align the 4 still unattached “Ikea_Lack_Hinge_V4_UpperLowerTableMiddle_Print4” so they “grip” onto both the upper and lower table respectively. Now, when the top table is centered, fix the hinges onto the lower tabletop with 2 small screws. After that, open up the table so the upper tabletop is at the top, and the hinges are at 90 degree up. Then fix the hinges to the upper tabletop with 2 screws. You are done! Have fun! ***Want to modify the design?*** You can modify the hinges using OpenSCAD and the supplied scad file. For instance, instead of the flip-up table here, you could create a flip-away version. To make sure your mechanical construction works, I can recommend Daves [Linkage](https://blog.rectorsquid.com/download-linkage/). You can construct and try mechanical contraptions using his open source software.
With this file you will be able to print Lift-Up Ikea Lack Table with your 3D printer. Click on the button and save the file on your computer to work, edit or customize your design. You can also find more 3D designs for printers on Lift-Up Ikea Lack Table .