Light fixture 3D print & toothpicks
prusaprinters
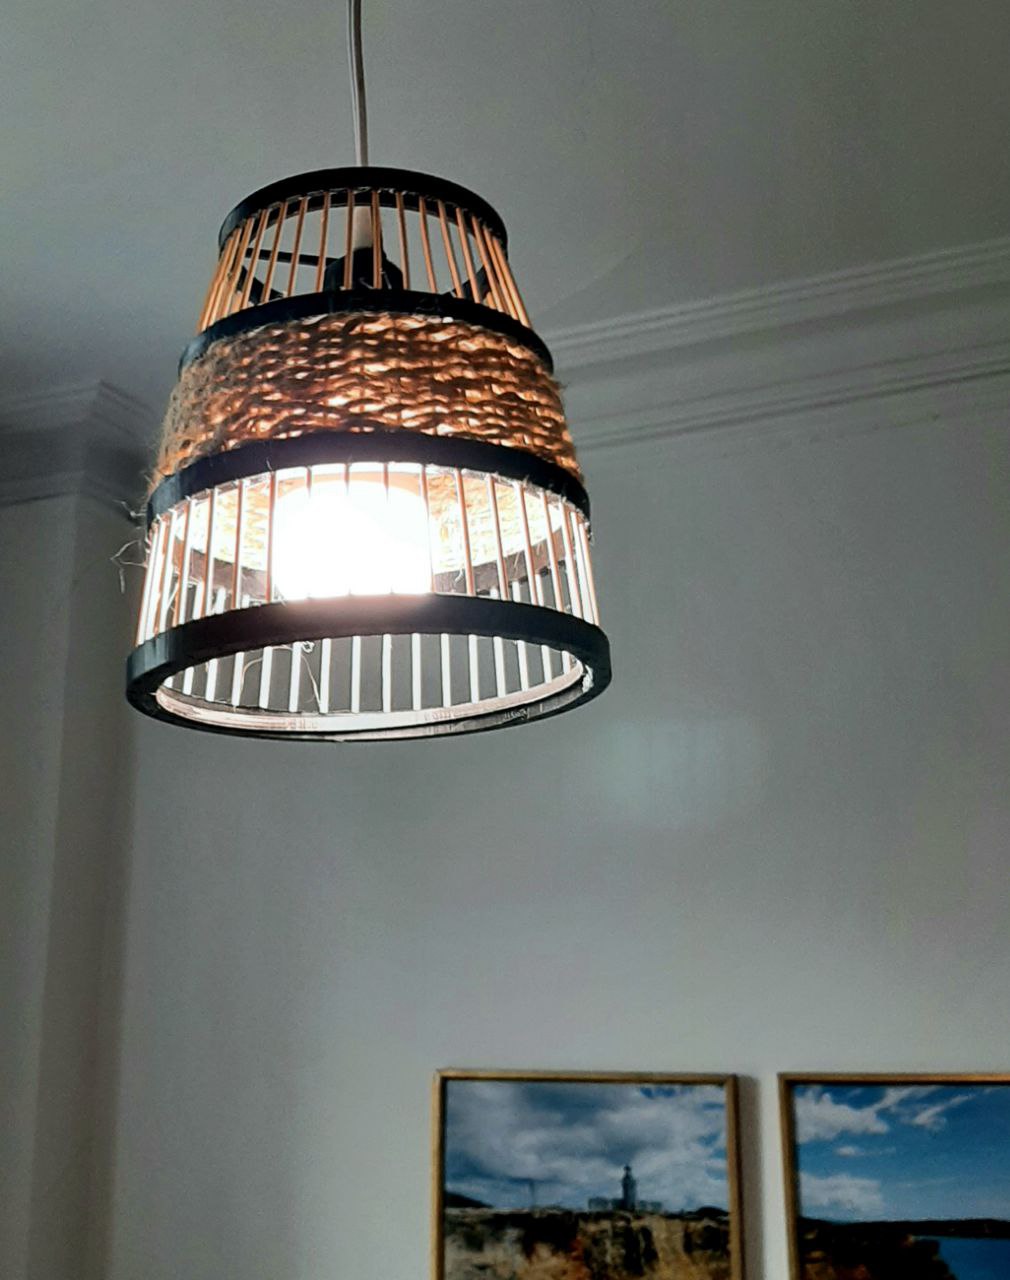
<p>This lamp is made out of 4 rings 3d printed and toothpicks between rings.<br>The inspiration was a rattan lamp. Those lamps are expensive, so this is a smaller more affordable lamp. </p><p>1-Print all the rings (15% infill, no support) and the top (50% infill, no support).</p><p>2-Use hot glue to glue toothpicks in the holes of the first ring (Ring1). Make sure to push the toothpicks all the way into the hole. Then, align the toothpicks in the holes of the second ring (Ring2) and add a small layer of Super Glue. Put a book on top of the rings and let it sit for 2h to let the adhesive dry. This part requires patience :)</p><p>3-Repeat for all the other rings (Ring2,3 & 4)</p><p>4-Place the top ring inside the lamp and screw the light cord (I got this one from amazon canada https://www.amazon.ca/gp/product/B01LG0RGUO/ref=ppx_yo_dt_b_asin_title_o05_s00?ie=UTF8&th=1) and screw the lightbulb.</p><p>5-If you like the look, you can weave twine outside and inside the toothpicks.</p><p>Let me know what you think, this was my first version. I could tweak the model if needed. It's my creation :)</p>
With this file you will be able to print Light fixture 3D print & toothpicks with your 3D printer. Click on the button and save the file on your computer to work, edit or customize your design. You can also find more 3D designs for printers on Light fixture 3D print & toothpicks.