Light switch extender
prusaprinters
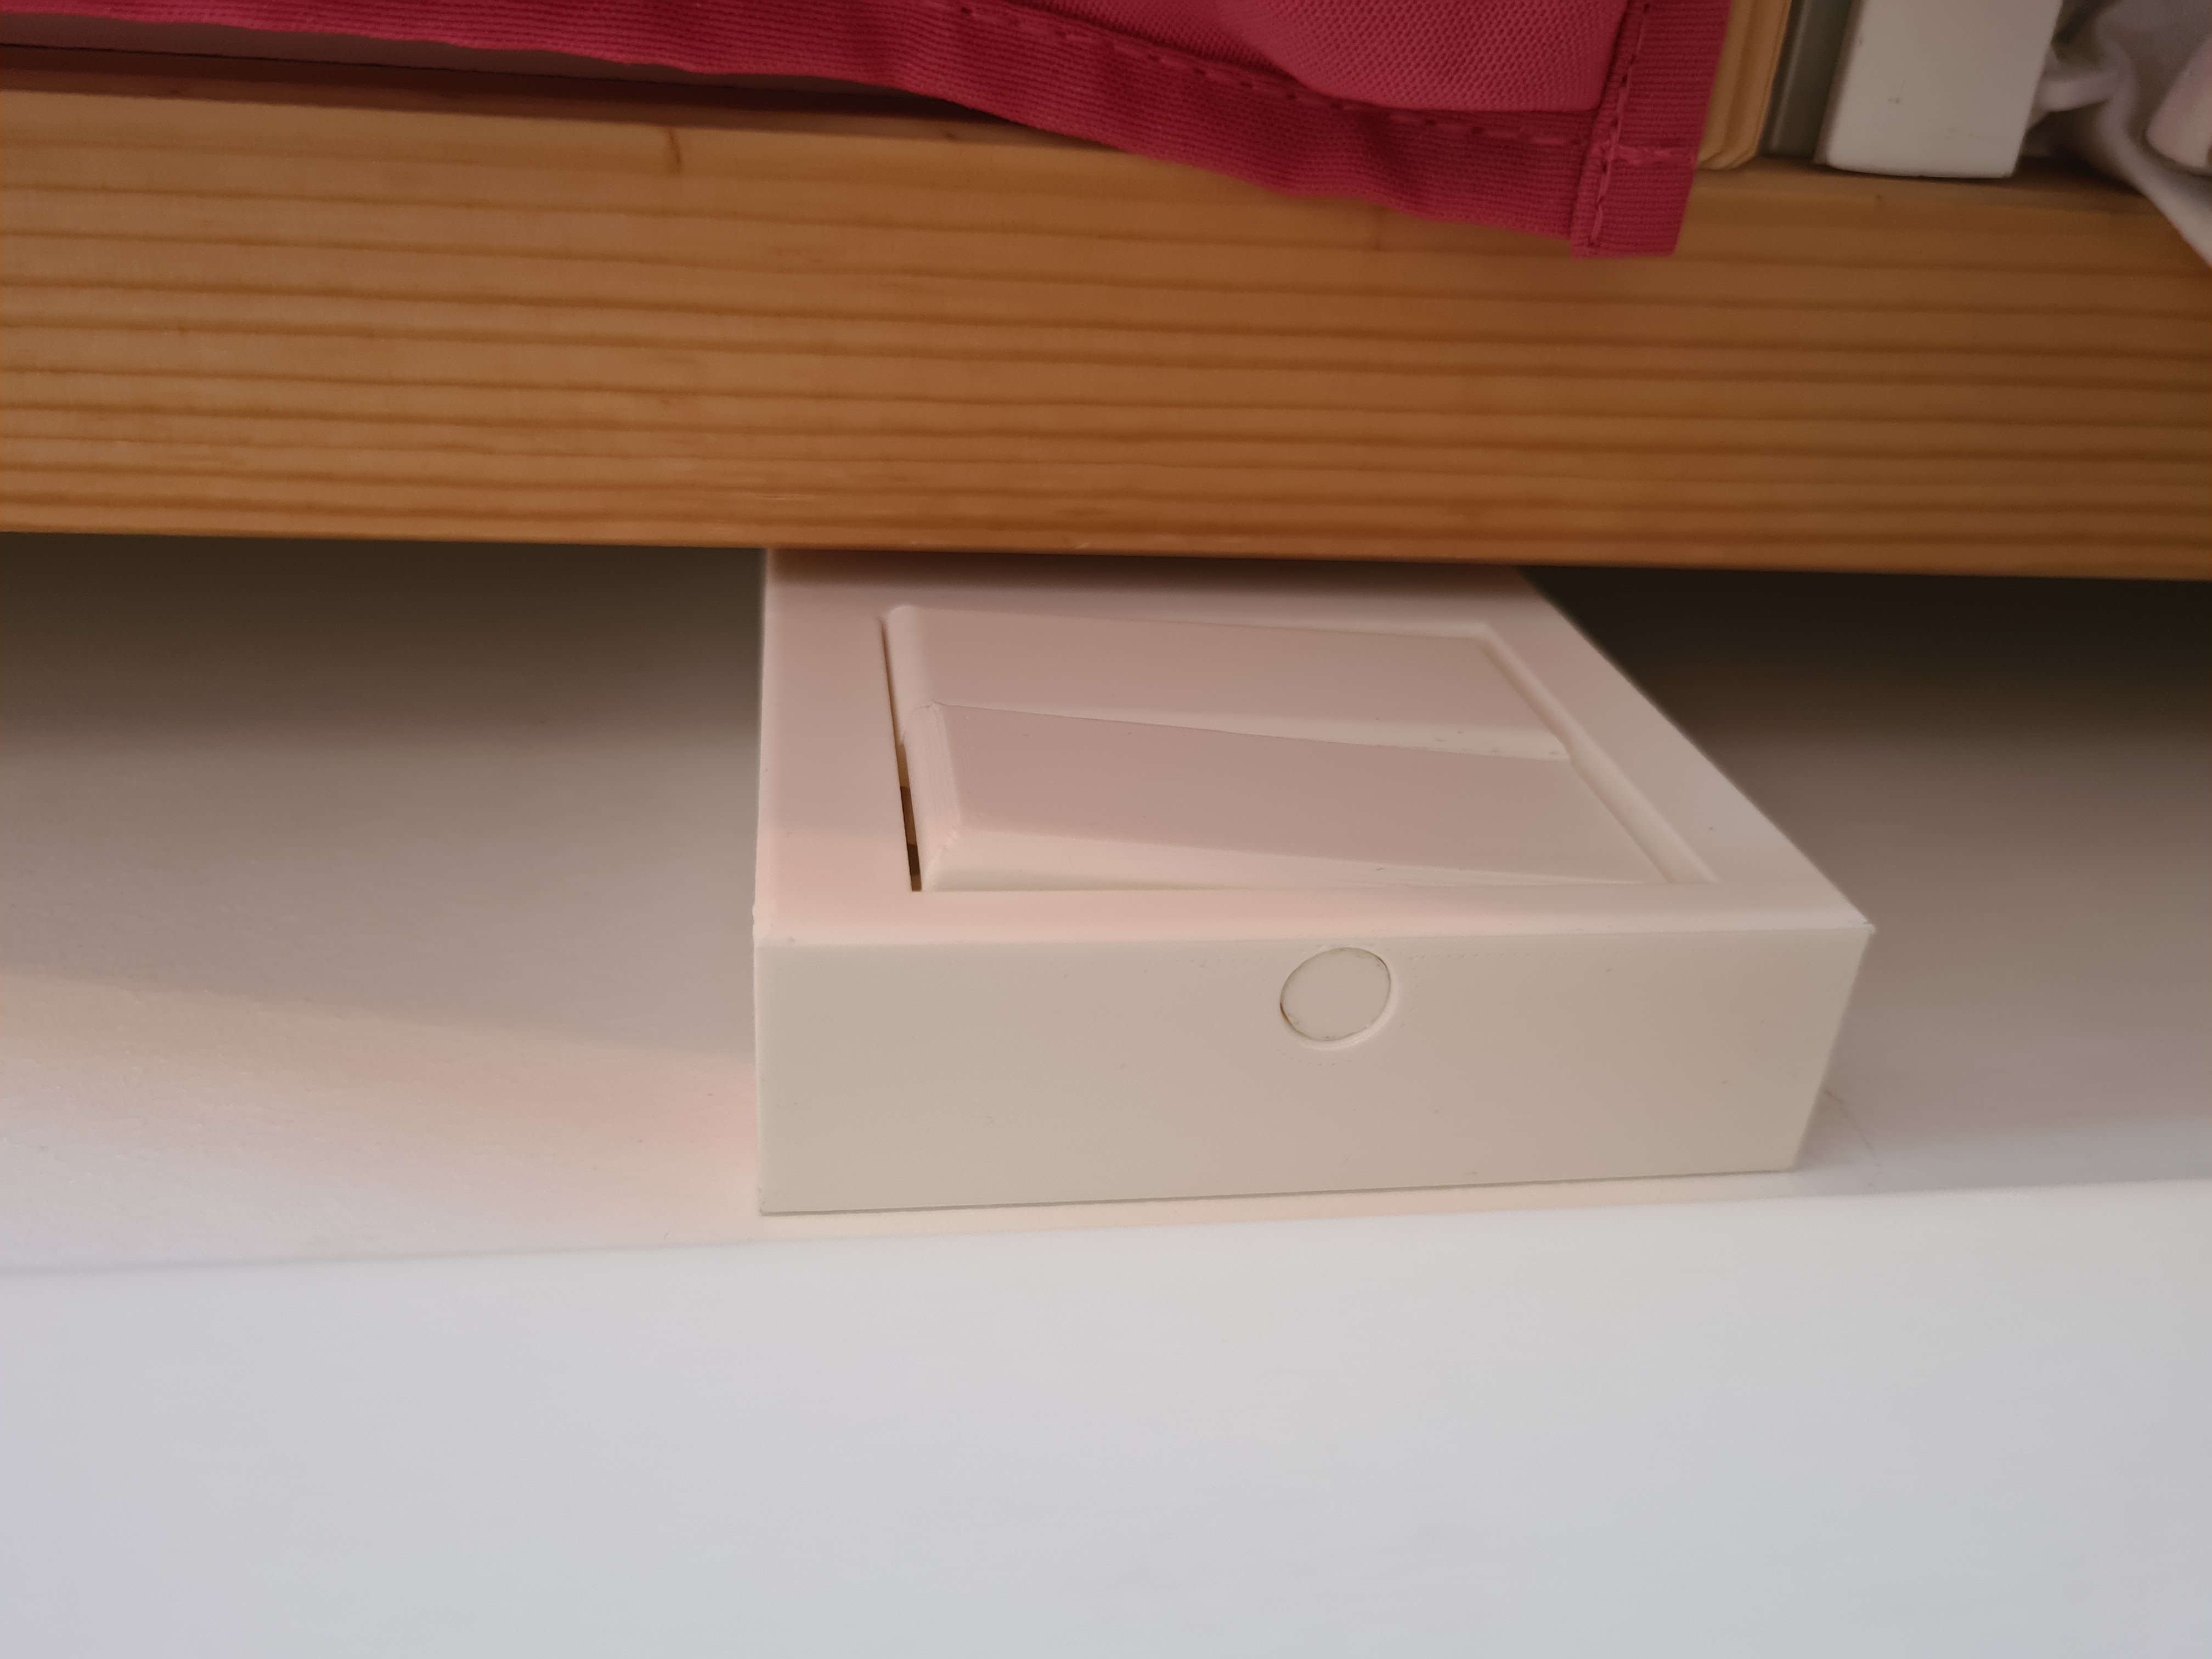
<p>The light switch in my daughter's room is located ~90 centimeters from the wall, which ends up exactly behind the bunk bed. The amount of space between the wall and the bed made it extremely difficult to operate that switch. I've designed this device which will mechanically transfer the new buttons' movement to the actual switch :)</p><p>First version switched both lights at the same time, the second one allows to operate both original buttons separately.</p><p><strong>Works well with Simon 10 switch (see the photo attached), other switches will probably have different sizing and will need adjustments!</strong></p><p>Fusion 360 source files attached, but the design is quite messy…</p><figure class="media"><oembed url="https://www.youtube.com/watch?v=84m_vNtdIkA"></oembed></figure><p><strong>Print instructions (all printed using PLA):</strong></p><ul><li>Body & buttons: 4-5 perimeters, 15% infill, 0.25mm layer height</li><li>Shaft: 8-10 perimeters, 0.25mm layer height</li></ul><p><strong>Assembly instructions:</strong></p><ul><li>Place the shaft in the body</li><li>If using 2-buttons version, put the second switch onto the shaft</li><li>Insert the two loose buttons into the shaft</li><li>Glue these loose buttons to the shaft using Super Glue (or some other glue of your choice)</li><li>Slide the cover onto your switch</li></ul>
With this file you will be able to print Light switch extender with your 3D printer. Click on the button and save the file on your computer to work, edit or customize your design. You can also find more 3D designs for printers on Light switch extender.