Lights for $33 Time Lapse Camera
thingiverse
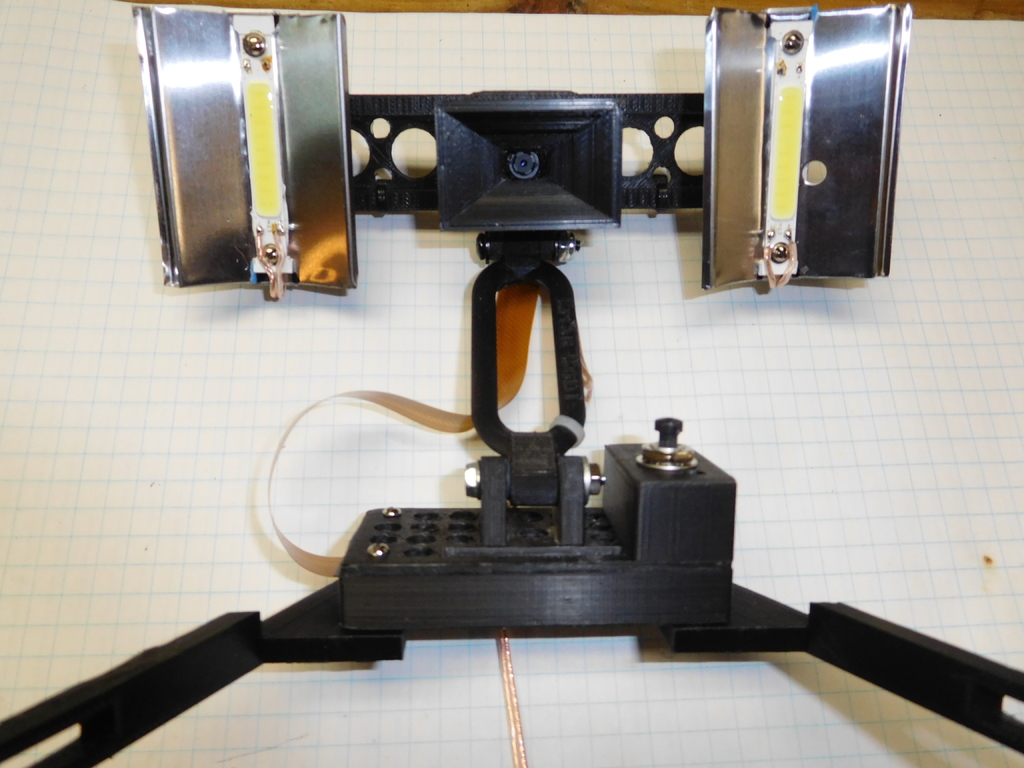
This remix covers the addition of LED COB lights and reflectors to allow the camera to take pictures in areas without good lighting or maybe at night when your studio is dark. Once I made the camera it became obvious that some kind of lighting would be useful so I dug around in my box of LEDs and found a pair of these COB style lights that were left over from a previous project. These lights came from ebay but just about any lights that make enough light to shoot with will work. Make sure you have the right power supply for the lights you are using, mine were made to work with 12v so a used 12v wall wart works find. The reflectors were cut from the shiny metal salvaged from inside a computer monitor, the tin gets very sharp when cut so a file will help to smooth over the edges. The hinge pivot and mount2 were designed to sandwich around the aluminum bracket that connects to the metal reflector. This design keeps the heat from the lights away from the plastic parts. I used heat sink compound between the lights and the reflector and another drop between the reflector and the aluminum bracket to help the transfer of heat. It might take a couple of close looks at the photos to see what's happening here. The hinge pin was made with a piece of coat hanger and a 4-40 threading die since bolts long enough were not available locally. I used a spring on one end to put tension on the hinge but still leave it movable. Wire ties and heat shrink tubing is used to keep the wires tidy and away from moving parts. Make sure your wires are safe and clear of moving parts. Since this project with the lights added is heavier than the last version without lights it was found that small spring clamps were needed to secure the camera to the 3D printer base plate. Longer legs are also needed so make sure you print those too. One clamp needed to be ground to allow clearance of the base plate, see photo. Remove the clamp levers before you operate your printer if they will hit any moving parts as mine did. The lens hood was glued on after the model was assembled to cut down on reflections from the lights. You should make sure the focus is correct for your rig before final assembly. Lights in action, https://vimeo.com/265916192 https://www.ebay.com/itm/5pcs-3W-White-COB-High-Power-LED-Stripe-LED-Light-Emitting-Diode/352236956976?hash=item5202f56d30:g:x4UAAOSwETJaOgXq
With this file you will be able to print Lights for $33 Time Lapse Camera with your 3D printer. Click on the button and save the file on your computer to work, edit or customize your design. You can also find more 3D designs for printers on Lights for $33 Time Lapse Camera.