Linear actuator / Stepper Pusher / 28BYJ-48 / M5 rod
thingiverse
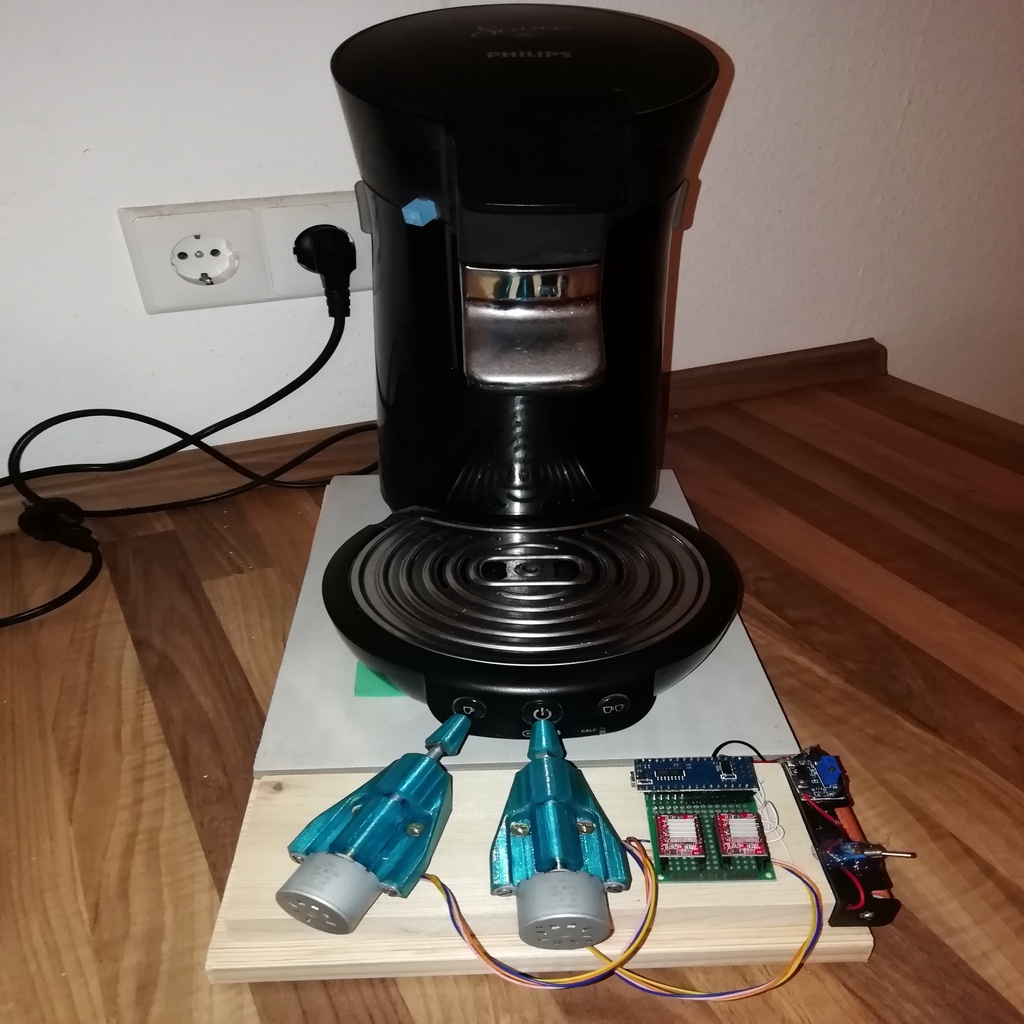
Edit to add V2: - Frame V2 with standoffs, featuring through holes for screwing it down to a plate. The frame is narrowed in the front, allowing two stands to be closer together. - M5 top to screw on to the front, preventing scratching and pushed buttons while offering an option to adjust length. The M5 thread needs to be cut manually after printing. Example picture: Two units, small PCB with an Arduino nano, two A4988 driven by a 18650 and step up module to 9V. ----------------------------------------------- I previously designed a lever for a 9g servo pushing buttons - which becomes too weak quite easily. https://www.thingiverse.com/thing:2806324 This setup uses a 28BYJ-48 12 V Motor, converted to bipolar and an A4988 stepper driver. Such a cheap stepper is capable of about 5Ncm of force according to what I've read. With the M5 setup converting rotation to linear motion, this results in roughly 25N pushing force, along with 10mm travel. It's not fast, but gets the job done. You will need besides the motor and electronics three nuts M5 and about 50...60mm threaded rod M5. The motor is held in place by two screws M3x8, threaded directly into the plastic. One M5 nut is pushed into the coupler which is then pushed onto the motor shaft. I aligned the other two M5 nuts on the threaded rod and fixed them with a drop of super glue. These nuts then slide inside the frame. Thus one rotation of the motor pushes the rod along with the two fixed nuts 0.8mm according to thread pitch forward. Both parts print upright without support and like 8mm bridging requirements. I printed mine in PETG. https://youtu.be/kVeuNMliQuA
With this file you will be able to print Linear actuator / Stepper Pusher / 28BYJ-48 / M5 rod with your 3D printer. Click on the button and save the file on your computer to work, edit or customize your design. You can also find more 3D designs for printers on Linear actuator / Stepper Pusher / 28BYJ-48 / M5 rod.