Linear rail for Prusa i3 Bear upgrade
prusaprinters
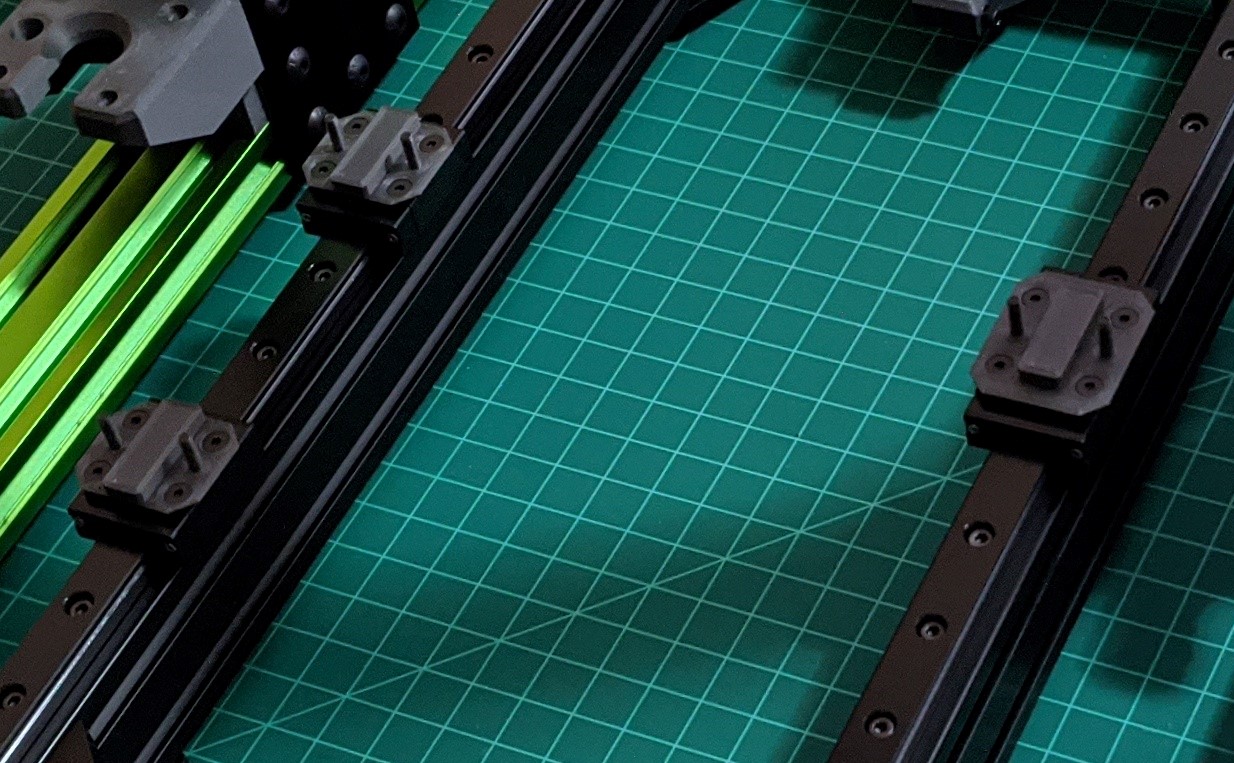
<p>Those are the parts I'm using on my Prusa Bear upgrade...<br/> I'm trying to re-use the U bolt concept.</p> <p>BOM:</p> <p>12) Flat Socket Cap Screw M3-4mm<br/> 6) Flat Socket Cap Screw M3-12mm<br/> 26) Socket Head Cap Screw M3-8mm<br/> 26) M3 Sliding T Nut - Zinc Plated<br/> 6) Nylon Hex Nut M3<br/> 32) Button Head Screw M5-10mm<br/> 8) Low Head Cap Screw M5-8mm (for the rail holder)<br/> 40) M5 Sliding T Nut<br/> 4) T Joining Plate<br/> 6) Angle Corner Connector<br/> 2) 20x40 Aluminum Extrusion 331mm<br/> 2) Linear Guide: Length 370mm, Width 12mm<br/> 2) Standard Block for linear rail: Unit Height 13mm (left side)<br/> 1) Long Block for linear rail: Unit Height 13mm (right side)</p> <p>Liquid plastic adhesive UV.</p> <p>After you printed the 3 spacers, you have to modify the 6 flat socket cap screws with a File as in the pic.<br/> Place the screw as in the pic and glued it, please to be sure it's well glued.<br/> The glue don't have to come out from the holes.<br/> All the screws have to be perfect in it, the screw's head don't have to touch anything.<br/> Attach the spacers on the blocks, place the carriage and then lock it with the Nylon Hex Nut.</p> <p>The instructions are complete because I'm doing a Step-by-Step Guide with photos.</p> <h3>Print instructions</h3><p>Rafts: No</p> <p>Supports: No</p> <p>Layer Height: 0.20mm</p> <p>Infill: 20%</p> <p>Perimeters: 4<br/> Top:5<br/> Bottom:5</p> <p>(Same print setting used to print the Y-Rod holder for the Prusa Bear upgrade)</p>
With this file you will be able to print Linear rail for Prusa i3 Bear upgrade with your 3D printer. Click on the button and save the file on your computer to work, edit or customize your design. You can also find more 3D designs for printers on Linear rail for Prusa i3 Bear upgrade.