Linear Rail X Axis Mod for Ender 3
thingiverse
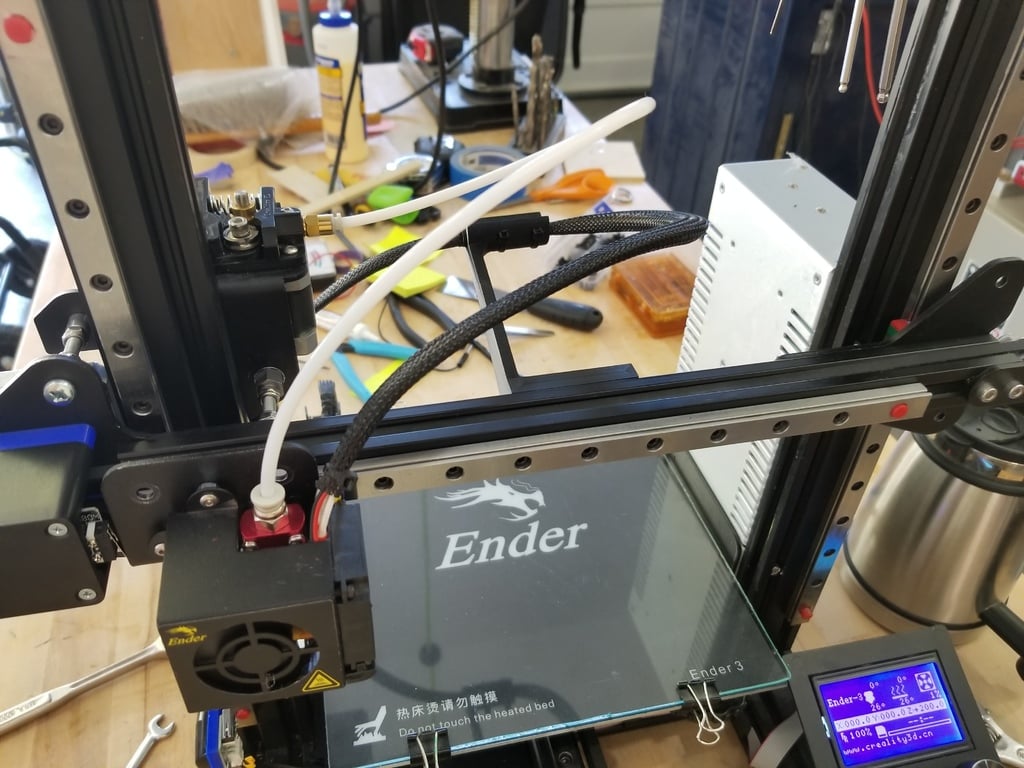
This mod is for adding a linear rail to the Creality Ender 3. I have these versions installed on my machine and they are working well. Is this a necessary mod? Probably not. The Ender 3 is a well built machine as it is. It's something that you can do to gain a small improvement and probably less headaches down the road when the wheels an bearings start wearing. I tried to keep it as simple as possible. The required parts are few, the largest being the 300mm long linear rail itself. At the time of this writing it was about $30.00 US on Amazon. Its cheaper by ordering it the weeks away method from China but with the quality on these things I spent the little extra so I could get it replaced if necessary. Notes: 1. The hardest part of this project is to drill out the X gantry plate that holds the hot end on. The thing that worries me is that Creality will change the plate a little. I made the Drill Guide patterned after mine. The first thing you should do is check to see if the drill guide aligns with your plate. Print the drill guide. Measure the 4 C holes to verify that they are 20mm apart to make sure it is properly to scale. If you have a bearing block attach it with long (12mm) screws to verify, if not just measure it. Use the two 5mm screws and nuts that hold the top wheels on to fasten the guide to the plate (pictured). There are two things to check here. The first is that there is about a 1mm gap between the straight edge of the guide and the two belt holding pieces that stick up from the plate. The guide edge will represent the edge of the bearing block. The gap is just to keep the block off of the curved part of the plate so it will sit flat. The second thing is to check that the two threaded lugs that the fan housing screws fasten into are centered in the B holes. If all is as it should be then go agead and drill the C holes through into the plate with a 3mm or 1/8" drill bit. 2. The only kludgy/unplanned thing I had to do on this mod was use a couple of 4mm nuts as spacers under the fan housing mounts to hold it away from the plate. The screws that hold the bearing block to the plate are in the way so.... It doesn't seem to affect anything but I don't know. If you have another fan mounting method you will have to check for interference. 3. The limit switch spacer is obvious. The X gantry plate comes out 9mm so the limit switch will also have to come out. The 40mm screws holding it all together need to be replace with 50mm screws. 4. The hole in plate that the bottom wheel goes through is 7mm so I used a 7mm screw/bolt go hold the belt extension on. It appears that 7mm is an odd size for metric bolts. I had a hard time finding one. I finally found the 15mm long one at Ace hardware. If you have trouble with finding one a 1/4" screw should work fine. I like using nylock nuts for things like this. They stay tight without haveing to over torque them. 5. I had problems with the first design of the belt adapter. It was not strong enough and pulled apart after several hours of use. I redesigned it with V2 giving it a little more beef and reorienting the part for printing so the forces from the belt tension were not pulling on the shear plane of the filiment laydown. Saying that, I printed a spare adapter for myself in case the new one breaks again. If you only have the one printer its a PITA to print a new part when the old one breaks. BOM: 1 x 300mm mgn12 Linear Rail with mgn12H bearing block. I got mine from Amazon. 1 x M7x15mm bolt or screw 1 x M7 Flat Washer 1 x M7 Nylock Nut 4 x M3x50mm flat head screw to replace the 40mm screws holding X servo on 10 x M3x8mmm Cap Screws 10 x M3 T-Nuts 2 x M4 nuts (Only used as spacers and use any 3mm thick spacer. Rev History 8.27.18 - Replaced the Belt Adapter with V2. V2 is stronger and the STL is reoriented so that it will print in the "flat" plane for strength. 12.18.18 - Replaced Drill Guide V1 with V2. It is the same exact size and function. I just repaired the STL file. Some were having problems printing it. 12.28.18 - Replaced Belt Adapter V2 with V3. V3 is a little stronger and the STL is a little cleaner.
With this file you will be able to print Linear Rail X Axis Mod for Ender 3 with your 3D printer. Click on the button and save the file on your computer to work, edit or customize your design. You can also find more 3D designs for printers on Linear Rail X Axis Mod for Ender 3 .