Linear Slide for Robotics (FRC / FTC / VEX)
thingiverse
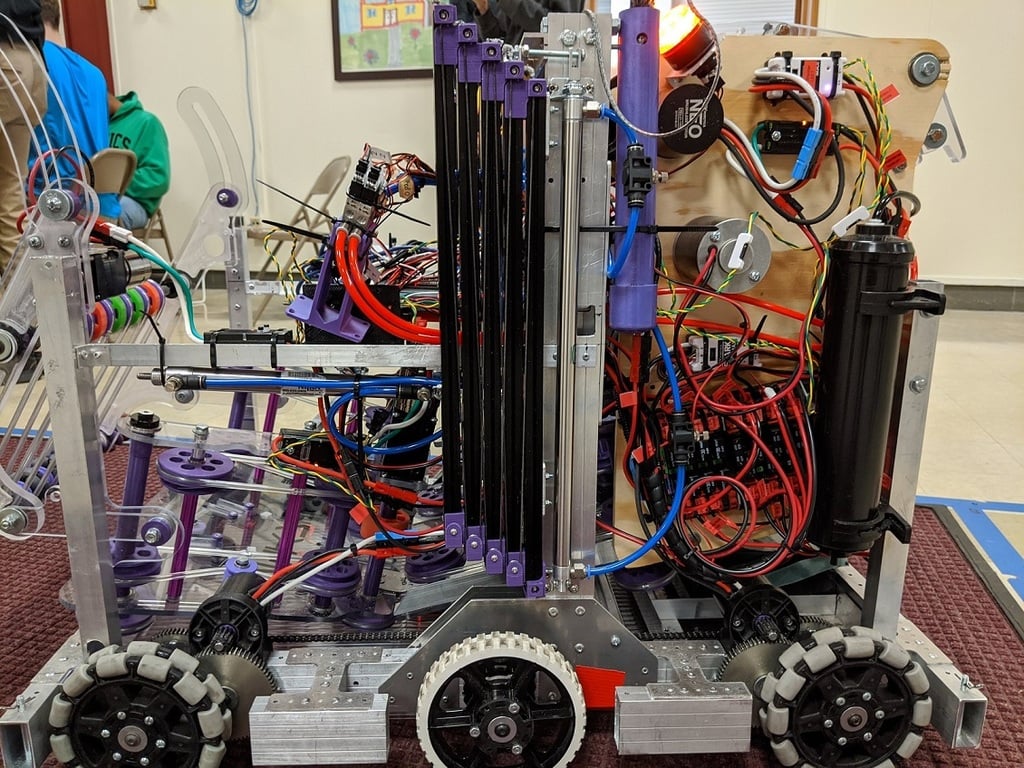
Multi-stage push-pull linear slide for robotic applications. Use by FRC Team 4905 to play the 2020 Infinite Recharge game. Our robot used a 4 stage linear slide that was actuated by a pneumatic cylinder. The retracted length was about 19", and it extended to about 74". Total weight was about 1.5lbs for the linear slide itself and about another 1lb for the solenoid, cylinder and tubing. The team used a 4-way solenoid, which allowed us to inch the slide up and down for adjustability. If you watch the video of our match at Granite State linked below you can see the slide move down slightly after fully extended to line up the hooks. Also note that the team used restrictors on the cylinder to control the extension and retraction to a manageable speed. Without the restrictors the extension was scary fast and violent. The design could be adapted to extend and retract with a winch, but that is left as an exercise for the maker. The linear slide works best pointed up, but will work parallel to ground. When parallel to ground, the frictional force increases nonlinearly as the slide moves out requiring more force to extend & retract. You can extend much higher up, than you can parallel to ground, but reaching out several feet is very workable, especially if you don't extend completely. There are 4 print files. You need one END and TOP for each slide. You will also need one S1 and one S2 print for each stage of the slide. In addition to the 3D prints you will need (all items can be purchased from Amazon): MakerBeam XL Black Anodized Beams 1000x15x15mm m3 nuts and washers for MakerBeam M3x8mm button head screws M3x16mm button head screws M3 Tap (to tap ends of MakerBeam) 1.3mm UHMWPE Cord V Groove Pulley Bearing (3x12x4mm) See attached picture for instruction on how to assemble and string the slide. Nuts slide into AL channels, and screws go in from outside. There are standoffs printed into the slide pieces to set the nuts at the right height for the screws to enter. The cord is held in place by the screw and washer that clamps the cord where it goes through the printed pieces. To keep the cord from slipping, it is recommended to loop it around the button head screw before tightening. Also, run the cord all the way through the printed part and knot the cord just beyond where it comes out. This will keep the cord from pulling out if the cord slips, and the knot gives good purchase when taking slack out of the cord. Do not use washers on the M3x16mm bolts that hold the V grove pulley in place as they will crush the plastic and keep the pulley from rotating. Washers should only be needed to clamp the cording. Below is a link showing the operation of a 3 stage linear slide: https://drive.google.com/file/d/122YZcI4gYCVlrI-GU7jR9ea8OS0qSh7T/view?usp=sharing To see the linear slide in action at the Granite State competition click the following link (note we are the robot with blue bumpers numbered 4905 close to camera): https://youtu.be/yKMKhowDObE?t=120
With this file you will be able to print Linear Slide for Robotics (FRC / FTC / VEX) with your 3D printer. Click on the button and save the file on your computer to work, edit or customize your design. You can also find more 3D designs for printers on Linear Slide for Robotics (FRC / FTC / VEX) .