Linear Stage
thingiverse
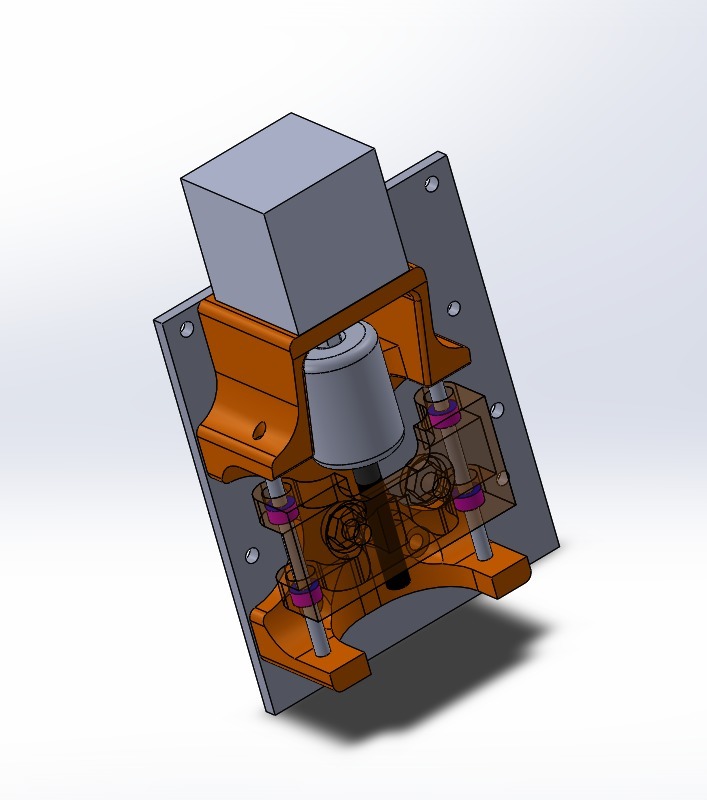
This linear stage was designed specifically for the Z axis of a plotter. It utilizes a stepper motor to adjust its position. The screw lead features a common M5 Caphead screw. I have achieved consistently good results by raising and lowering a pen. I believe it will be suitable for use with heavier loads, such as an engraver motor. Be sure to keep the lead screw lubricated at all times. As always, I am happy to share the SolidWorks files; simply get in touch. Bill of Materials: * Item descriptions for items available on eBay UK. Also available from our favorite place, China. - Stepper Motor: 28mm Nema 11 stepper motor with 4 wires, 0.8A, 6.5Nm, 10oz-in, bipolar CDD - Bush: White nylon spacers, plastic standoffs, round, thick, 3mm internal diameter - Flexible Coupling: Flexible shaft coupling, coupler, stepper motor, CNC, 3D printer, 5mm - Guides: 3mm x 54mm dowel pins - Lead Screw: M5x40mm Cap head screw; chop off the head - Lead Screw Nut: M5 Assembly Considerations: 1. Push fit the bushes into the carriage. Push fitting the bush effectively deforms the internal diameter. Therefore, it is recommended to use a 3.2mm bit drill and rectify the internal diameter, which will help the bushes slide freely. 2. The sliders are two polished 3mm dowel bars, meant to be push fitted in the base. Be sure to do this carefully, as the axial direction is the weakest side of the print. Drilling the holes using a 3.1mm drill bit helped them slide more easily and still remain quite tight in the base. 3. Lead Screw Nut: Push fit it into the carriage; if possible, use super glue to bond it to the carriage.
With this file you will be able to print Linear Stage with your 3D printer. Click on the button and save the file on your computer to work, edit or customize your design. You can also find more 3D designs for printers on Linear Stage.