Lion Signet Ring with Resizing Instructions
thingiverse
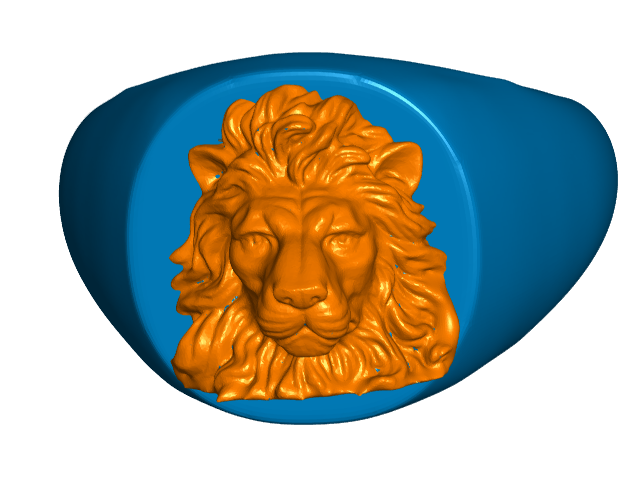
Lion Signet Ring with Resizing Instructions PLEASE READ THIS ENTIRE DESCRIPTION INCLUDING RESIZING INSTRUCTIONS. These rings are based on the great blank ring design by Hodlem. <b>They are really designed for Resin printers to get the best results. </b> You will need supports if you use a Filament printer but with the proper settings you might get a decent result. Let me know if you Like these as there are dozens more I could do. There are 3 files included. The blank ring, the face or object for the "signet", and a complete ring. The ring and face should be printed with the flat sides to the build plate. This will allow you to print/paint in different colors and glue the face to the ring. The complete ring .stl will need supports. TO RESIZE FOR YOUR FINGER: Below are the online resources to quickly calculate scaling your print at the proper ring size. First, you need to know what your ring size is for the finger you plan to wear the ring and the MM conversion. To determine your US ring size and for most US ring sizes, print this PDF: https://www.dazzlingrock.com/pdf_files/RingSizer.pdf For a more complete ring size chart, you can view/print this image: https://tinyurl.com/4mjm97kk SCLAING THE STL FILES FOR YOUR RING SIZE (really easy): Once you determine the MM conversion for your ring size, you need to calculate by what percent you need to increase or decrease the default blank ring and face/signet in your slicing software. The default size of the BLANK-SIGNET-RING.stl is approximately 22mm (the inside of the hole for your finger). That happens to be ring size 12 3/4. Go here to calculate your scaling: https://tinyurl.com/ah4kadd7 and see the calculator image above or here: https://tinyurl.com/2rhx7552 Once on the Calculator.Net page, go to the 3rd calculator down - Percentage Difference Calculator. Enter 22.00 as Value 1 and the MM of your ring size (for example 19.76 for size 10), and click Calculate. The page will refresh showing the results. In the example above, it will show (the 2nd result down) that 19.76 is a 10.18% decrease of 22.00. So, in theory (I have not done enough testing), you simply subtract 10.18% from the default 100% object size. In your slicing software you then resize both the blank ring and the face/signet to 89.82% (Uniform Scaling - all 3 axis). If your ring size is more than 22mm, the calculator results will show the increase in size by percent - just add that to the default 100%. I would love to hear back from anyone who prints these to adjust the calculator instructions if need be.
With this file you will be able to print Lion Signet Ring with Resizing Instructions with your 3D printer. Click on the button and save the file on your computer to work, edit or customize your design. You can also find more 3D designs for printers on Lion Signet Ring with Resizing Instructions.