Liquid Cuprum. Print-in-place lampshade
prusaprinters
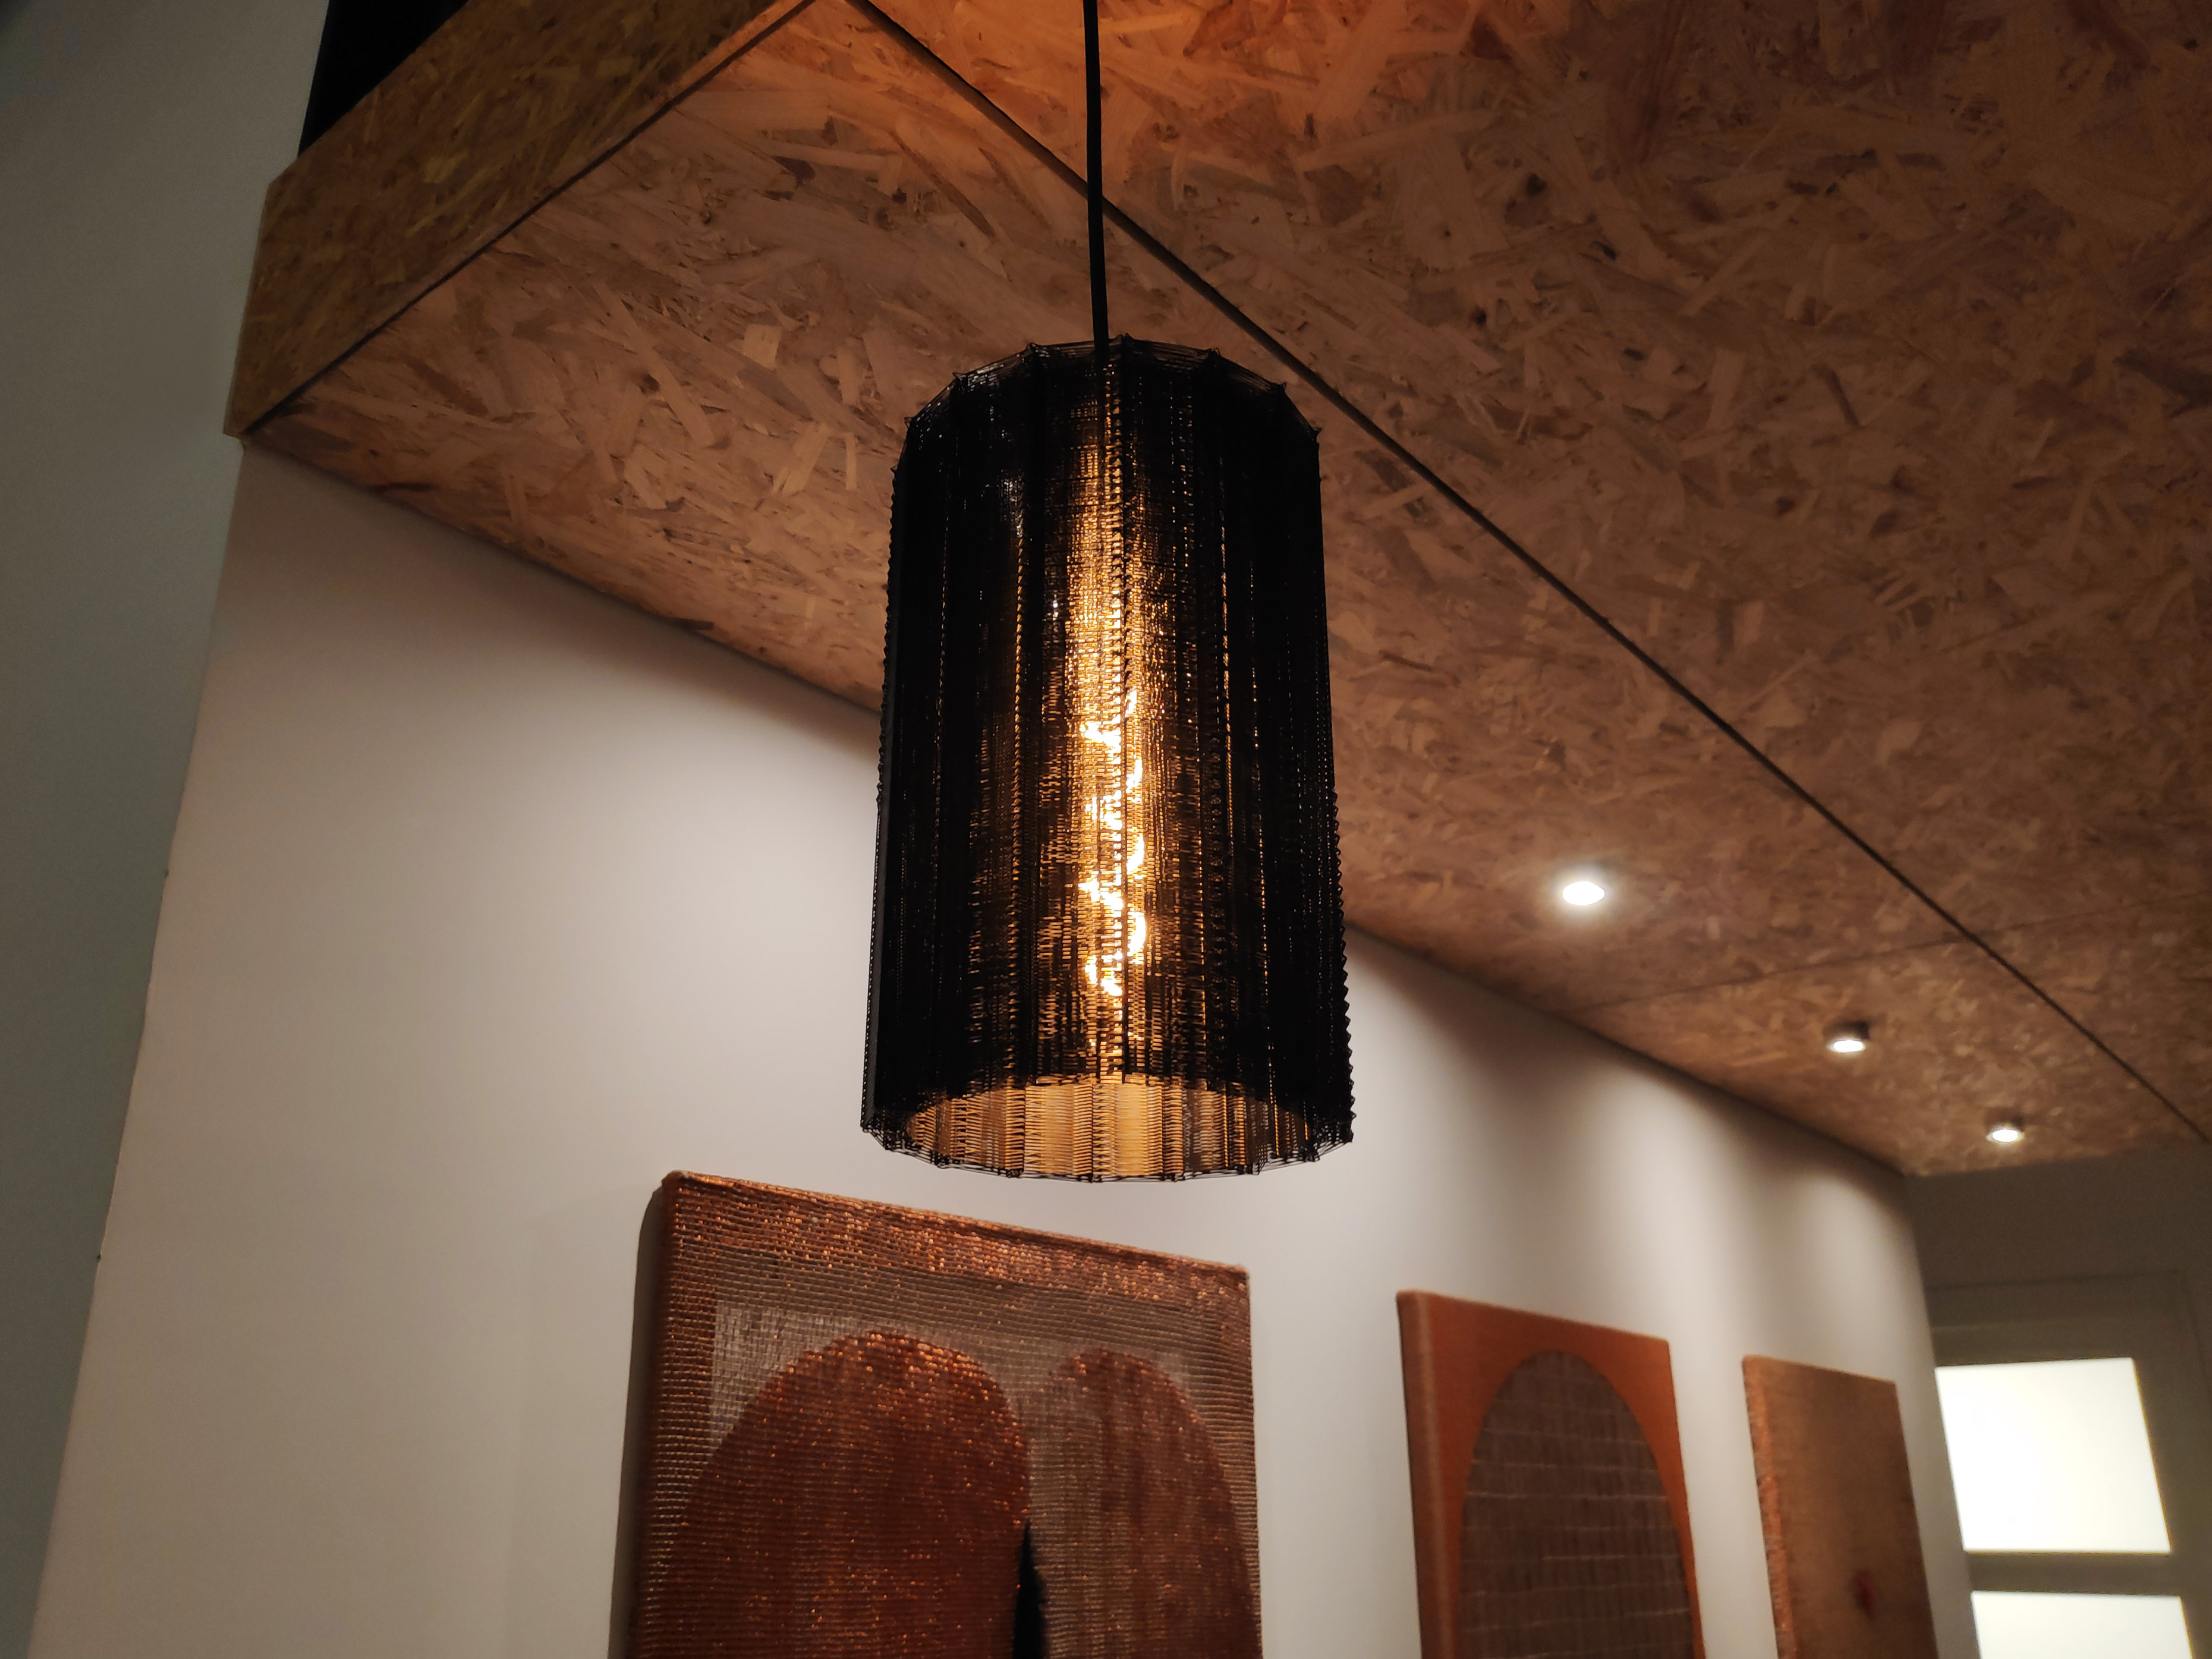
<p>For fast printing of large objects, thin-walled models or "spiral vase" printing are often used. This method has a drawback - a large surface requires uniform heating and sometimes deforms: it bends in large waves. If the wall is even, then it may lack rigidity — it bends easily. Well, the thin walls look a little lightweight. But what if you split this wall in two and print them interlaced? Of course, you need some kind of connection between the walls - "bridges". But it is these connecting bridges that can become the support for the bridges of the walls themselves, for the next layer.<br/> The design I have developed is reminiscent of 19th century engineering objects or wicker baskets. The threads do not repeat the previous layer, but are stretched by "bridges" and touch each other only at the intersection nodes. This approach allows you to create a semi-open, semi-transparent structure and even apply opaque plastic. The black PLA, when illuminated by an IKEA ROLLSBO lamp, acquired a shade of antique copper, so I named the project Liquid Cuprum. But why "liquid"? The double wall of the lampshade creates spectacular moving moirés and unusual shadows - this is best shown in the video:</p> <figure class="media"> <oembed url="https://www.youtube.com/embed/bj_XVcKg97s"></oembed> </figure> <p>The plafond can be printed in two versions - as a thin veil (LiquidCuprum_lamp_1) and with wider straw-like bars (LiquidCuprum_lamp_2 - this version creates stronger illusions of movement).</p> <p>Only one part is used and is printed in place, no post processing required. At the same time, printing can be stopped at any time and a lampshade of the desired length can be created. The default diameter is 156, the height is 240 (v1) and 260 mm (v2).<br/> The shade fits IKEA HEMMA lamp and most other pendants with a socket size of about 40 mm.</p> <p>Here, a slight pulling of the threads without support is used, which serves to more firmly adhere the threads and compensate for displacements: the outward loop creates two points of contact with the lower and upper layers, rather than one.</p> <p>I believe that this approach can be used in other projects as well, it allows you to create a stronger structure and the effect of greater wall thickness while maintaining material consumption and printing time. And in comparison with the same size of the object when printing in one wall (for example, in the spiral vase mode), the option I proposed turns out to be much more stable and with a flat plane, without deformation due to shrinkage.</p> <p>The choice of LED lamp allows you to obtain the desired color shade and brightness. I liked how the IKEA ROLLSBO lamp works with the lampshade, but you can use other shapes and colors. Do not use lamps that generate heat.</p> <p>Check out another project of mine - Polar Sheep Fluffy Lamp <a href="https://www.prusaprinters.org/cs/prints/40124-polar-sheep-lamp">https://www.prusaprinters.org/cs/prints/40124-polar-sheep-lamp</a></p> <p>And the project where I pushed the idea of printing with bridges to the limit: <a href="https://www.prusaprinters.org/prints/41007-orbital-structural-printing-print-in-place-lamp">https://www.prusaprinters.org/prints/41007-orbital-structural-printing-print-in-place-lamp</a></p> <h3>Print instructions</h3><p>The model is economical (plastic consumption is 36.3 meters) - 8.6 shades can be printed from one kilogram PLA coil (data for v1). Printing time is only 6 and a half hours (for v2 - 7:30).<br/> Since the size of the parts must match the height and width of the layer, changing the scale when printing can lead to unpredictable results (but you can increase the Z height by a multiple of the layer height, in 0.3 mm increments per layer, or decrease it by simply stopping the print at a sufficient height). I advise you to print with 0.3 ply height and 0.3-0.4 ply width, with 100% airflow. The print speed for me was 70 mm / s (I was a little reinsured, on layers above 15-20 you can speed up the print). As the speed increases, the plastic becomes matte, if you want to get a glossy shine, you should not increase it too much (and I recommend changing the speed smoothly during printing, otherwise the texture may be clearly different).</p> <p>Filling is not required (but you can put 20%). Well, no support is needed - unlike other projects, the threads should hang freely here. No post processing is required.<br/> I printed the PLA, but this is possible with other materials with the settings adjusted.</p>
With this file you will be able to print Liquid Cuprum. Print-in-place lampshade with your 3D printer. Click on the button and save the file on your computer to work, edit or customize your design. You can also find more 3D designs for printers on Liquid Cuprum. Print-in-place lampshade.