Lithophane creator
prusaprinters
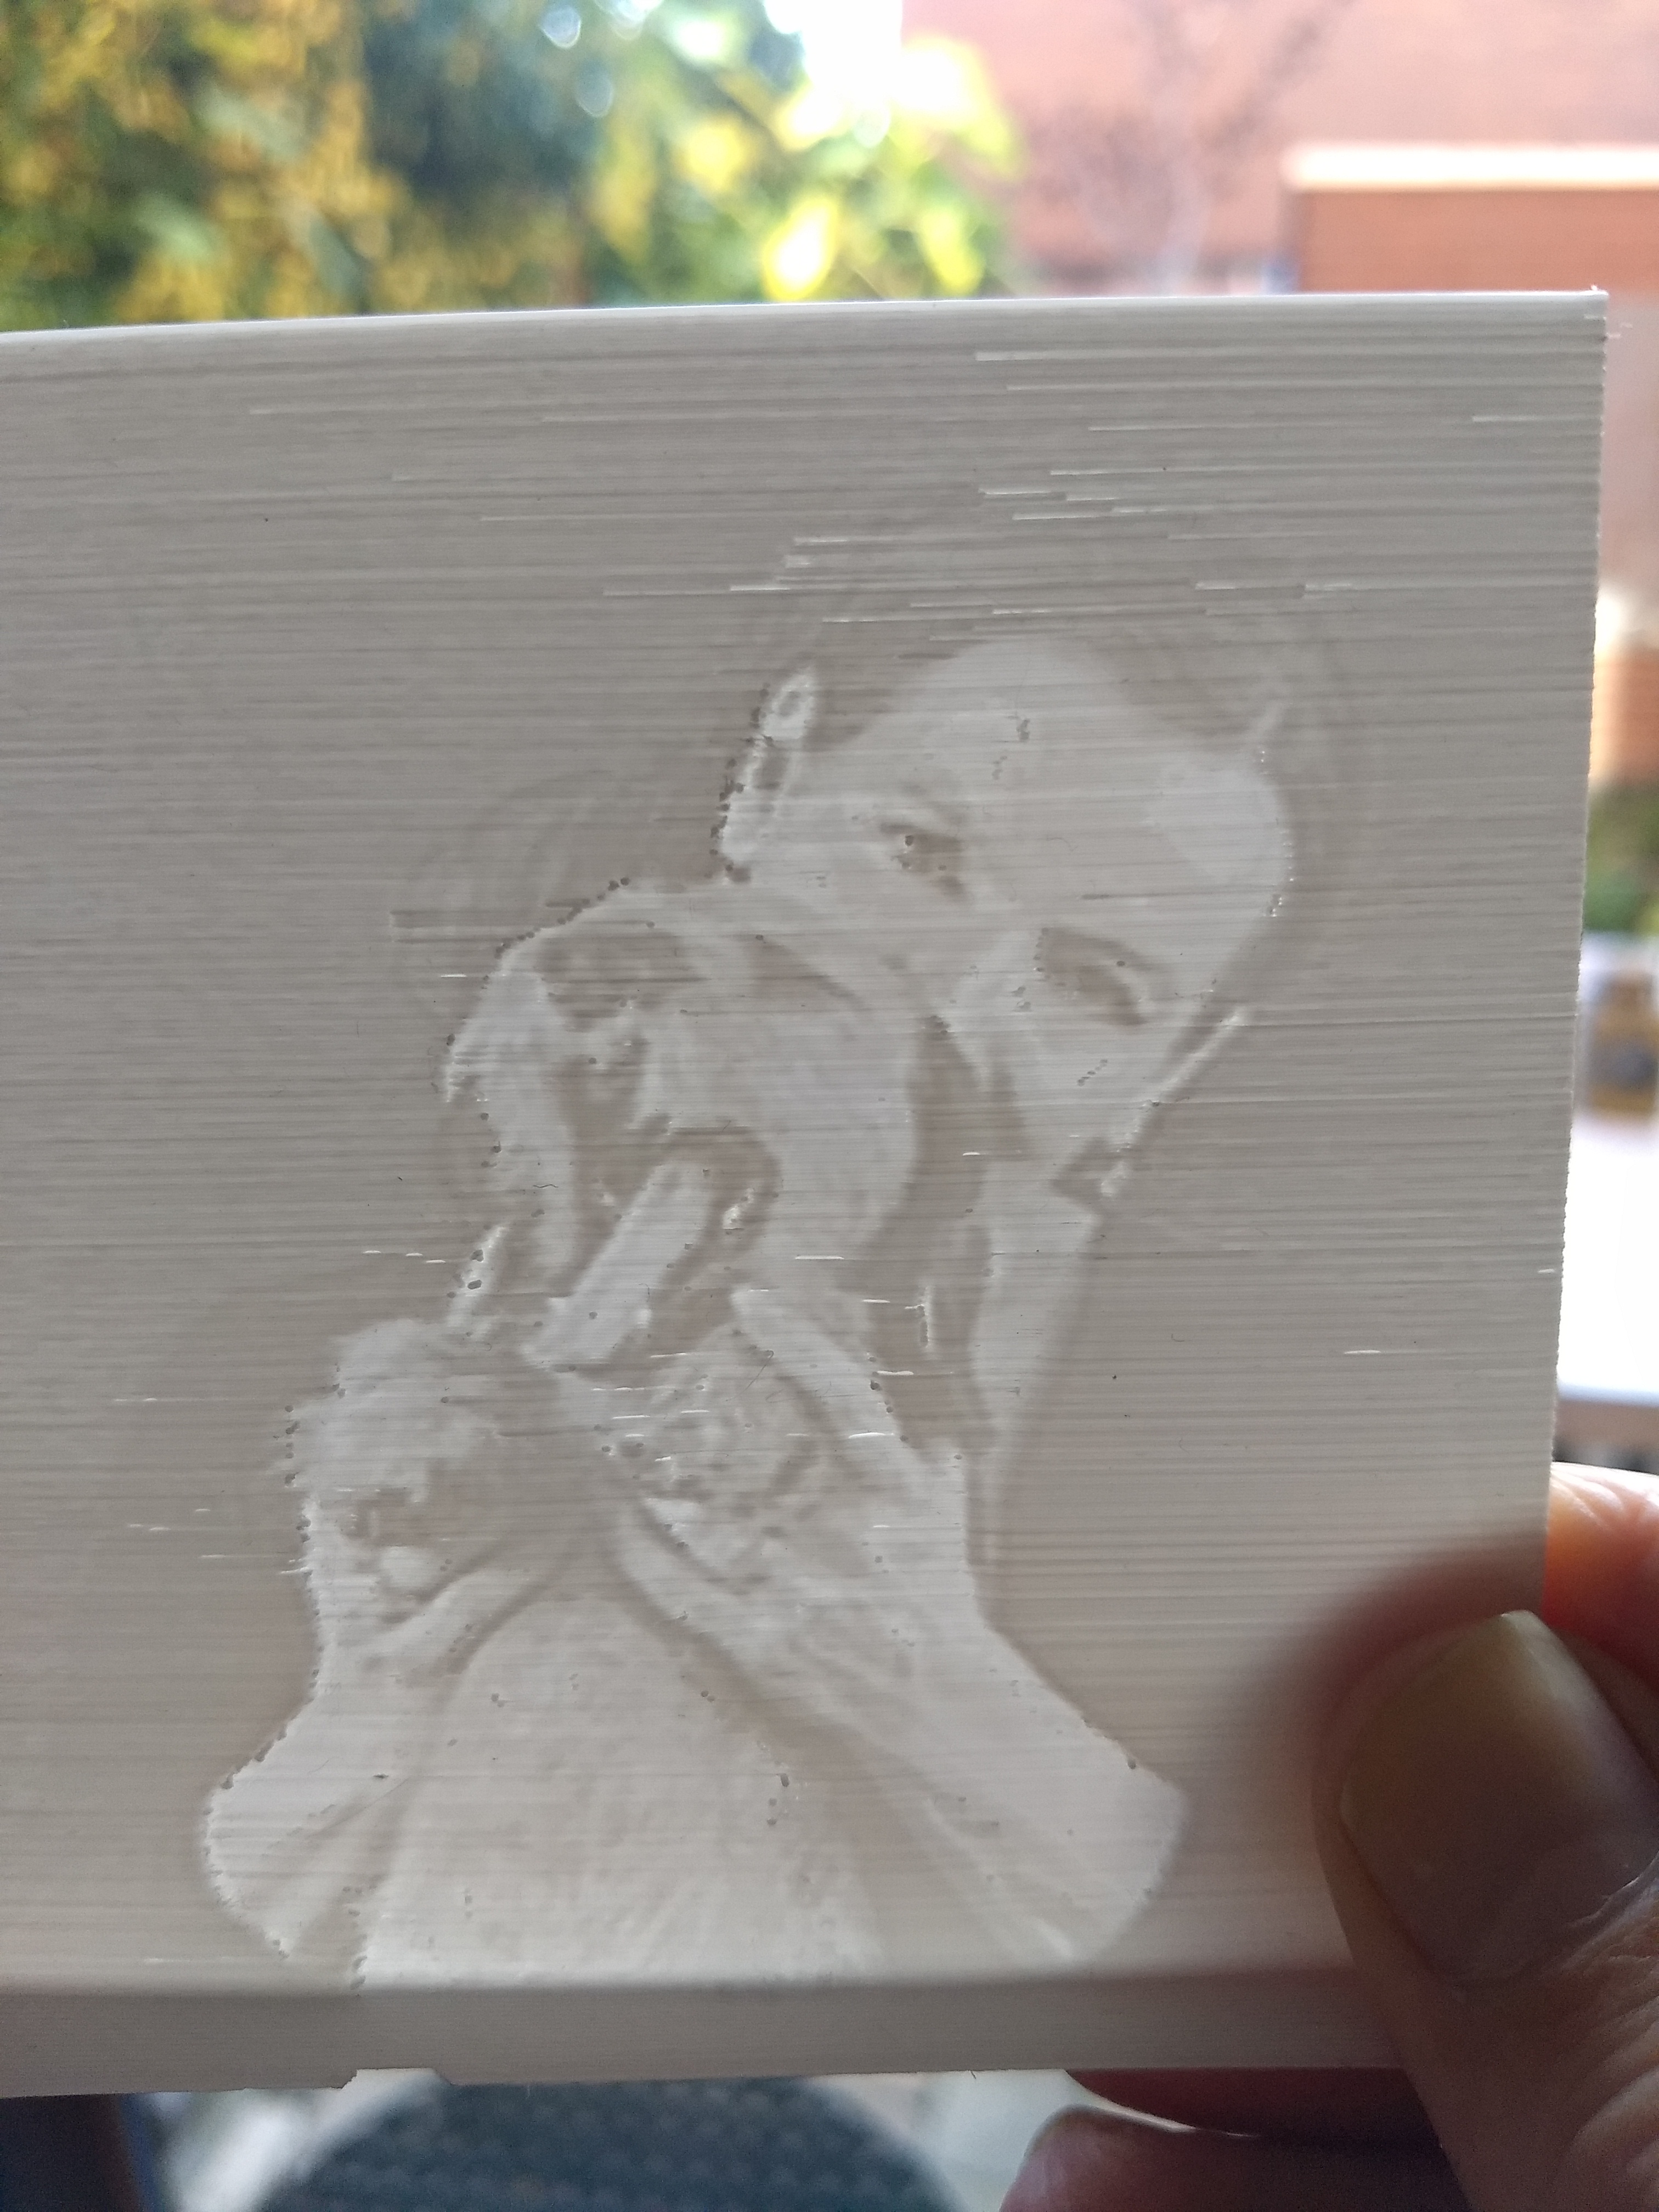
<p>Create lithophanes from your own photos with the Customizer from OpenSCAD. Use the Customizer to import your photo, resize the print to match your photo and select a thickness. Create your .stl file and 3d print in five easy steps without the need to code.</p><p>Steps to create a lithophane of your photo</p><ol><li><strong>Download OpenSCAD</strong>. For this your need the free and open source program <a href="http://openscad.org/">OpenSCAD</a> which is available for OSX, Windows and Linux. Start OpenSCAD and load the .scad file available here together with the sample negatives photos below. Easiest is to have the .scad file and the negatives in the same folder or map. Now use the Customizer to create you .stl file. </li><li><strong>Make a negative of your photo</strong>. Before loading your photo into OpenSCAD you need to make a negative of the photo first. There are many ways to do this but I use Imagemagick, a command line tool for <a href="https://imagemagick.org/script/download.php#linux">Linux</a>, <a href="https://imagemagick.org/script/download.php#windows">Windows</a>, <a href="https://imagemagick.org/script/download.php#macosx">Mac OSX</a>, and others. To create a negative type: <i>convert -negate foo.png inverted_foo.png</i> on the command line. </li><li><strong>Use the Customizer</strong>. The Customizer has the option to change the background. This is important to select. If the background of your original photo is mostly white or lightly coloured choose ‘light’. If it's mostly dark choose ‘dark’. In addition enter the height and width in pixels of your photo.</li><li><strong>Render and save the .stl file</strong>. To create an .stl press F6 or select Design/Render in the menu. It's important to know that rendering takes longer when the image is larger. I found that a a 200x200 pixels photo takes a few minutes to render. Since the resolution of the 3d printer is limited it's probably needless to go beyond 40.000 pixels.</li><li><strong>Slice and print</strong>. Make sure that the photo is placed in the upright position as shown in one of my photos.</li></ol><p>Have fun.</p><p>EDIT: step 2. If you rather use a GUI instead of the command line you can also use GIMP, yet another free and open source program. Download GIMP for OSX, Windows or Linux. Open the original photo. Next select Colors and then Invert in the menu.</p><p>EDIT: step 2. Make sure that your photo is converted to a png file before using it in OpenSCAD. Again you can use either Imagemagick or GIMP for it. In Imagemagick simply type: convert -foo.jpg -foo.png. In GIMP open the jpg file and then select File and then Export As in the menu, change the extension to png and then click Export again. </p>
With this file you will be able to print Lithophane creator with your 3D printer. Click on the button and save the file on your computer to work, edit or customize your design. You can also find more 3D designs for printers on Lithophane creator.