Lithophane ornament
prusaprinters
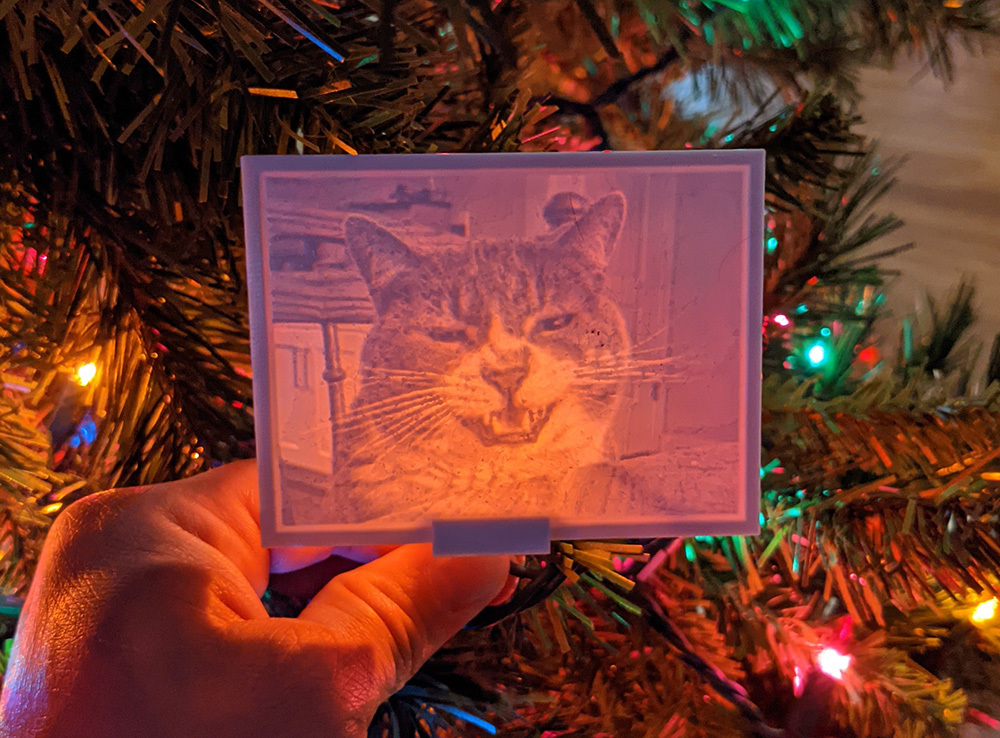
<p>Small 65mm tall lithophane ornament that clips onto existing Christmas tree lights, no batteries or additional lights required!</p> <p>Rail around image allow for multiple light mounts. This was designed around incandescent lights with a 8.2mm socket diameter. The clip is slightly undersized to 7.5mm to allow a good snap fit. I found red, yellow, and pink lights worked the best with incandescent lights and blue or green appear better on LED lights, in my small sample size.</p> <p>To setup the image to be compatible with this clip:</p> <p>Photoshop/Gimp/other photo editor:</p> <ol> <li>Crop photo as desired (approximately square or near rectangle)</li> <li>Change the image to black and white</li> <li>Auto color to set image color scale</li> <li>Change the image size to 480 pixel high</li> <li>Increase canvas size by 20pixel (~1.25mm) with gray infill in both directions, from the center of the image</li> <li>Increase canvas size by 40 pixel (~2.5mm) with black infill in both directions, from the center of the image</li> <li>(optional for ornament hook) Add a white circle 10 pixel diameter in the gray stripe at the top in the middle.</li> <li>Save as .jpg</li> </ol> <p>Cura (I used 4.6 and 4.8):</p> <ol> <li>Open photo in Cura</li> <li>Set height to 2.0mm</li> <li>Set base to 0.2mm</li> <li>Set depth to 65mm with Darker is higher</li> <li>Set linear color model</li> <li>Click OK</li> <li>Adjust print settings as follows:<ul> <li>layer height is 0.1mm</li> <li>initial layer height is 0.1mm</li> <li>Print Thin Walls is enabled</li> <li>Infill Density is 100%</li> </ul> </li> </ol> <h3>Print Settings</h3> <p><strong>Printer Brand:</strong></p> <p>Creality</p> <p class="detail-setting printer"><strong>Printer: </strong> <div><p>Ender 3</p></div> <p><strong>Rafts:</strong></p> <p>No</p> <p class="detail-setting supports"><strong>Supports: </strong> <div><p>No</p></div> <p><strong>Resolution:</strong></p> <p>0.1</p> <p class="detail-setting infill"><strong>Infill: </strong> <div><p>mixed</p></div> <p><strong>Filament:</strong> ZYLTech PLA white</p> <p><br/> <p class="detail-setting notes"><strong>Notes: </strong></p> </p><div><p>Lithophane must be printed with 100% infill. Clips can have infill 20% or lower</p></div> Post-Printing ============= <p>(optional) Once finished printing the lithophane, drill out the optional white circle added for a hook.</p> <p>Step 1: Snap LithoClip into LightClip as shown, these can be mostly snapped together and do not need as much of an opening as shown.</p> <p class="detail-image"><img src="https://cdn.thingiverse.com/assets/81/10/ca/db/8c/PXL_20201212_183203953.jpg"/></p> <p class="detail-caption"><strong> Step 1: Snap LithoClip into LightClip as shown, these can be mostly snapped together and do not need as much of an opening as shown.</strong></p> <div><p>Step 2: Snap assembly onto the lithophane image on the desired edge with the light clip on the back of the image.</p></div> <p class="detail-image"><img src="https://cdn.thingiverse.com/assets/78/d7/a3/f9/b2/PXL_20201212_183154876_scaled.jpg"/></p> <p class="detail-caption"><strong>Step 2: Snap assembly onto the lithophane image on the desired edge with the light clip on the back of the image.</strong></p> <div><p>Step 3: Slide the clip to the desired position on the rail and pinch it closed. This should pin it in position on the frame.</p></div> <p class="detail-image"><img src="https://cdn.thingiverse.com/assets/12/84/d0/db/22/PXL_20201212_183059257_scaled.jpg"/></p> <p class="detail-caption"><strong>Step 3: Slide the clip to the desired position on the rail and pinch it closed. This should pin it in position on the frame.</strong></p> <div><p>Step 4: Add additional clips as desired.</p> Step 5: Clip onto plastic socket of light and enjoy! <p><strong>Step 5: Clip onto plastic socket of light and enjoy!</strong></p> <p><strong>To remove/reposition:</strong></p> <p>To release the clip, apply firm pressure to the lithophane image and light clip as if you are trying to flatten it. This will push the clip apart and loosen the fit. Clips do degrade a bit over time, but I have found they can be repositioned 4 to 5 times before they become notably loose.</p> </div></p></p></p> Category: Art
With this file you will be able to print Lithophane ornament with your 3D printer. Click on the button and save the file on your computer to work, edit or customize your design. You can also find more 3D designs for printers on Lithophane ornament.