Lockable box
myminifactory
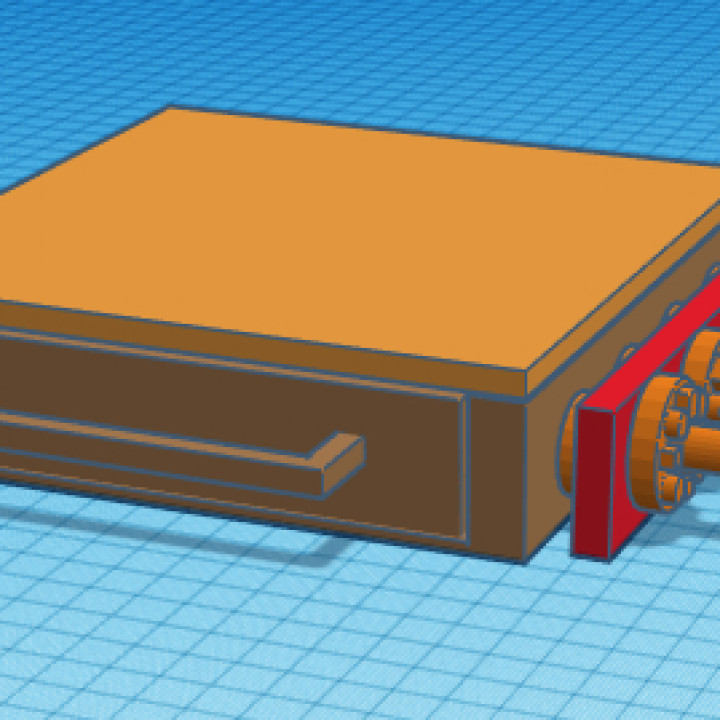
This is a lockable box I designed in Tinkercad. The locking mechanism is not the best, but takes 5 minutes or so for the average adult to pick it, and it should keep most young kids out. The way that the number system works is this: Large square is 1, circle to the right is 2, small square to the right is 3, and so on. Oh and maybe you will want to print the barrels slightly scaled down to prevent sanding. The idea of how it should look when finished is shown in plc # 1. Assembly directions are in the misc. notes section.This is a lockable box I designed in Tinkercad. The locking mechanism is not the best, but takes 5 minutes or so for the average adult to pick it, and it should keep most young kids out. This is the way that the number system works: Large square is 1, circle to the right is 2, small square to the right is 3, and so on. Oh and maybe you will want to print the barrels slightly scaled down to prevent sanding. The idea of how it should look when finished is shown in plc # 1. Now for the assembly. Note: If parts don't fit, go ahead and sand. Step 1. Print the parts! (:Step 2. Insert all of the barrels into the connector bar. (Refer to pic # 2 for steps 2-3)Step 3. Glue knobs onto the ends of the barrels (make sure the barrel pins are up and the barrels are still in the connector bar) with whatever number you want directly on the top. This makes the barrel assembly. (how to make the combo 1234 is demonstrated in pic # 2)Step 4. Set the drawer in the frame and slide in the barrel assembly.Step 5. Glue the lid on and your done!Oh yeah and turn the knobs to lock! (:
With this file you will be able to print Lockable box with your 3D printer. Click on the button and save the file on your computer to work, edit or customize your design. You can also find more 3D designs for printers on Lockable box.