Logitech C270 Case and Manual Focus Ring
thingiverse
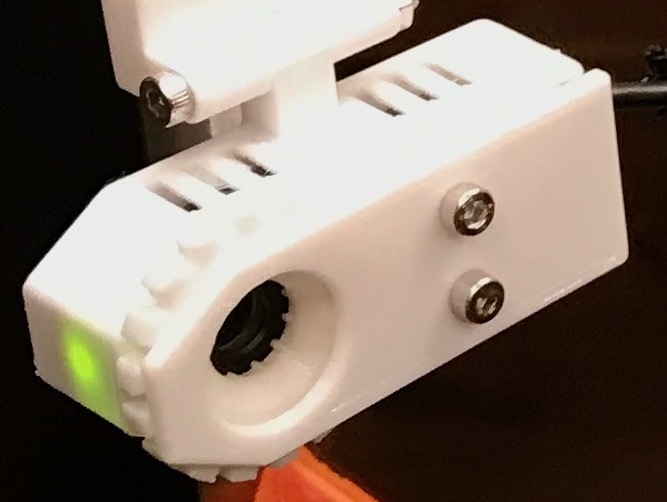
This is a new case for the every-popular Logitech C270. The case is designed for use with a mounting system I created and will post links to. The case features an integrated manual focus ring and a slim profile which makes it ideal for use in an enclosure, as well as ventilation slits. The case utilizes the screws from the original webcam case, and can be printed without supports. There are two versions of the case, and the only difference between them is the distance between the mounting hole and the case. The shorter version works well with the rigid mount, and the longer version works well with the articulated mount. Pick your favorite, and go wild with it. Aside from the printed parts, you will need: 2x M3 x 8mm screw 2x M3 nuts Original screws from webcam housing Once you have printed the pieces and gathered all of the extra parts, the assembly is mostly straight forward. There are a few noteworthy bits to highlight however. Begin by disassembling the Logitech C270, and retain the screws found throughout the process. Then: 1- Due to the location of the nuts which secure the focus ring retainer to the lid, you will need to use a little glue (either super or hot). Position the M3 nuts in the recesses designed into the lid, and apply a little bit of glue to hold them in place. This can be left to dry (or cool) while we continue the assembly. 2- The webcam takes a bit of trickery to fit into the case, but it can be done without applying any pressure to the circuit board. 3- Once the webcam is inside of the case, secure it to the case using the two original screws from disassembly of the original case. Insert the screws in the holes circled in red (see photos) and tighten loosely (you don't want to crack the webcam's circuitboard or strip the printed holes). 4- When the glue holding the two M3 nuts to the lid has dried, it is time for final assembly. Place the lid on to the case, and secure it in place using the original three screws from the webcam's original housing. 5- Install the manual focus ring. 6- Finish the assembly by attaching the focus ring retainer to the lid with the 2x 8MM M3 screws. Links to related projects: Articulated X-Axis Arm https://www.thingiverse.com/thing:4337176 Rigid X-Axis Arm https://www.thingiverse.com/thing:4337080
With this file you will be able to print Logitech C270 Case and Manual Focus Ring with your 3D printer. Click on the button and save the file on your computer to work, edit or customize your design. You can also find more 3D designs for printers on Logitech C270 Case and Manual Focus Ring.