Logitech G25/ G27/ G29 Handbrake
thingiverse
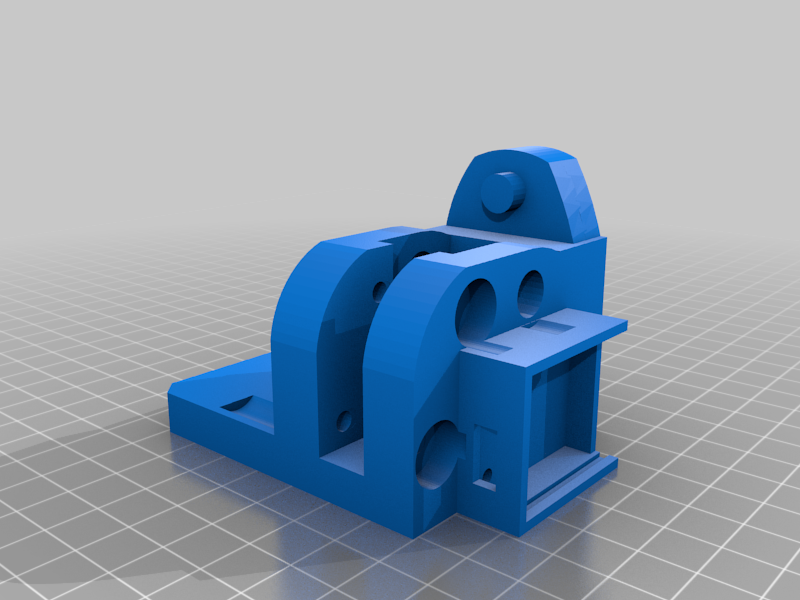
Items needed: 16 mm aluminum tube (you have to drill it 8 mm and 4mm holes) SPDT Micro Interruptor (like these https://www.amazon.com/Cylewet-25Pcs-Switch-Arduino-CYT1073/dp/B073TYWX86 https://www.amazon.it/gp/product/B01JRQWCQ2) 4 bolts (4x25 mm) with 2 nuts. 1 bolt (8x40 mm) with 1 nut. 2 bolts (6x25 mm) no nuts needed. (used to connect supports to G29, verify that G27/G25 have the same holes, I can't check it.) 1 spring (i bought one from ironmongery, 12mm diameter should be ok). 1 Digispark Usb ATTINY85 board (to emulate a key for our handbrake). I bought this one: http://digistump.com/products/1 (from aliexpress). Two wires. Tools needed: -Soldering Iron: You'll have to solder the P0 pin to NO and GND to COM respectively on your Switch. -Dremel alike tool. -Driller (to make an 8 mm hole to our tube, the hole near the spring, 4mm holes for the handbrake "cover"). -Micro usb cable. Software needed: -Arduino IDE ( https://www.arduino.cc/en/main/software). You'll have to install the trinket keyboard library's and the Attiny85 board drivers (because Arduino IDE have to recognise the board). -Digistump digispark drivers ( https://digistump.com/wiki/digispark/tutorials/connecting ). I more over suggest to download the keyboard library directly from github (download the entire repo here https://github.com/adafruit/Adafruit-Trinket-USB then keep only the folder TrinketKeyboard and compress it to a zip, then install the library manually inside arduino's program. This because that specific library is not found from arduino, a similar one is instead found and installed but it didn't work... -Handbrake board code (this code enables the board to push the COMMA keyboard button mapped to our switch), obviously you can modify the keyboard button mapped as your preferences. Handbrake code download: https://drive.google.com/file/d/1ueVhz8GHW2HozKdMkt_V-fGilqvFoX9U/view?usp=sharing This project differs from the original for the following points: 1) attiny hard case is integrated in the main base support to have everything in the same place 2) the switch sensor used is smaller (I used that mainly because I already had it at home, but also is more compact) 3) holes for bolts (except 8x40) have a bigger "entrance" to simplify screwing and hidind the head of bolts inside the support (this mainly for 6x25 used to connect supports to the shifter) 4) added holes on handbrake "cover" to avoid it moving using it SUGGESTION: use infill 80% for main_support, with 30% (on old project) the side where spring press broke, so just in case more infill should avoid better that problem. Once you have completed your DIY handbrake you'll have to screw it to your shifter. UPDATE: Changed main support to be more resistant on the back (where spring apply force) and made a hole on the bottom to get in and out attiny board without soldering/dissoldering if necessary to remove.
With this file you will be able to print Logitech G25/ G27/ G29 Handbrake with your 3D printer. Click on the button and save the file on your computer to work, edit or customize your design. You can also find more 3D designs for printers on Logitech G25/ G27/ G29 Handbrake.