Logitech G29, G920, G27 Handbrake
thingiverse
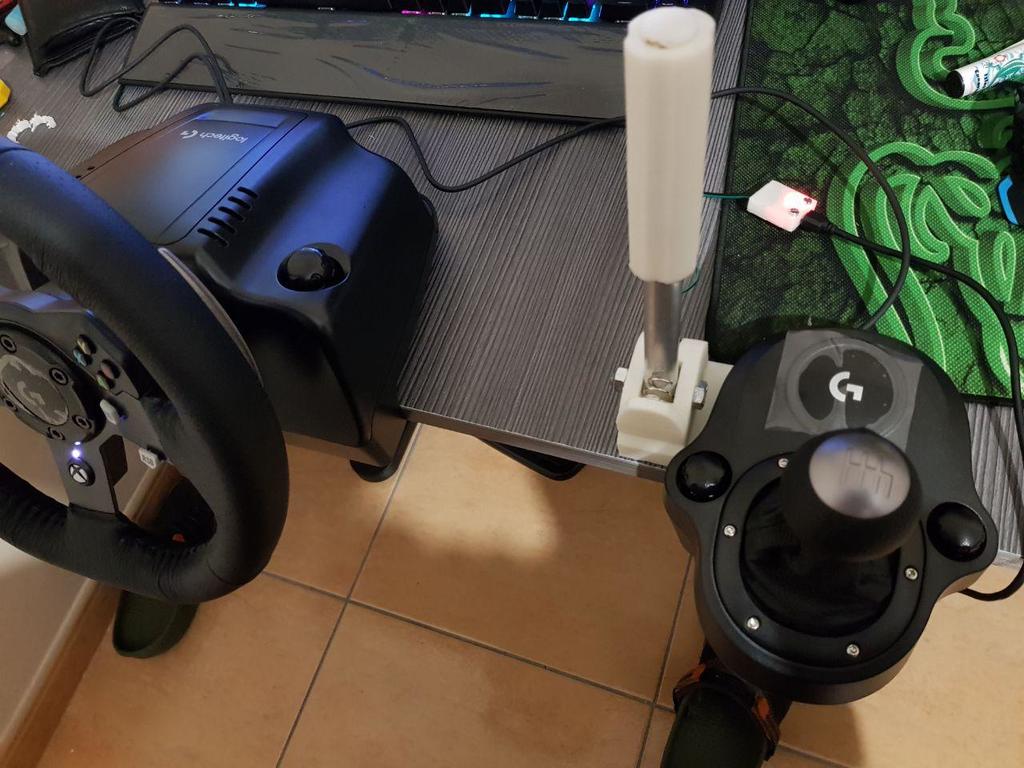
2018 update: Items needed: - 16 mm aluminum tube (you have to drill it an 8 mm hole) - V3 Microswitch SPDT 16a Micro Switch (http://www.ebay.es/itm/V3-Microswitch-SPDT-16A-Micro-Switch/251827572523?hash=item3aa217cf2b:m:mONdUDFbmsgXjdcCSmAGbFg) - Two bolts (3x30 mm) with 2 nuts. - One bolt (8x50 mm) with 1 nut. - One spring (i bought one from a chinese store, cut it and left 3 rings of it). - One Digispark Usb ATTINY85 board (to emulate a key for our handbrake). I bought this one: http://digistump.com/products/1 (from aliexpress). - Two wires. Tools needed: -Soldering Iron: You'll have to solder the P0 pin and GND to your Switch. -Dremel alike tool. -Driller (to make an 8 mm hole to our tube). -Micro usb cable. Software needed: -Arduino IDE (https://www.arduino.cc/en/main/software). You'll have to install the trinket keyboard library's and the Attiny85 board drivers (because Arduino IDE have to recognise the board). -Digistump digispark drivers (https://digistump.com/wiki/digispark/tutorials/connecting). -Handbrake board code (this code enables the board to push the COMMA keyboard button mapped to our switch). Handbrake code download: https://drive.google.com/file/d/1ueVhz8GHW2HozKdMkt_V-fGilqvFoX9U/view?usp=sharing The attiny85 hardcase is optional. Also you can change the way you map your handbrake switch. In 2015 i used and old Usb Joystick, but this time i used an Arduino board clone). Once you have completed your DIY handbrake you'll have to screw it to your shifter.
With this file you will be able to print Logitech G29, G920, G27 Handbrake with your 3D printer. Click on the button and save the file on your computer to work, edit or customize your design. You can also find more 3D designs for printers on Logitech G29, G920, G27 Handbrake.