Logitech Quickcam Pro 9000 Mount
thingiverse
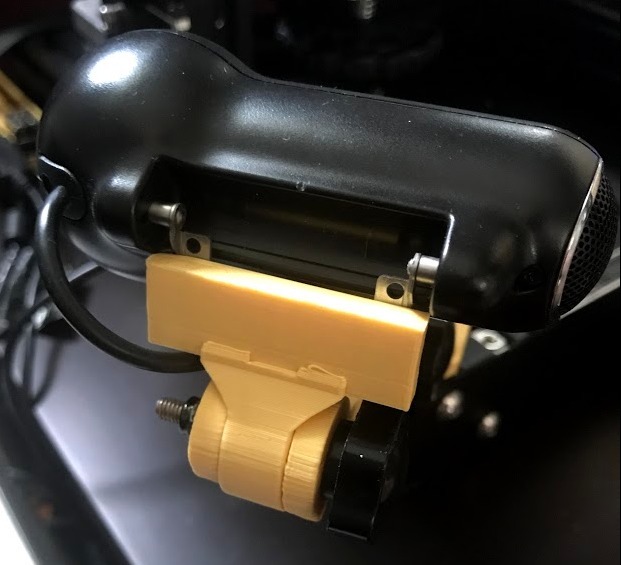
See the remix source [mounting system](https://www.thingiverse.com/thing:2477180) for base, arm and joint models. To use this part, first remove the stock mounting arm from the Quickcam Pro 9000. It's held in place by four small screws. Reserve two of them for re-use. Print this mount part. Grab a sharpie and align the two mount points on the camera with the long bar on the end of this mount part. Mark two dots on the part with the sharpie where the mount holes are. Using a dremel or small hand drill, drill two 5/64" holes where you marked them with sharpie. Now use the two mounting screws you held in reserve earlier to fasten the camera to the mount. Note: If you use a low amount of infill (I used 20%), the screws will have less material to grab ahold of, resulting in a less firm attachment. Even with 20% though, it was plenty tight enough to use without a concern. If you don't have a screw gun, or you don't want to use power tools, you can probably use a small framing nail and a hammer to make the holes instead. The screws just need enough of an opening to make the initial purchase.
With this file you will be able to print Logitech Quickcam Pro 9000 Mount with your 3D printer. Click on the button and save the file on your computer to work, edit or customize your design. You can also find more 3D designs for printers on Logitech Quickcam Pro 9000 Mount.