Logitech Saitek Trim Wheel for Flight Throttle Quadrant
prusaprinters
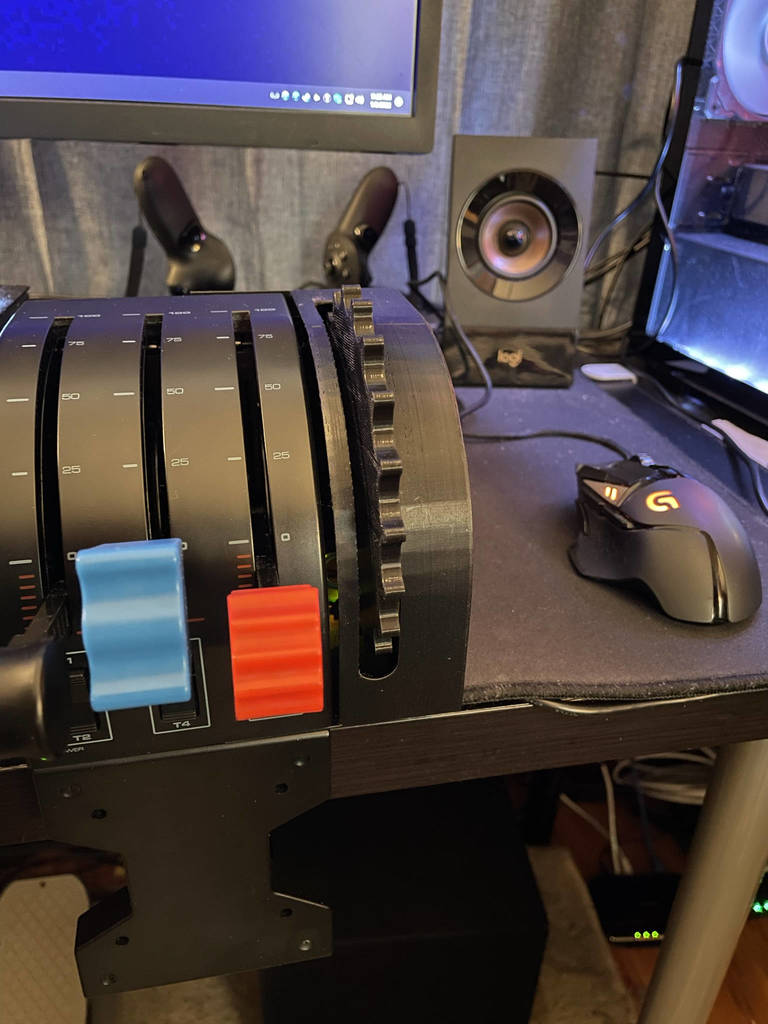
<p>I've wanted a trim wheel for flight sim stuff for years but the old Saitek model isn't made anymore and examples on eBay are rare and cost a fortune so I decided to make my own.</p><p>This is built with an Arduino Leonardo, some 3d printed parts, and a cheap rotary encoder.</p><p>This won't work with an Arduino Uno or Arduino Mega. It needs to be an Arduino Leonardo.</p><p>The Solidworks files and arduino sketch source code are all here to download and mess with how you see fit.</p><h3>Parts you'll need</h3><ul><li>Arduino Leonardo: <a href="https://www.amazon.com/gp/product/B0786LJQ8K/ref=ppx_yo_dt_b_asin_title_o09_s00?ie=UTF8&psc=1">https://www.amazon.com/gp/product/B0786LJQ8K/ref=ppx_yo_dt_b_asin_title_o09_s00?ie=UTF8&psc=1</a></li><li>Rotary Encoder: <a href="https://www.amazon.com/gp/product/B06XQTHDRR/ref=ppx_yo_dt_b_search_asin_title?ie=UTF8&psc=1">https://www.amazon.com/gp/product/B06XQTHDRR/ref=ppx_yo_dt_b_search_asin_title?ie=UTF8&psc=1</a></li><li>6 M3x10 Screws to screw the arduino and rotary encoder into the case</li><li>6 M3 Nuts to go with the M3x10 screws</li><li>2 M4x10 Screws to screw the case to the throttle quadrant</li></ul><h3>What do you need to download?</h3><ul><li>You'll need to print case.stl and trim wheel.stl</li><li>You'll need to download trim_wheel.ino and open the arduino sketch in there and program it to your arduino. I use Arduino IDE for this. You can get that at <a href="https://www.arduino.cc/en/software">https://www.arduino.cc/en/software</a></li><li>If you want to mess with the model and remix it or whatever you can download Trimwheel_sw.zip for the Solidworks source files.</li></ul><p>How do you put this together?</p><ul><li>Print both STLs</li><li>Screw in the arduino and rotary encoder</li><li>Wire the CLK pin from the trim wheel to the PWM 2 pin on the arduino</li><li>Wire the DT pin from the rotary encoeder to the PWM 3 pin on the arduino</li><li>Wire the + pin from the rotary encoder to the 5v pin on the arduino</li><li>Wire the GND pin from the rotary encoder to any GND pin on the arduino</li><li>Attach the wheel to the rotary encoeder</li><li>Screw the trim wheel case on to the back or bottom (whichever of those surfaces the clamp is NOT on) of the throttle quadrant</li><li>Plug in the trim wheel to your computer with USB</li><li>Fire up arduino IDE and open trim_wheel.ino</li><li>Click the right pointing arrow in the tool bar to send the sketch to the arduino.</li><li>After your computer makes a couple of USB connect/disconnect noises it's ready to test in the USB game controllers control panel</li></ul><p>At this point you should be good to go. This has been tested in Microsoft Flight Simulator (2020) and when I set the elevator trim axis to the axis of the new controller (should show up in flight sim as Arduino Leonardo)</p>
With this file you will be able to print Logitech Saitek Trim Wheel for Flight Throttle Quadrant with your 3D printer. Click on the button and save the file on your computer to work, edit or customize your design. You can also find more 3D designs for printers on Logitech Saitek Trim Wheel for Flight Throttle Quadrant.