Logitech Z906 speaker wall mount
thingiverse
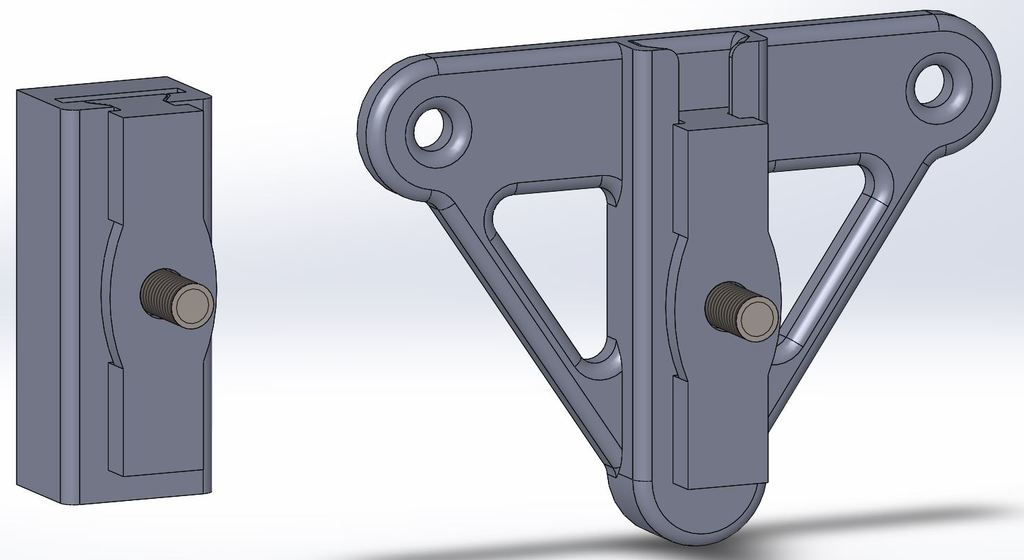
I had the older Logitech z5500 surround-set, but it broke. So i replaced it with the newer Logitech Z906. The front speakers are mounted on top of the rails ("handson rails") of my shelf mounting points. They slide on top of them. After you slide them on the rails you can slide the speaker with the bracket on the mounting point (bracket on the left of the first picture). For the rear i already had holes in the wall from the Z5500 mounting points that i wanted to use. So the second bracket is made for the original mounting points on the wall (the holes from the z5500 are 75mm apart). They can also be used for the front, but they can't be used for the middle speaker since the audio connectors are placed differently. The speaker bracket is the same for both the front and the rear. I made the files in SolidWorks for students because i'm a student in the Bachelor of Mechanical Engineering. I have added the SolidWorks files for those who want to make adjustments and i added the .STL files for those who just want to print. The version of "MaximSachs" gave me the idea for my own version of this speaker mounts. But i made my own since these ones work better for me. (I didn't try his version) The screws needed for the speakers are: Pan head 1/4-20 x 1/2 UNC (per speaker 1 is needed) 2x wall screw depends on the socket you use (per mounting point) Feel free to contact me for questions!
With this file you will be able to print Logitech Z906 speaker wall mount with your 3D printer. Click on the button and save the file on your computer to work, edit or customize your design. You can also find more 3D designs for printers on Logitech Z906 speaker wall mount.