LoveBox clone - Send love messages :)
prusaprinters
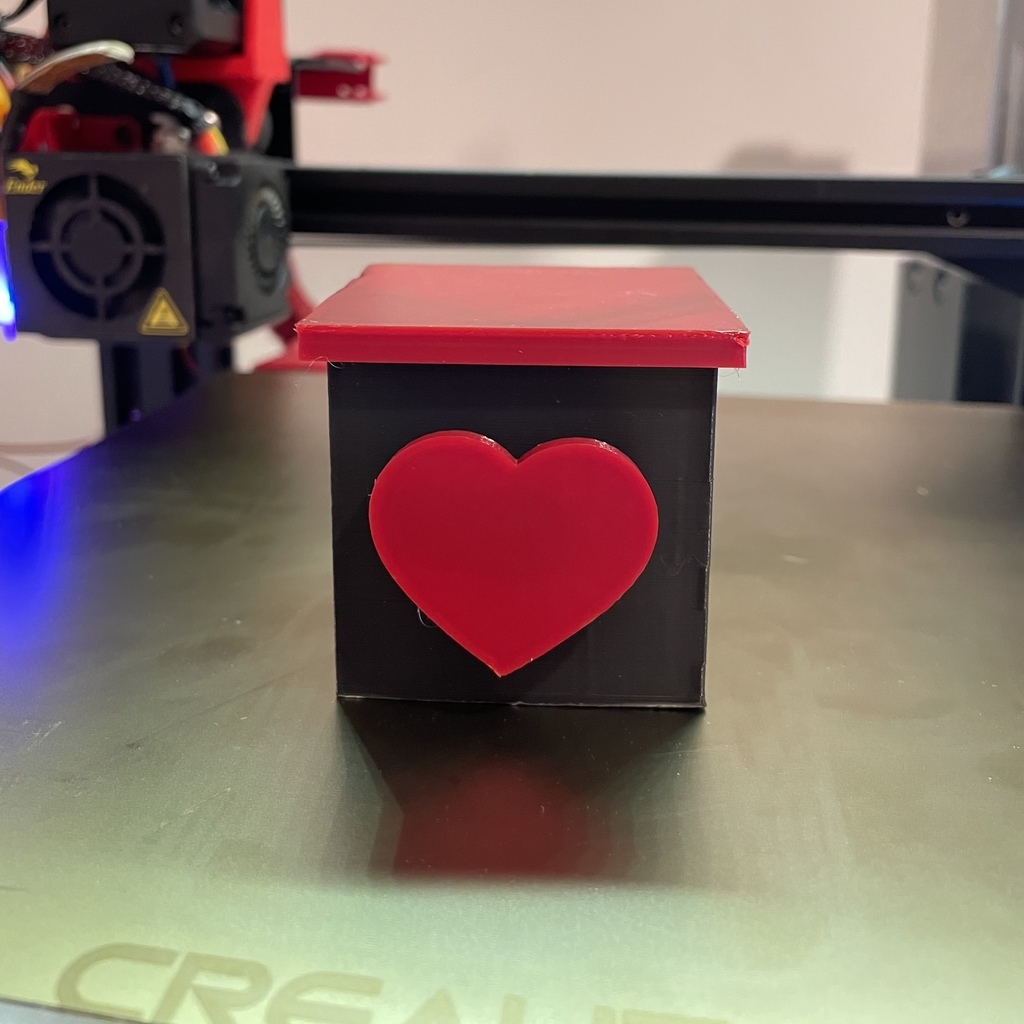
<h3>LoveBox Clone</h3> <p>This is a DIY clone of <a href="https://en.lovebox.love/">Lovebox</a> and is inspired by the work of <a href="https://github.com/julisa99/Lovebox/">julisa99</a>.</p> <p>This project is powered by a Wemos D1 Mini that runs a WebSocket client and controls the OLED display and servo motor. A light sensor is used to identify the messageRead status.</p> <h3>Details</h3> <p>I wanted to experiment with the Wemos platform and was constantly target by Lovebox ads and thought it would be a good idea to give it a try. I then found the work of julisa99 but didn't like that the delay between updating the gist and the message being received + I dind't have access to a laser cutter to cut the wood panels of their design.</p> <p>Inspired by their work I have then designed this clone of the clone, using the same wiring but with a new Sketch that uses Websockets for an instantaneus message delivery.</p> <p>Once the message is delivered to the node websocket server, the message gets propagated to all the clients pooling it such as the Wemos. The Wemos activates the servo and displays the message on the screen until the cover is removed and the light hits the photoresistor. When the analog input reads the light, stops the servo and clears the screen after some time. The time and the light reading can be configured in the Sketch to match your preferences.</p> <h3>Materials</h3> <p>(all <a href="https://www.amazon.com?linkCode=ll2&tag=thingiverse09-20&linkId=e4759bff1fa9a55a0f897d801ce2d765&language=en_US&ref_=as_li_ss_tl">Amazon</a> links have my referral, please search manually for the product if you wish not to use my link.)</p> <ol> <li><a href="https://www.amazon.co.uk/gp/product/B07B2JVPKX/ref=as_li_tl?ie=UTF8&camp=1634&creative=6738&creativeASIN=B07B2JVPKX&linkCode=as2&tag=thingiverse09-20&linkId=d4b0ea3d123867e2c9476b8f5823d1b0">WeMos D1 Mini</a></li> <li><a href="https://www.amazon.co.uk/gp/product/B07B2JVPKX/ref=as_li_tl?ie=UTF8&camp=1634&creative=6738&creativeASIN=B07B2JVPKX&linkCode=as2&tag=thingiverse09-20&linkId=d4b0ea3d123867e2c9476b8f5823d1b0">SG90 9g micro servo motor</a></li> <li><a href="https://www.amazon.co.uk/gp/product/B07B2JVPKX/ref=as_li_tl?ie=UTF8&camp=1634&creative=6738&creativeASIN=B07B2JVPKX&linkCode=as2&tag=thingiverse09-20&linkId=d4b0ea3d123867e2c9476b8f5823d1b0">GL5516 photoresistor</a></li> <li><a href="https://www.amazon.co.uk/gp/product/B07B2JVPKX/ref=as_li_tl?ie=UTF8&camp=1634&creative=6738&creativeASIN=B07B2JVPKX&linkCode=as2&tag=thingiverse09-20&linkId=d4b0ea3d123867e2c9476b8f5823d1b0">10kΩ resistor</a></li> <li><a href="https://www.amazon.co.uk/gp/product/B07B2JVPKX/ref=as_li_tl?ie=UTF8&camp=1634&creative=6738&creativeASIN=B07B2JVPKX&linkCode=as2&tag=thingiverse09-20&linkId=d4b0ea3d123867e2c9476b8f5823d1b0">SSD1306 I2C OLED display</a></li> </ol> <h3>Code</h3> <p>Find the latest code for this project on my GitHub at this link: <a href="https://github.com/claitz/Lovebox-WebSocket">https://github.com/claitz/Lovebox-WebSocket</a></p> <h3>Build</h3> <p>Follow the diagram and solder all the components together.</p> <p>Allow for 5-6 centimeters of solid core soldering wire between the Wemos and the OLED.</p> <p>The photoresistor also needs to be extended with some wire to allow its positionings on the Top_screen.stl.</p> <p>I have to admit I have used an awful lot of hot glue in this build.</p> <p>There are supports on the bottom of the Box.stl to glue the Wemos in place.</p> <p>Once the Wemos has been glued to the bottom, install the servo motor and secure it with the screws provided with the servo. There are holes in the back of the box to operate the screwdriver through.</p> <p>Hold the screen and the photoresistor in place on Top_screen.stl with the hot glue and push the support on the top of the box until it<em>clicks</em> in place. Surprisingly no hot glue is needed here.</p> <p>Screw the arm to the servo motor with the provided screw and then hotglue the heart in place.</p> <h3>Print</h3> <p>I have printed everything in black PLA, except for Heart_flat.stl and Top_cover.stl that were printed in red.</p> <p>There is a second version of the heart included but I didn't like the finish even when printing at 0.1mm - I might remodel this later.</p> <h3>Software setup</h3> <p>Upload index.JS in your server of choice and launch it with npm install and then node index.js. A websocket server will be created at serverIP:8080</p> <p>Copy credentials_example.h in credentials.h and input your SSID, wifi password and WS endpoint ip address as per previous step.</p> <p>Use a WebSocket client to send messages to serverIP:8080, the server will aknowledge the message and forward to all clients connected to it. This means you can run multiple Lovebox on the same server and they'll all get the message.</p> <h3>Donations ⭐</h3> <h6>tags: Lovebox Instruction Wemos OLED Websocket Valentine</h6> Category: Electronics
With this file you will be able to print LoveBox clone - Send love messages :) with your 3D printer. Click on the button and save the file on your computer to work, edit or customize your design. You can also find more 3D designs for printers on LoveBox clone - Send love messages :).