Luke's Lightsaber
thingiverse
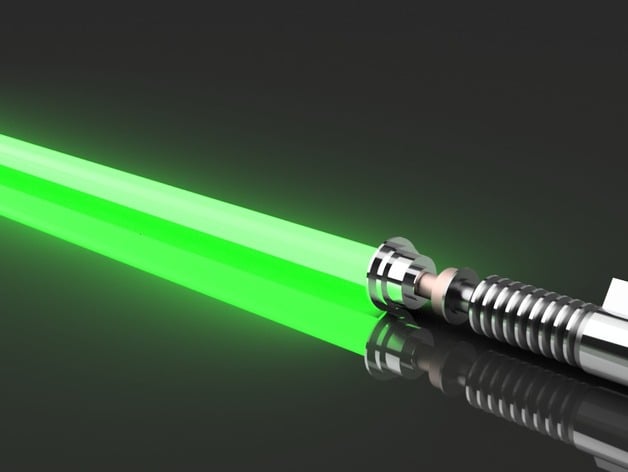
Outside dimensions were referenced from a schematic from Martin Taylor. Chamfers and fillets were added in areas to strengthen design. Lightsaber is hollow and will house electronics and lights when I am done with it. I included the fusion 360 achieve file and a .step file so that you can edit it if you wish. Total parts to print: 5-7 (Depending if you print the tube mount and the battery lock) Build size Largest part is a little less than 5in tall. Which will fit on most printers I know and work with. Some threads can be removed to reduce that size. Supports There are duplicates of the parts that require supports. You can choose to use the supports I generated with Meshmixer or you can take the files without the Supported prefix and add your own supports. Blade For my lightsaber I am using a 5ft x 1in OD tube. The nylon tube I am using doesn’t thread easily and is thin so there is a tube attachment with threads on it. Print it and force it onto the bottom of the tube. Light sanding of the tube may be required. I found a good link for tube in this pdf:http://www.hyperdynelabs.com/docs/hyperblade/HyperBlade%20saber%20blade%20kit.pdf They recommend two different tubes. One for the inside led blade and another for the outside blade. Outside tube: http://www.mcmaster.com/#8628k67/=10fuu6s My current design only accounts for the outside tube. A small change to the Tube Attachment can allow for both tubes. They sell it in 5ft length. I cut mine down to around 3ft (according to some forum posts about blade length). Battery The RidgedHandle component is designed with the intention of housing a 18650 rechargable battery (~67mm x 18.8mm OD). There is enough room on the sides of the battery to run wires past it. USB Ordered from Amazon: http://www.amazon.com/gp/product/B00R3B0AOK?psc=1&redirect=true&ref_=od_aui_detailpages00 Mounts into bottom section. With threaded cap to protect if from dust when not using. The bottom also uses left-handed threads, so that you can undo the usb cap without unscrewing the entire lightsaber. Print Settings Printer Brand: MakerBot Printer: MakerBot Replicator 2 Rafts: Doesn't Matter Supports: Doesn't Matter Resolution: .1 - .15 Notes: Supports There are duplicates of the parts that require supports. You can choose to use the supports I generated with Meshmixer or you can take the files without the Supported prefix and add your own supports. Post-Printing Thread cleaning After printing this on a Makerbot with PLA, I ran sand paper and a sharp deburring tool in areas that need it. Threads fit perfectly. Love the feel of it. Optional painting Using silver and gold sharpie paint pen. The Silver turned out really nice. I need to hone the gold into a copper-rustic look. Will update with pictures if I change it. How I Designed This Schematic from Martin Taylor. Referenced dimensions to create outer body. Design to Cardboard cut-out from 123D Make to 3D printing. Designed in Fusion 360. Easy to use and free software for education and hobbyists/ enthusiasts. Cross Section of lightsaber. 18650 battery is the yellowish block nested into the RidgedHandle. I also have the bright LED I am using at the top.
With this file you will be able to print Luke's Lightsaber with your 3D printer. Click on the button and save the file on your computer to work, edit or customize your design. You can also find more 3D designs for printers on Luke's Lightsaber.