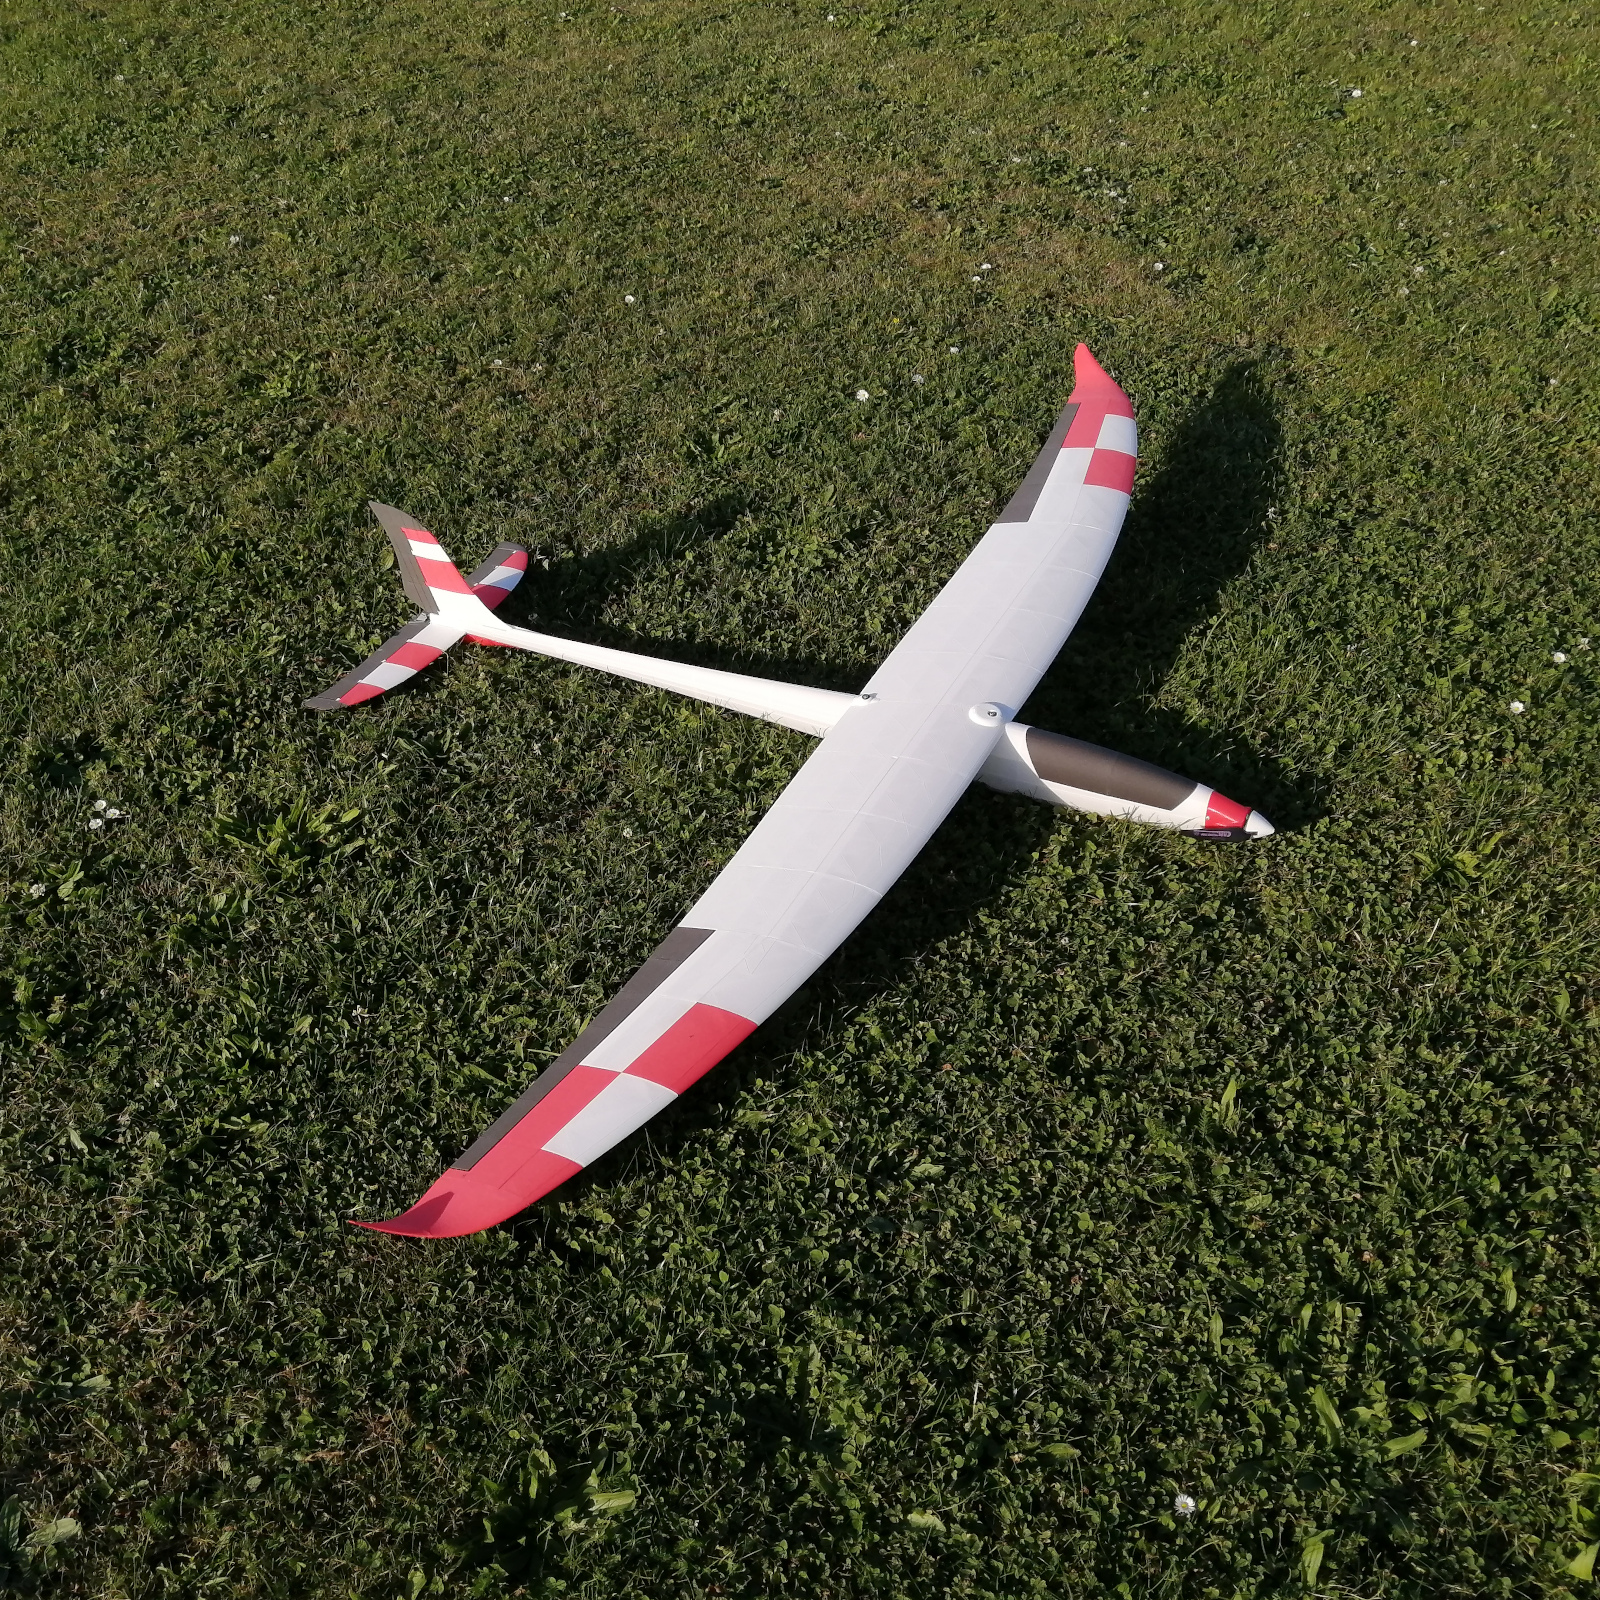
Lukisegler (electric RC glider)
prusaprinters
<h3>CArts Lukisegler</h3><figure class="media"><oembed url="https://youtu.be/lIbfx48m30Y"></oembed></figure><h3>CArts Lukisegler (english)</h3><p> </p><figure class="image image-style-align-right image_resized" style="width:47.35%;"><img src="https://c-arts-modelle.de/carts_modelle_web/fluggeraete/carts_lukisegler/bilder/segler_schwerpunkt_01_web1000.png" alt="Abbildung a)"></figure><ul><li><strong>Span:</strong> approx. 1700 mm</li><li><strong>Body length:</strong> approx. 1000 mm</li><li><strong>Take-off weight (LW-PLA):</strong> approx. 650 g</li><li><strong>Take-off weight (PLA / PETG):</strong> approx. 1050 g</li><li><strong>Drive:</strong> brushless motor</li><li><strong>Propeller :</strong> folding propeller</li><li><strong>Battery:</strong> 3S-4S Lipo 1000-1300 mAh</li><li><strong>Controls:</strong> elevator / rudder / aileron / motor</li><li><strong>Center of gravity:</strong> 70-75 mm behind the profile nose</li><li><strong>Rudder deflections:</strong> 15-20 °</li></ul><p> </p><p>The CArts Lukisegler is an electrically powered glider that comes entirely from the 3D printer.</p><p>The design is most closely based on a hotliner. As a pilot you should have some experience, as in my opinion 3d-printed models are not suitable for beginners.</p><p>The complete building-instructions can be downloaded from my website: <br><a href="https://c-arts-modelle.de/carts_modelle_web/fluggeraete/carts_lukisegler/carts_lukisegler.html">https://c-arts-modelle.de/carts_modelle_web/fluggeraete/carts_lukisegler/carts_lukisegler.html</a><br><i>(It is a german website, but the translator in Chrome or Chromium will do quite a good job!)</i></p><p>The Lukisegler can be printed from PLA, PETG or lightweight PLA (LW-PLA). The construction of the parts is designed for a minimum of retracts is necessary when printing. This minimizes stringing especially when using PETG or LW-PLA.</p><p>The individual parts should also be printed individually. Otherwise the stringing will be too strong and the post-processing of the parts will be too time-consuming.</p><p><strong>Modifiers</strong> are used in the print files . These are essential for the stability and for the structure of the individual parts! The surfaces for connecting the individual parts are made by using <strong>modifiers</strong> .</p><p>Required accessories</p><h3>Parts for the construction</h3><p>Carbon rods or fiberglass rods as well as various adhesives are required for the construction.</p><h4>Adhesives</h4><ul><li>Superglue, low viscosity</li><li>Medium-viscosity superglue</li><li>5-minute epoxy resin</li></ul><h4>Carbon rods</h4><ul><li>Carbon rod 1 mm: 2 pieces (1000 mm length)</li><li>Carbon rod 1.5 mm: 5 pieces (1000 mm length)</li><li>Carbon rod 2 mm: 6 pieces (1000 mm length)</li></ul><h4>Steel wire</h4><ul><li>Steel wire 1 mm: 2 pieces (1000 mm length)</li></ul><h4>Magnets</h4><ul><li>Neodymium magnet round 8x2 mm (d x h): 1 piece</li></ul><h4>Screws</h4><ul><li>Wood screws 2x10 mm (d x h): 26 pieces</li><li>Screw M3x20 mm: 1 piece</li><li>Screw M3x30 mm: 1 piece</li></ul><h3>Electronics</h3><h4>Servos</h4><ul><li>Micro servos: 4 pieces (maximum dimensions (L x W x H) 23.5 x 10 x 24 mm)</li><li>9g Mini-Servos can be used in the fuselage with a updated servo plate:<br><a href="https://www.printables.com/de/model/204579-lukisegler-electric-rc-glider-update-servoplate-fo">https://www.printables.com/de/model/204579-lukisegler-electric-rc-glider-update-servoplate-fo</a></li></ul><p>I use high quality servos with metal gears. These can cope with even greater loads (e.g. in the event of undesired contact with the ground) without damage. The additional costs for this are worthwhile.</p><h4>Receiver</h4><ul><li>Minimum: 5 channels</li></ul><h4>Engine</h4><ul><li>Brushless motor (maximum dimensions (d x H) 28 x 50 mm)</li></ul><h4>ESC (controller)</h4><ul><li>Minimum: 20A (3-4S)</li><li>BEC minimum: 2A</li><li> </li></ul><h3>How I set up Prusaslicer for my printer:</h3><figure class="media"><oembed url="https://youtu.be/wvLSVYyUMD8"></oembed></figure><h3>How to add modifiers and paint on seams in Prusaslicer:</h3><figure class="media"><oembed url="https://youtu.be/szOrIJutmyo"></oembed></figure><p> </p><h3>CArts Lukisegler (deutsch)</h3><figure class="image image-style-align-right image_resized" style="width:53.15%;"><img src="https://c-arts-modelle.de/carts_modelle_web/fluggeraete/carts_lukisegler/bilder/segler_schwerpunkt_01_web1000.png" alt="Abbildung a)"></figure><p> </p><ul><li><strong>Spannweite:</strong> ca. 1700 mm</li><li><strong>Rumpflänge:</strong> ca. 1000 mm</li><li><strong>Abfluggewicht (LW-PLA):</strong> ca. 650 g</li><li><strong>Abfluggewicht (PLA / PETG):</strong> ca. 1050 g</li><li><strong>Antrieb:</strong> Brushless-Motor</li><li><strong>Luftschraube:</strong> Klappluftschraube</li><li><strong>Akku:</strong> 3S-4S Lipo 1000-1300 mAh</li><li><strong>Steuerung:</strong> Höhe / Seite / Quer / Motor</li><li><strong>Schwerpunkt:</strong> 70-75 mm hinter der Profilnase</li><li><strong>Ruderausschläge:</strong> 15-20°</li></ul><p> </p><p>Der CArts Lukisegler ein Segler mit Elektroantrieb, der vollständig aus dem 3D-Drucker kommt.</p><p>Die komplette Bauanleitung gibt es auf meiner Website: <a href="https://c-arts-modelle.de/carts_modelle_web/fluggeraete/carts_lukisegler/carts_lukisegler.html">https://c-arts-modelle.de/carts_modelle_web/fluggeraete/carts_lukisegler/carts_lukisegler.html</a></p><p>Das Design ist am ehesten an einen Hotliner angelehnt. Als Pilot sollte man etwas Erfahrung mitbringen, da meiner Meinung nach 3d-gedruckte Modelle nicht für Anfänger geeignet sind.</p><p>Der Lukisegler kann aus PLA, PETG oder Lightweight-PLA (LW-PLA) gedruckt werden. Die Konstruktion der Teile ist so ausgelegt, dass beim Druck ein Minimum an Retracts nötig ist. Dies minimiert das Stringing beim Druck. Gedruckt wird mit einer 0,4mm Düse und einer Lagenhöhe von 0,2mm.</p><p>Die einzelnen Teile sollten auch einzeln gedruckt werden. Sonst wird das Stringing zu stark und die Nachbearbeitung der Teile wird zu aufwändig.</p><p>In den Druckdateien werden <strong>Modifier </strong>verwendet. Diese sind essentiell wichtig für die Stabilität und für den Aufbau der einzelnen Teile!</p><p> </p><p>Benötigtes Zubehör</p><h3>Teile für den Aufbau</h3><p>Für den Aufbau werden Carbon-Stäbe bzw. Glasfaser-Stäbe sowie verschiedene Klebstoffe benötigt.</p><h4>Klebstoffe</h4><ul><li>Sekundenklebstoff dünnflüssig</li><li>Sekundenklebstoff mittelflüssig</li><li>5-Minuten Epoxidharz</li></ul><h4>Carbon-Stäbe</h4><ul><li>Carbonstab 1 mm: 2 Stück (1000 mm Länge)</li><li>Carbonstab 1,5 mm: 5 Stück (1000 mm Länge)</li><li>Carbonstab 2 mm: 6 Stück (1000 mm Länge)</li></ul><h4>Stahldraht</h4><ul><li>Stahldraht 1 mm: 2 Stück (1000 mm Länge)</li></ul><h4>Magnete</h4><ul><li>Neodym-Magnet rund 8x2 mm (d x h): 1 Stück</li></ul><h4>Schrauben</h4><ul><li>Holzschrauben 2x10 mm (d x h): 26 Stück</li><li>Schraube M3x20 mm: 1 Stück</li><li>Schraube M3x30 mm: 1 Stück</li></ul><h3>Elektronik</h3><h4>Servos</h4><ul><li>Micro-Servos: 4 Stück (Maße maximal (L x B x H) 23.5 x 10 x 24 mm)</li><li>9g Mini-Servos können im Rumpf mit einer aktualisierten Servoplatte verwendet werden:<br><a href="https://www.printables.com/de/model/204579-lukisegler-electric-rc-glider-update-servoplate-fo">https://www.printables.com/de/model/204579-lukisegler-electric-rc-glider-update-servoplate-fo</a></li></ul><p>Ich verwende hochwertige Servos mit Metallgetriebe. Diese stecken auch größere Belastungen (z.B. bei einem ungewünschten Bodenkontakt) ohne Schaden weg. Die Mehrkosten dafür lohnen sich.</p><h4>Empfänger</h4><ul><li>Minimum: 5-Kanal</li></ul><h4>Motor</h4><ul><li>Brushless-Motor (Maße maximal (d x H) 28 x 50 mm)</li></ul><h4>ESC (Regler)</h4><ul><li>Minimum: 20A (3-4S)</li><li>BEC Minimum: 2A</li></ul><p>Die komplette Bauanleitung gibt es auf meiner Website: <a href="https://c-arts-modelle.de/carts_modelle_web/fluggeraete/carts_lukisegler/carts_lukisegler.html">https://c-arts-modelle.de/carts_modelle_web/fluggeraete/carts_lukisegler/carts_lukisegler.html</a></p><p> </p><h3>Meine Einstellungen in Prusaslicer:</h3><figure class="media"><oembed url="https://youtu.be/MY42Wg9ulPk"></oembed></figure>
With this file you will be able to print Lukisegler (electric RC glider) with your 3D printer. Click on the button and save the file on your computer to work, edit or customize your design. You can also find more 3D designs for printers on Lukisegler (electric RC glider).