Lulzbot Taz 4 Raspberry Pi Extension
thingiverse
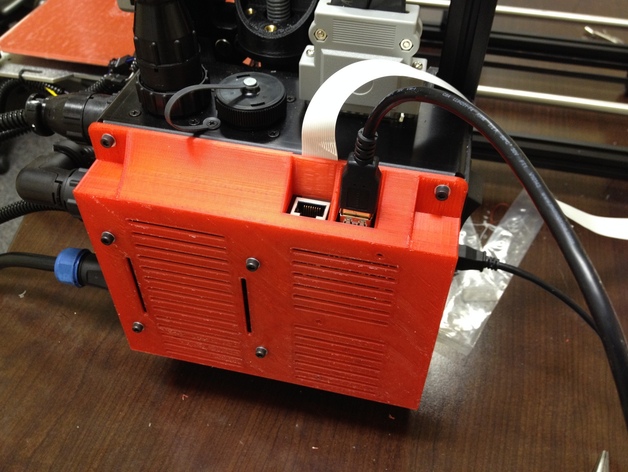
Here's an extension to the Lulzbot Taz electronics enclosure to fit a Raspberry Pi for wireless printing and monitoring of your projects. The extension features room for the existing fan and a built-in holder system to keep the Pi in place. Update: Please use v3 of this model. I've updated the Pi holder to address a problem with the clips breaking. The USB and network ports for the Pi are exposed on the top of the cover, and there's a groove to allow the Pi camera ribbon cable to pass through. The RAMBo board can supply 5v power to the Pi from the inside of the enclosure, so the system turns on with the TAZ. Works great with Octoprint or Astrobox for Raspberry Pi. This model was designed using Google SketchUp and the measurements taken from the Lulzbot design diagrams for the Taz electronics enclosure. The SketchUp file is included so please feel free to modify to suit your needs. Enjoy! Instructions Update: Please use v3 of this model. I've updated the Pi holder to address a problem with the clips breaking. Print with supports for the box overhangs on the top and bottom. See the included pictures for support locations. Make sure you already have your Raspberry Pi loaded with Octoprint or similar software and that the SD card is in place. Fit the raspberry pi into the enclosure. For v2, take care not to break the clips when you insert the Pi. For v3 (recommended), slide the Pi into the 2 clips at the front, then use an M3x5mm screw to secure the board through the mounting hole. Power the Pi I took an existing micro USB cable to power the Pi and cut the USB-A end off. Then I terminated the V+ and Ground wires using standard female crimp pins for .1" housings and a 2 wire crimp connector housing to make a nice connector to the RAMBo. See the included pictures to find the external power pins on the RAMBo board to connect to. It's labeled on the bottom right of the board and will supply 5v to the Pi when TAZ is turned on. Turn the TAZ off and unscrew the metal electronics enclosure top. Disconnect the fan and unscrew from the original enclosure. Transfer fan to the new extended enclosure with the same hardware plus 4 3mm nuts. Connect the Raspberry Pi USB power to the 5v pins on the RAMBo board and reconnect the fan power. Install the new extended enclosure. If the Raspberry Pi camera module is installed, take care to keep the ribbon cable in the groove at the top before tightening the 4 screws. There should be enough clearance for a USB Wifi module to be installed for wireless communication with the Pi. I used the other USB port and a short cable to connect the Pi to the TAZ. It should be possible to wire the GPIO serial pins from the Pi directly to the serial breakout on the RAMBo board to eliminate the external connection. If you choose to do that, take care to use a logic level converter board in between so that the 3v Pi can communicate with the 5v RAMBo. The RAMBo board exposes multiple serial connections. Serial 0 is shared with the USB. The firmware may need to be modified to communicate over the other serial channels.
With this file you will be able to print Lulzbot Taz 4 Raspberry Pi Extension with your 3D printer. Click on the button and save the file on your computer to work, edit or customize your design. You can also find more 3D designs for printers on Lulzbot Taz 4 Raspberry Pi Extension.