Lulzbot TAZ 6 X-Axis Levelling Tool
thingiverse
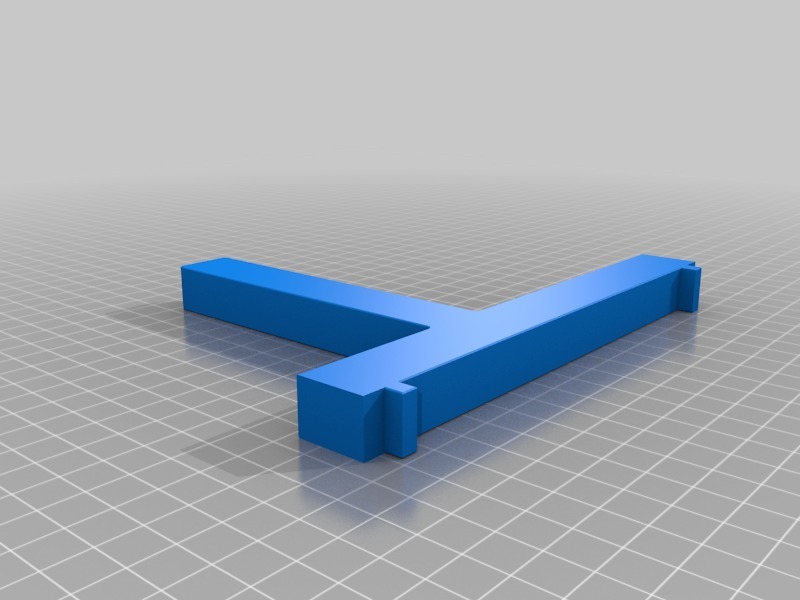
Lulzbot say that one should level the X-Axis by measuring from the top of the axis rods to the top 20mm rails. I've always found this awkward to do and puzzling as the point of reference should surely be the bottom rails of the printer where the Y-Axis is attached. Hence this simple tool (or tools as you'll need to print two of them). *How to use them* Jog the print bed to the back of the printer so it's out of the way and jog up the X-Axis so that you can insert the two tools into the slots in the bottom rail; one on each side of the printer (the top of each tool should be in-line with the lower X-Axis rod). Now jog down the X-Axis so that it's a mm or two above the top of the tools (don't overshoot!). **Now turn off the printer.** Slide a bit of paper between the top of the left hand tool and the X-Axis rod. Slowly wind down the left hand lead screw until the paper is just caught (gently pull the paper and you'll soon feel the point when it catches). Repeat with the right hand side. Double check both sides. Turn your printer back on and jog up enough to allow you to remove the tools. Voila! Your X-Axis is levelled. Maybe not to a sub-micron precision but certainly better than eyeballing a 6" ruler :) PS - These also work with piercet's openrail X-Axis: https://www.thingiverse.com/thing:2692604
With this file you will be able to print Lulzbot TAZ 6 X-Axis Levelling Tool with your 3D printer. Click on the button and save the file on your computer to work, edit or customize your design. You can also find more 3D designs for printers on Lulzbot TAZ 6 X-Axis Levelling Tool.