Lundy LIDAR Satellite Model (+ Tutorial)
prusaprinters
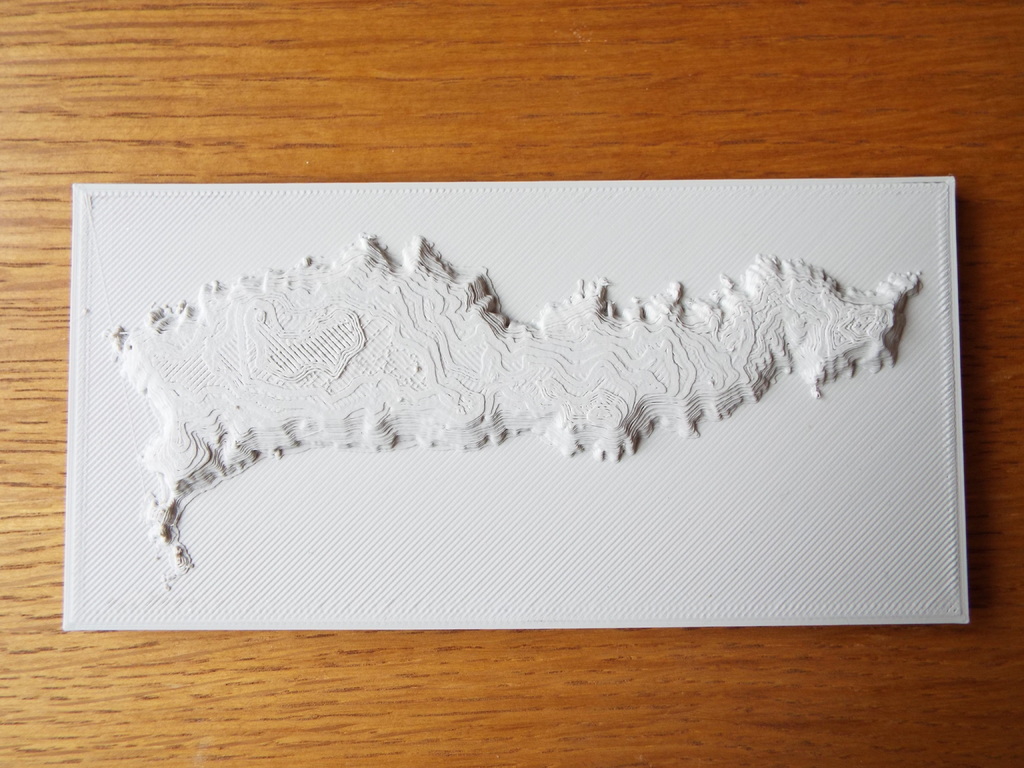
<p>This model is of the island of Lundy, United Kingdom. Lundy is a small island off the coast of Devon: <a href="https://www.landmarktrust.org.uk/lundyisland/">https://www.landmarktrust.org.uk/lundyisland/</a> .The model uses LIDAR Point Cloud Data, which is very detailed and also has x,y and z to scale.</p> <p>I created this model using point cloud data as I was unhappy with the definition of online terrain STL generators. The data used to make this was very high definition, I could even make out individual buildings as shown on the point cloud screenshot above, though I had to simplify this for the final model.</p> <p>I did not make this to any particular scale but I calculate it to be around: 1:35652</p> <p>I printed this at 0.16mm layer height for the island and 0.28mm for the base.</p> <p>I have detailed below how I made this model in case this interests anyone.</p> <h3>How I Made this, Tutorial:</h3> <p>This tutorial will show how you can create a model of a location of your choice. All of the data and software for the process is free. I used LIDAR point cloud data to create a model of Lundy, UK, the point cloud data is very high definition so is useful for high detail of small areas.</p> <p>Firstly, source the LIDAR Point cloud data online; I used <a href="https://environment.data.gov.uk/ds/survey/#/survey">https://environment.data.gov.uk/ds/survey/#/survey</a> for UK data. To find LIDAR data for your region search for "LIDAR point cloud data".</p> <p>Download the LIDAR data from the above website by selecting the region and downloading all files with the same date then extract the .laz files into a folder.</p> <p>Next we need to convert the .laz files into ASCII XYZ text files; use the software Cloud Compare: <a href="http://www.danielgm.net/cc/">http://www.danielgm.net/cc/</a></p> <p>Within Cloud Compare click open and select all the .laz files. Import them with default settings. Once imported you should be able to see the point cloud. Select all the files under the "DB Tree" box, click edit, merge. This will merge all the text files into one point cloud. Once merged select the one file within the "DB Tree box" and click file, save. I used default settings and selected semicolon as the separator.</p> <p>Now we have the ASCII XYZ text files the program to make this information into a mesh is MeshLab <a href="http://www.meshlab.net/">http://www.meshlab.net/</a></p> <p>Within MeshLab click file, import mesh. Select the .txt file that outputted from Cloud Compare and import it with default settings. This will take some time to import and will not respond while importing.</p> <p>Once imported its a good idea to reduce the number of vertices. My example has 19 Million points which is unnecessary for 3D printing a model. To simplify the amount of points; click Filters, Point Set, Point Cloud Simplification. Choose the number of samples you want based on how much detail you want on the finished model. I went from 19million down to 1 million, by inputting 1000000 in the Number of Samples field.</p> <p>From This point I followed this guide but I will summarise below: <a href="http://fabacademy.org/archives/2014/tutorials/pointcloudToSTL.html">http://fabacademy.org/archives/2014/tutorials/pointcloudToSTL.html</a></p> <p>Select Filters, Normals, Curvatures and Orientation, Compute Normals for Point Sets. Default settings should be fine here.</p> <p>Now click Filters, Remeshing, Simplification and Reconstruction, Screened Poisson Surface Reconstruction. I chose the reconstruction depth of 16 but you can tweak this to get better results. The higher the number, the more polygons on the finished mesh and therefore the longer the meshing process will take. This step will take some time and program will be unresponsive until the mesh has finished generating.</p> <p>You will now have a mesh made from the point cloud data. The original point cloud, simplified point cloud and the mesh will show on the right pane of the software, you can click the eye icons on the point clouds to show only the mesh. Now you can export the mesh as an STL by clicking file export mesh, choosing STL when saving the file.</p> <p>From here you can open as usual with software such as Windows 3D Builder to repair the mesh and add 3D shapes such as a base.</p> Category: Scans & Replicas
With this file you will be able to print Lundy LIDAR Satellite Model (+ Tutorial) with your 3D printer. Click on the button and save the file on your computer to work, edit or customize your design. You can also find more 3D designs for printers on Lundy LIDAR Satellite Model (+ Tutorial).