Luno Tri Spinner + Design Tutorial - Public Domain
thingiverse
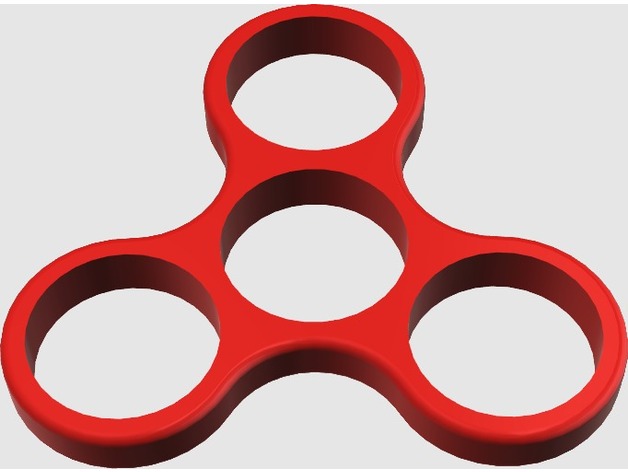
My take on a more traditional style tri spinner, made available under public domain license so feel free to use as you see fit. Standard 608 bearing size used throughout. You'll also find the 123D Design sketch that I employed to create this and a quick tutorial. How I Designed This A straightforward design process was used here. If you'd like to experiment with it, I've attached the 123D Design sketch that I used as reference. Follow these steps below and check out the attached screenshot to recreate this spinner. Please note that this tutorial assumes basic familiarity with 123D Design. For those new to 123D Design, a quick 7-part video series from shapeways can be found at https://www.youtube.com/playlist?list=PLB1379Ylrc1r-UwRBcCEPpPNUfCG-f2qq You also need to understand that there are 360 degrees in a circle and to evenly space bearings on a tri-spinner, they must be placed 120 degrees apart. Create the Spinner! To view a larger version of the image, right-click it and select "View in new tab" Step 1 - Create the center bearing circle cutout using sketch circle. I set the diameter to 22.1mm as it works well for me. Step 2 - Draw a line (sketch polyline) from the center of step 1 outwards to the right at a 30-degree angle and set the length to 25mm Step 3 - Draw a line from the center of step 1 outwards to the left at a 30-degree angle and set the length to 25mm. Step 4 - Draw a line outwards straight up and set the length to 25mm. You now have the center locations for your bearing cutouts. See drawing 1 in the image. Step 5 - Use sketch circle on each center location to make 22.1mm diameter circles Step 6 - On the same perimeter bearing centers, use the sketch circle tool again and create 28.1mm diameter circles. This gives our bearings a nice rugged 3mm wall. You could make these 26.1 if you want thinner 2mm walls. See drawing 2 in the image This is now almost complete. Technically you could put a 28.1mm circle around the center bearing and have a spinner, but let's add the curved indents now. Step 7 - Basically repeat steps 2-4 above. However this time you will be drawing lines between the existing circle centers. All lines should be at 60 degrees apart Step 8 - On the non-bearing centers, use sketch circle to create 21.9mm circles. This makes the non-bearing circles intersect the walls of the bearing circles. See drawing 3. Step 9 - Delete the guidelines from the center. Just click on the line and press delete. This makes it easier to select objects to extrude Step 10 - Select just the bearing walls and the space between the bearing walls and the center bearing cutout. You can select multiple objects by holding shift and then clicking. See drawing 4. Step 11 - Once all the objects are selected, click the gear and select extrude. Set the extrude distance to 7mm. Hold left-click on the extruded model and drag it away from the sketch. See drawing 4 and 5 You should now have a rough spinner 3D model! Now let's finish it! Step 12 - Select Modify and then Fillet. Now select the top and bottom outside edge of the model, again using shift to select both at the same time. A box at the bottom of the screen will pop up. Input 1.3 and hit enter. See drawing 6 That's it! Your spinner is now complete and you've successfully recreated what I have here. If you made it this far, congratulations!
With this file you will be able to print Luno Tri Spinner + Design Tutorial - Public Domain with your 3D printer. Click on the button and save the file on your computer to work, edit or customize your design. You can also find more 3D designs for printers on Luno Tri Spinner + Design Tutorial - Public Domain.