Luxury Ball, with magnetic clasp (In Parts)
thingiverse
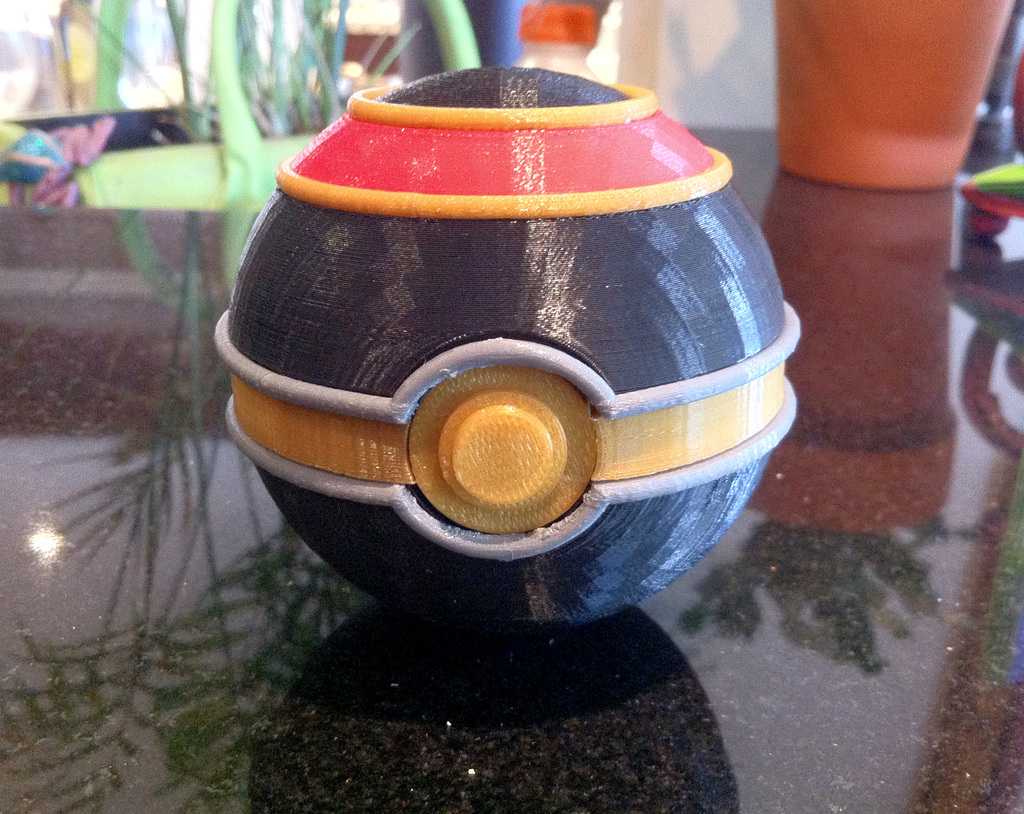
This version of the luxury ball with magnetic clasp lets you assemble the lid and bottom shells with each section/color separated out into different parts. There are a lot of parts so I figured I would separate this into its own thing. If you would rather print the lid all as one piece please see http://www.thingiverse.com/thing:953054 Print all the parts out. Print two of the Lux_Lid_Silver_Ring.stl you will need one for the lid and one for the bottom shell. I printed most of the parts with 1 shell except for the Lux_Ring and the Lux_Lid_Silver_Ring, where I used 2 Shells. And only the Silver Ring part needs supports. I also used 100% infill on the silver ring part because it is a little more fragile then the other parts. All the lid parts snap together really tightly so you wont need glue. To assemble the Lid correctly first print out the black base and then attach the gold ring 1 to it. Make sure it is fully snapped into position. Then snap on the red ring, then finally the second gold ring, and the silver ring. After assembling the lid and the bottom you can glue the button and the ring to the bottom with the hinge in place as you glue the ring down. Then snap the hinge into the lid. You will also need 2 magnets (1/4" X 1/16"). Just glue them in place. Tip: Print your bottom piece at a higher in fill percentage, around 40-50% and then all the other parts at 5-10%. That way it will be bottom heavy and not roll around as much.
With this file you will be able to print Luxury Ball, with magnetic clasp (In Parts) with your 3D printer. Click on the button and save the file on your computer to work, edit or customize your design. You can also find more 3D designs for printers on Luxury Ball, with magnetic clasp (In Parts).