M3D 3mm Acrylic (plexiglass) enclosure, 3D printed and laser cut
thingiverse
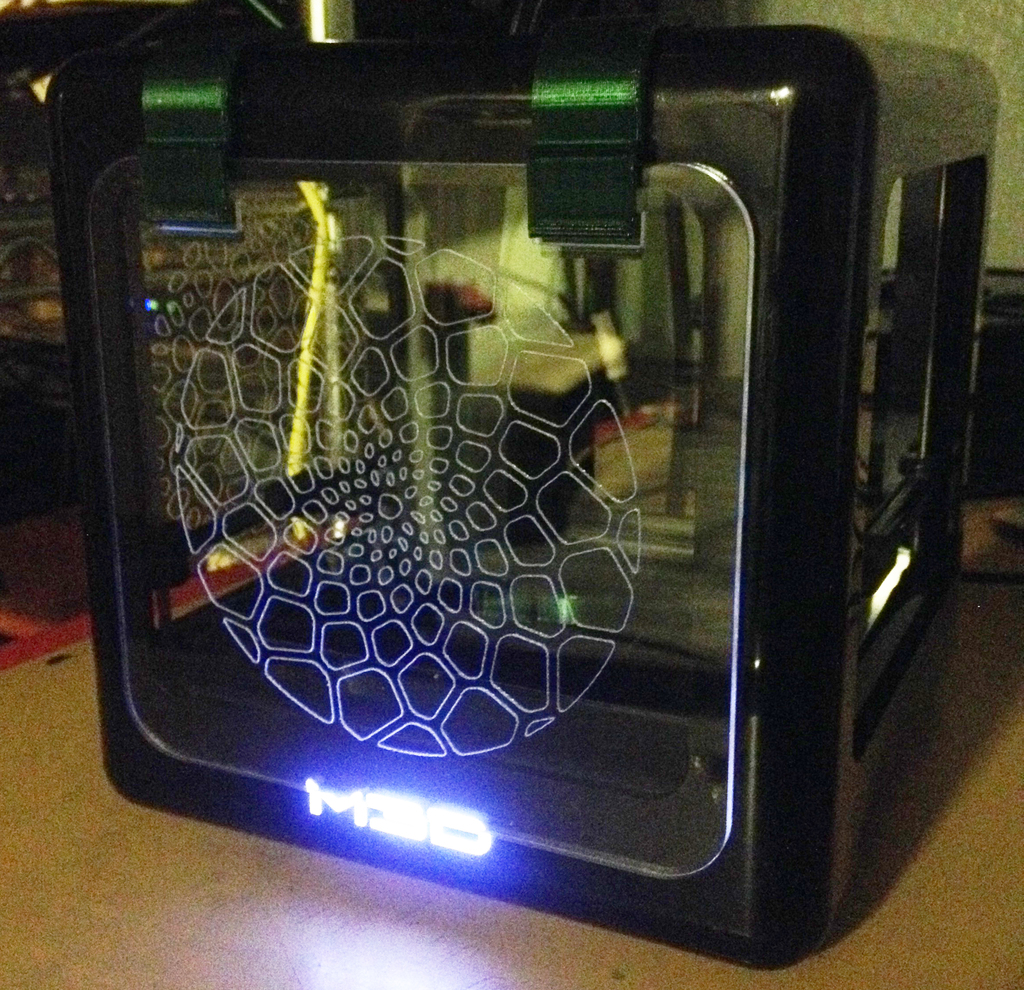
I modified the original .stl for the enclosure clips to suit 3mm acrylic instead of 2 mm, and created vector files to be able to laser-cut the acrylic sides. I used the patterns from ZenziWerken's excellent Organic Structure Trivets to decorate my enclosure sides. One cool side effect is that the glowing M3D logo on the front of the printer gives an edge-lit effect to the engravings on the acrylic! There are several ways you can laser engrave the acrylic: 1. Vector-engrave the pattern—the same as vector cutting, but with much less power or faster speed, so it doesn't burn all the way through. This is what I did, using the Color Mapping tool available for Epilog machines. I did it this way because it's much faster, cleaner-looking, and less fume-producing than raster engraving. 2. Raster-engrave the pattern—make the line thickness of the pattern as thick as you would like and raster engrave it. Slower, but a more dramatic effect. 3. "Frost" the acrylic with raster engraving—"fill" the shapes of the pattern, or the shapes of the outline, with black to either frost the individual blobs for a cool 'screening' effect, or frost everything BUT the blobs for a cool 'window' effect. If you're cutting your acrylic by hand, you could also print these patterns, tape them to the underside, and engrave by hand with a rotary tool.
With this file you will be able to print M3D 3mm Acrylic (plexiglass) enclosure, 3D printed and laser cut with your 3D printer. Click on the button and save the file on your computer to work, edit or customize your design. You can also find more 3D designs for printers on M3D 3mm Acrylic (plexiglass) enclosure, 3D printed and laser cut.