Mac Keyboard Stand - Remixed
thingiverse
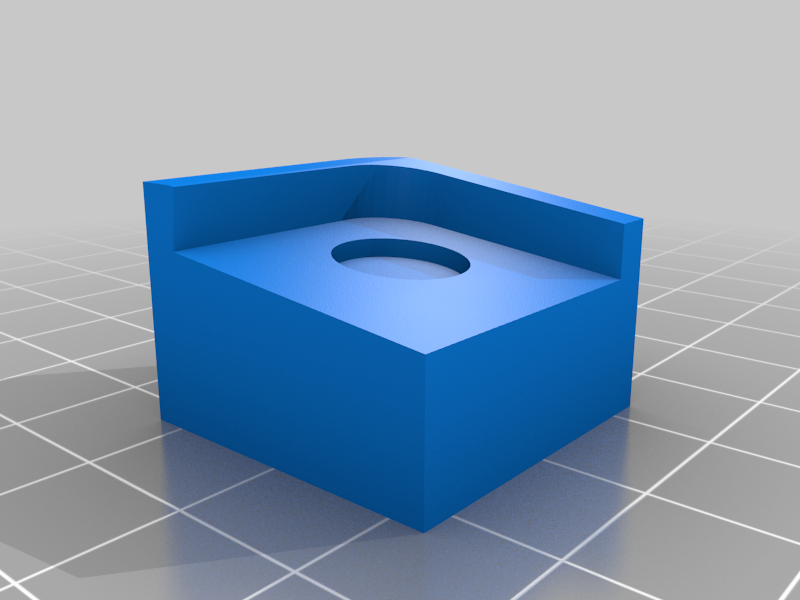
I look the original design which was good, but it lacked a good way to attach to the keyboard short of double sided tape/glue to make it kind of permanent. I like magnets and really, who doesn't? So I took the original design and sunk a 1.5mm x 10mm hole into the middle (tilted to correct angle). I then used these magnets: North Showing - https://www.amazon.co.uk/gp/product/B00TACFTAA South Showing - https://www.amazon.co.uk/gp/product/B00TACFTEG Ignore the notch I cut in one of the photos that was an attempt to see if accessing the switch would be easier. It's not really. The way I attached the magnets is as follows: 1. Into each foot place 1 small drop of CA glue (very small), then removing the backing from the magnets (ex the North showing one), push one into the hole with the glue on both feet. 2. Let these set and dry completely. 3. Drop the south showing magnet on top of each north showing one, then remove the paper backing from both 4. Simply line up both feet on the keyboard (this is best done with the keyboard upside down), once aligned press down into place to set the adhesive. Now you can remove the 3d printed feet leaving one side of the magnet behind. This makes it nice for travelling or putting into a bag. The feet will simply pop off and on as you need. The magnets have about 0.4KG pull so plenty strong to keep the feet in place as you use it. I hope you enjoy this remix for a very good design.
With this file you will be able to print Mac Keyboard Stand - Remixed with your 3D printer. Click on the button and save the file on your computer to work, edit or customize your design. You can also find more 3D designs for printers on Mac Keyboard Stand - Remixed.