Mac Mini Wallmount for models from 2010-pre2014
thingiverse
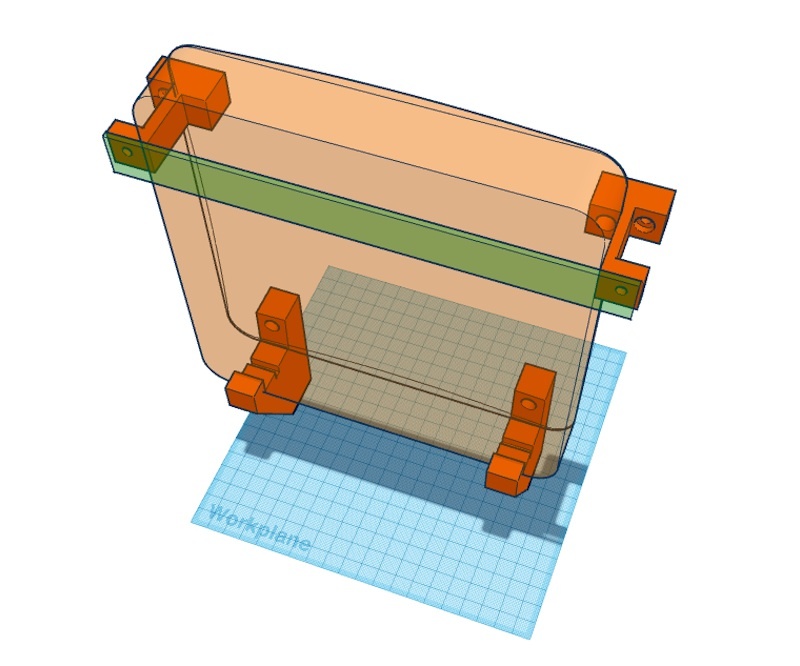
This thing was designed to hold Mac Mini models from 2010 up to 2014 before Apple started soldering RAM onto them. To assemble it, you need to mount the cable ports facing upwards. It will then be attached to a pixel board or similar in your workshop. Now that it's good enough, this thing can be used as a useful tool in my workshop. This thing won't win any awards for its visual appearance; that wasn't the priority when designing it. Some parts were taken from Thing #385676 and had to be modified to work with the newer Mac Mini models (2010-2014). Do not use these bottom holders alone, as they might cause the Mini to fall off. The photos included in this description were taken during the early stages of development. Requirements: * M5x20mm screws (lenshead, slotted, or cylindrical) * Hex nuts M5 or hammer nuts M5 * 2x M4x16-20mm screws (depending on bar thickness) * Hex nuts M4 for top bar mount Parts: * Left side bottom holder * Right side bottom holder * Top clamp (single board mount screw), may turn slightly when removing the Mini * Top clamp (two board mount screws), should not turn at all when removing the Mini The bottom mounts: * Bottom mounts V4, with a cutout that follows the spherical shape of the backside more accurately than before * Please note that this case model is a rough approximation only; the cutouts may not fit perfectly. The top bar clamps: * Mount them 30mm away from the top edge, where the rounded corners end. * Use screws M4x20 to secure them. If you want to add some protection to the top surface of the case, you can use film, foam, or thin rubber between the clamp and the surface. Exception: * If you have a headless Mini (with fewer cables), you might be able to secure it with just one top clamp in the middle of the ports side. Make sure the bottom holders are properly aligned so the Mini doesn't move left or right. Printing: * You can print this thing on even small printers. * Required parts: 1x right bottom mount, 1x left bottom mount, and 2x top bar mounts (choose one). * Filament requirements: PLA only; no fancy stuff needed. * Print settings: + Perimeter/shell count: 4 or 5 + Layer height: 0.2 or 0.3mm + Infill: 10-15% + Support: none + No raft or brim required if printing PLA. Post-printing: * Remove tiny portions from the inside of the beveled plane on the back claw. * Check often to avoid mistakes. For the single screw mount, use nuts hammered into the soft surface (MDF or pixeldust board) for a tight fit. For the two screw mount, use regular hexnuts instead; they provide a tighter fit than hammer nuts.
With this file you will be able to print Mac Mini Wallmount for models from 2010-pre2014 with your 3D printer. Click on the button and save the file on your computer to work, edit or customize your design. You can also find more 3D designs for printers on Mac Mini Wallmount for models from 2010-pre2014.