Mad Scientist Light Switch - US Single and Dual Switch Versions
thingiverse
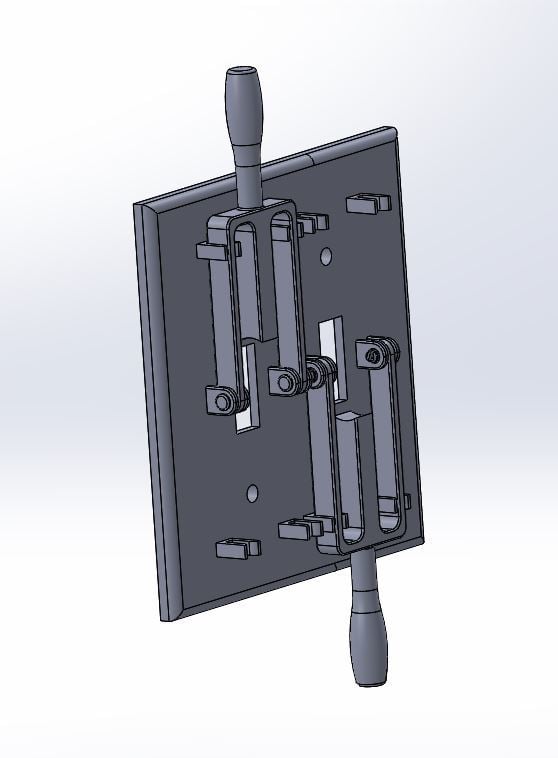
Y'all don't read the README (I'm not judging, I don't either), so I'll post it here! So, you've decided to flip the lights on every time you cackle maniacally. Who am I to judge? I do the same. A few notes before you jump in: There are two different switches in this package. One is for your standard light switch. The second is for a dual-switch light switch. Important: there are parts that can be used for both and parts that cannot. Choose wisely. For the single-switch option, print one pin, one transfer case, one backing, and one handle. See the layout pics for recommended orientation. I print the backing standing up on because it prints well that way, and removing supports from the underside was a challenge. Assembly is simple; put the backing over the switch, wedge the transfer case on the switch itself, and slot the handle into the holes and insert the pins. For the dual-switch option, print four pins, two transfer cases, one backing, and two handles. See the layout pics for recommended orientation. This backing cover has to be on its back; otherwise, it's too tall. Bump the supports away from the walls by 2mm so you can pry them off the bottom. Assembly is a little more complicated; install the backing, put the handles on first since the inner pins need to be inserted from the switch sides (see the overview pic) and then raise the handle enough to slip the transfer cases on the switch. Use your angles. I did a lot of prototyping with this project. I designed, experimented, documented, and cussed my way through it. That being said, I am not taking responsibility for you burning your eyebrows off or, worse, burning your house down. If you follow this guide, do so with caution and common sense. Check your work and check mine. If you spot an egregious error, please let me know so I can correct it. If you aren't already subscribed to my Patreon (patreon.com/wrongwaytoinvent) and you like my work, I'd really appreciate you subscribing for a month or longer to support me and my printing endeavors. Thank you so much! All the part designs are my original design work. You may share them as long as you leave my name on the parts, don't resell them, and cite me and my Patreon where you post the designs (it's just patreon.com/wrongwaytoinvent). If you want to do redesign work on them, please ask me first; depending on how extensive it is, I'll take my name off for you. Thank you, and happy printing! William Sonnek Sonnek Designs wrongwaytoprint
With this file you will be able to print Mad Scientist Light Switch - US Single and Dual Switch Versions with your 3D printer. Click on the button and save the file on your computer to work, edit or customize your design. You can also find more 3D designs for printers on Mad Scientist Light Switch - US Single and Dual Switch Versions.