Magnetic ball joints for the Kossel Clear (the steel ball side)
thingiverse
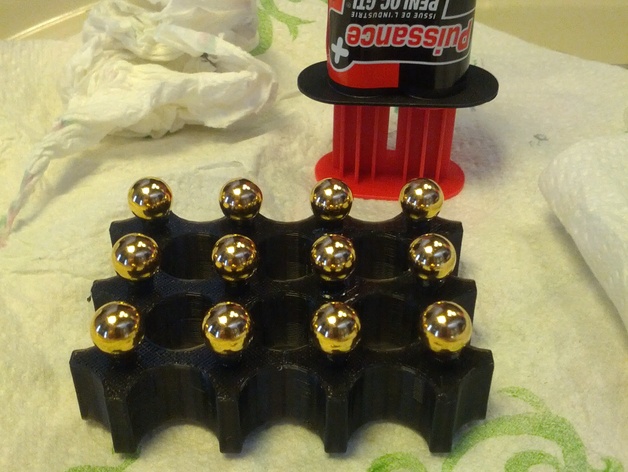
This is just a little device that I printed to facilitate the gluing of steel balls onto M3 (10mm).It uses the very same magnets that will be used in the magnetic ball joint setup to attract the steel balls on the M3 heads while the glue hardens. Instructions I advise the use of two components acrylic glue (Penloc GTI style) in a dual syringe for this. JB weld or other metallic epoxys are not advised as the metal inside will be attracted by the magnets. Acrylic glue is also simpler to use (no component mixing), more fluid than epoxy (which makes life easier in this case) and has a stronger shear strength. If you have 6x8mm magnets, use the STL file. Otherwise adjust the sizes in the openscad script. Print, (do not forget to put the model upside down before printing, small M3 holes below), put the magnets in the deidcated holes, screw the M3s on the other side. For each ball repeat: 1- scratch the ball on a tiny patch with your favorite tool (I used a Proxxon but a piece of sand paper will be fine) 2- put a tiny drop of glue (a drop from the syringe) on the head of a M3 3- put the steel ball on top with the scratched patch below and twist it along the Z axis to have it well centered. Once all 12 balls are seated, wait for 24 hours. Unscrew the balls and remove the magnets by pushing them from above (with the M3 Allen key for example).
With this file you will be able to print Magnetic ball joints for the Kossel Clear (the steel ball side) with your 3D printer. Click on the button and save the file on your computer to work, edit or customize your design. You can also find more 3D designs for printers on Magnetic ball joints for the Kossel Clear (the steel ball side).