Magnetic Catan Board
prusaprinters
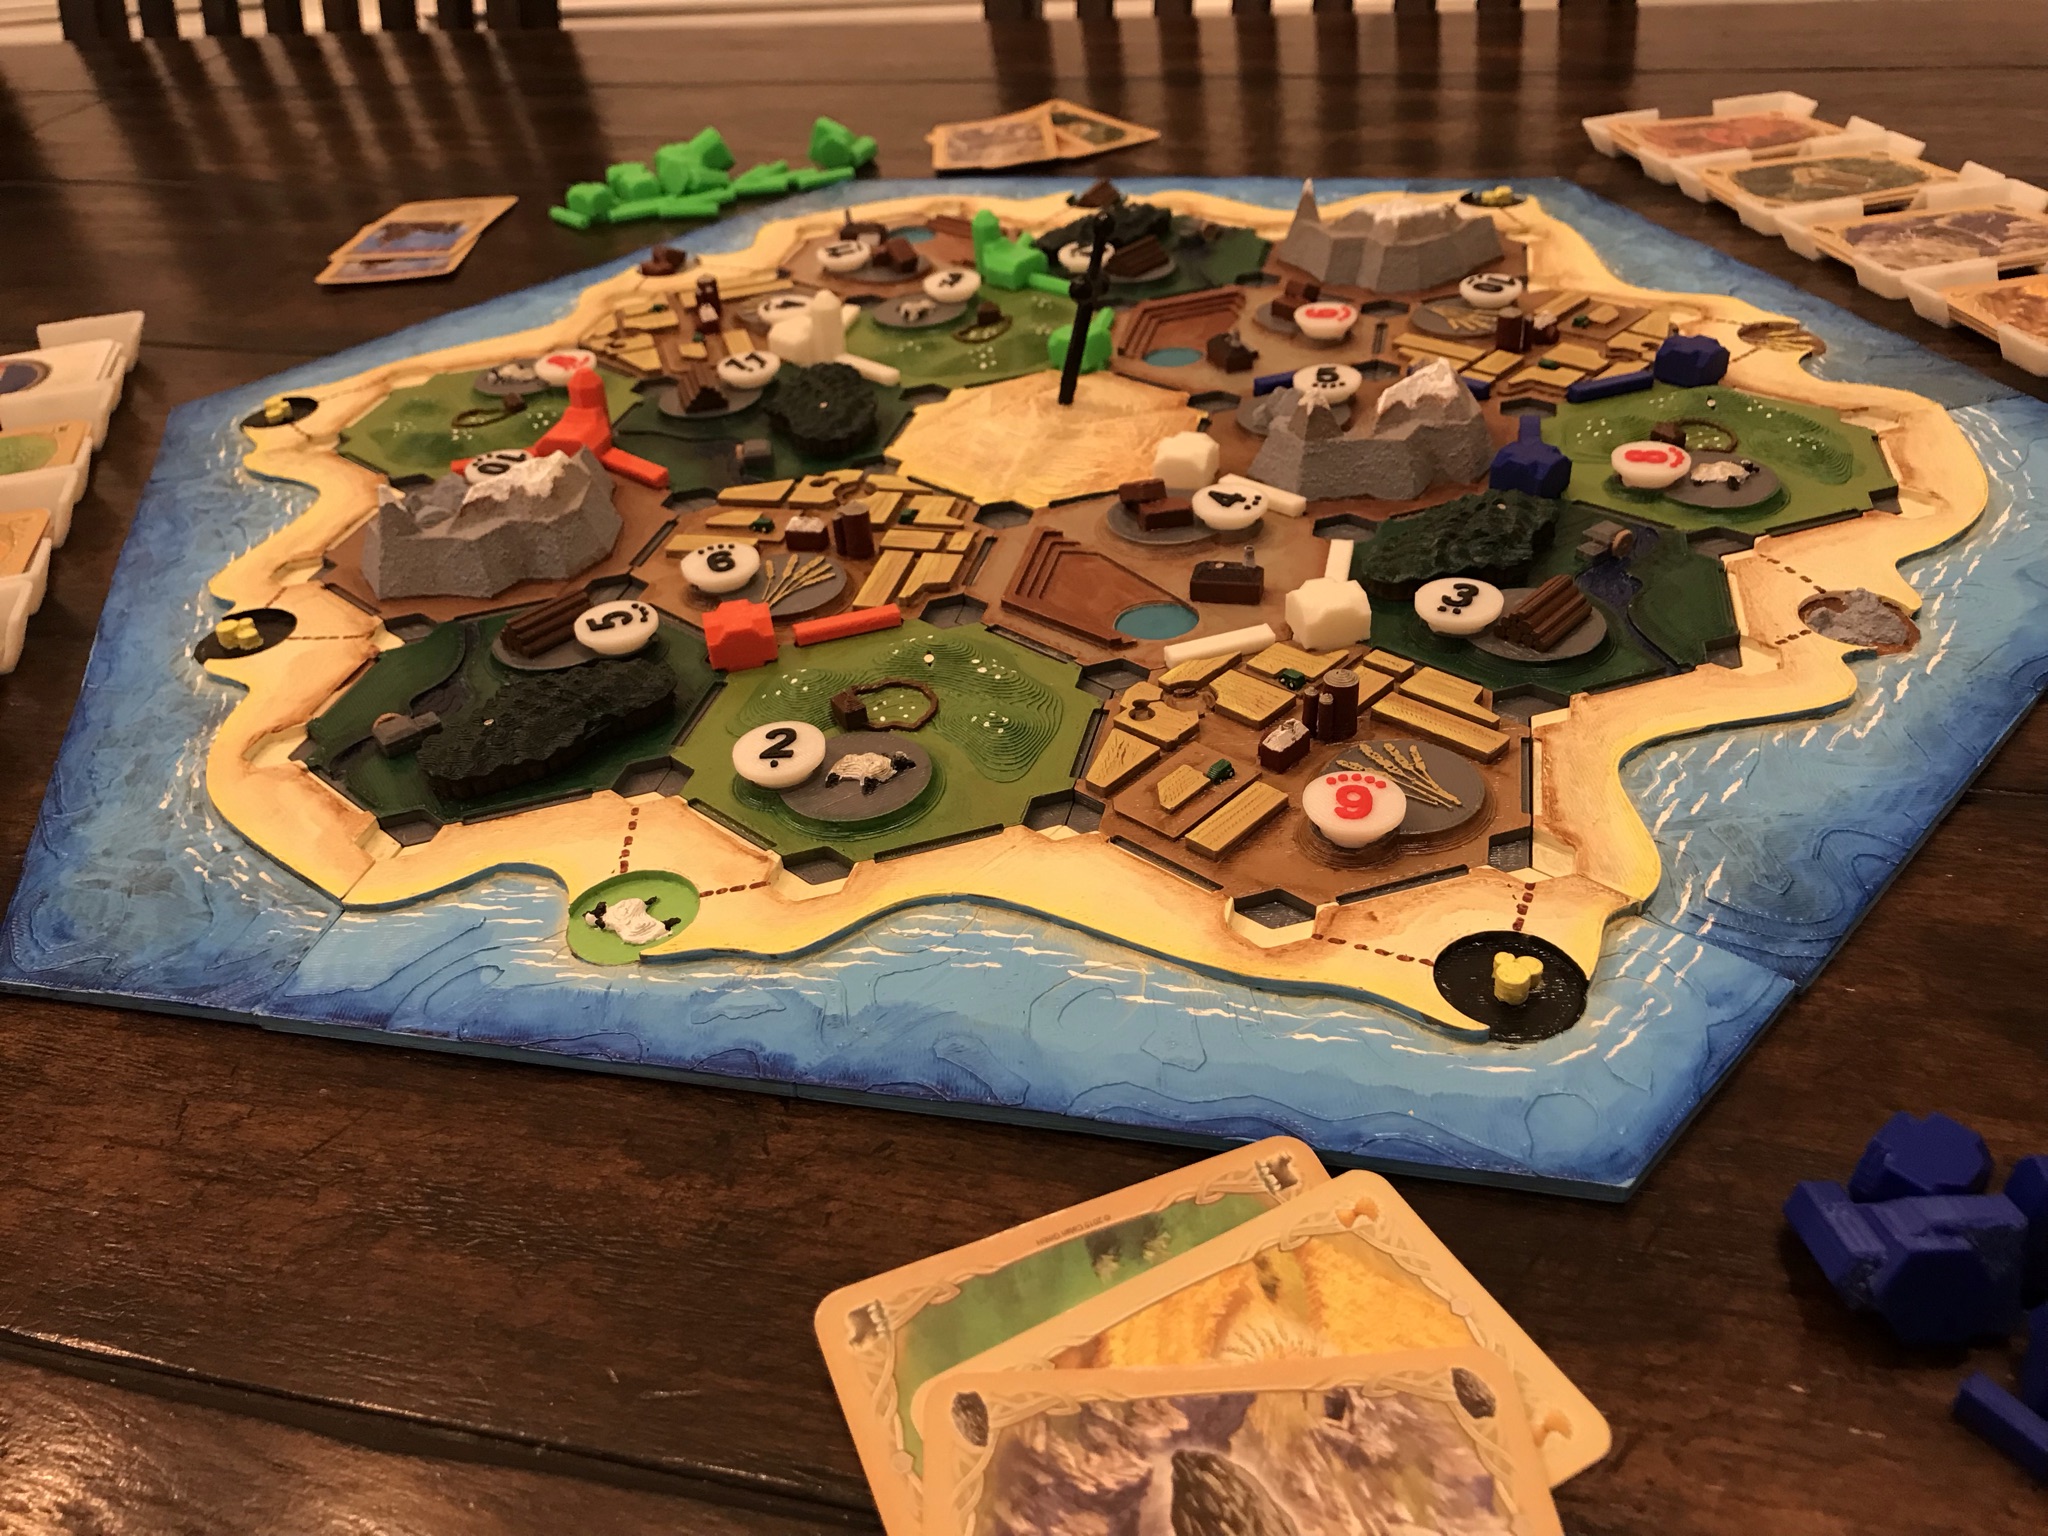
<p>It seems inevitable that when Klaus Teuber created his famous board came “Catan”, the numerous players would eventually ask for a 3D version of the game. And so, here is my interpretation of this wonderful game. </p><p>Originally, I designed this set as a simple gift for my parents, and my intent was that each terrain hex be printed in a different color. What I forgot however, is that my mother loves painting with acrylics. So, my father printed the entire set in grey, and the result is what you see here. </p><p>I have added/changed a few features to this version of the game. The first is the noticeable change of the robber marker. In this version, I have designed it as a sword, which sticks into the “ground” of whatever terrain hex it is currently occupying. This is accomplished via a magnet on the end of the sword, with corresponding magnets set into each hex. This sword is printed in two halves, which are then aligned and bonded together using 1.75mm diameter filament in the handle. As shown in the pictures, use of different colors can make for a neat hilt. </p><p>Perhaps the biggest feature of this set is the addition of magnets. After playing countless games with the original cardboard, I eventually got fed up with how easy it was to mess up the board. So, to make the board immovable, 13 magnets are added to each hex. With this many magnets, orientation is crucial. Refer to the diagram below, where the red arrows indicate the north pole of each magnet. </p><figure class="image"><img src="https://media.prusaprinters.org/media/prints/72383/rich_content/d4936c61-4b2f-4c55-a373-d70cdce0cd97/image.png#%7B%22uuid%22%3A%2292fd9cfb-cc7d-4e24-9f14-af3cf75d45ce%22%2C%22w%22%3A743%2C%22h%22%3A789%7D"/></figure><p>The 13th magnet is placed in the diamond shaped slot on top of each hex. Again, orientation is important. Each magnet must go into the slot the same way. This slot is where the robber marker (sword) will rest. As such, the magnet that goes into the sword needs to be inserted opposite of the hexes to ensure that the magnets will mate. Otherwise, you will never be able to place the robber on your opponents tile! </p><p>The magnets this is designed for are 2.9mm diameter by 1.9mm depth, and can be purchased on amazon here: <a href="https://www.amazon.com/MEALOS-Magnets-3mmx2mm-Miniatures-Storage/dp/B08NZTN426/ref=bmx_pl6kziio_3/147-9240598-3509162?pd_rd_w=5b4LT&pf_rd_p=1f75fbb3-7d95-464f-8182-952155c0316b&pf_rd_r=SCD4P52V2MFYTP49D00Q&pd_rd_r=cba47364-76fc-4613-8a07-f8d24aef157b&pd_rd_wg=RemP4&pd_rd_i=B08NZTN426&psc=1">https://www.amazon.com/MEALOS-Magnets-3mmx2mm-Miniatures-Storage/dp/B08NZTN426/ref=bmx_pl6kziio_3/147-9240598-3509162?pd_rd_w=5b4LT&pf_rd_p=1f75fbb3-7d95-464f-8182-952155c0316b&pf_rd_r=SCD4P52V2MFYTP49D00Q&pd_rd_r=cba47364-76fc-4613-8a07-f8d24aef157b&pd_rd_wg=RemP4&pd_rd_i=B08NZTN426&psc=1</a></p><p>You will need 320 total magnets for this project.</p><p>The second biggest feature change is that of the settlements, cities, and roads. I tried to stay true to the original image of the game pieces, with the settlements being basic, squat buildings, while the cities exhibit a tower. However, I did add some embellishments. The important factor of this change however, is the hex base that each city and settlement rests on. These hexes correspond with indents on the board which allow the city/settlement to be restrained. The roads are also designed to fit in the indents between each hex, without regard to orientation.</p><p>Another noticeable feature difference is the addition of the resource image to each hex. I did this in order to ease confusion about which hex is which, although I hope that experience with this version of the game will make this feature irrelevant. </p><p>The last feature of note is in regard to the number tokens. Each token is identified by a letter, and when sliced, they should be letter side down (on the build plate). This will allow for the final layers to be printed either black or red, as in the original game. These tokens are specifically sized to be placed on each terrain hex alongside the resource image. Note: if the letters on the bottom are hard to distinguish, a fine point sharpie works well to highlight the letters. This can be seen in the images.</p><p>Aside from features, there is one other assembly required before the game can be fully enjoyed. The sea frame pieces were rather large, and so in order to accomodate any smaller printers, they have each been split in half and labeled as parts “#A” and “#B”. These halves can be kept separate if desired, although my recommendation is that they be bonded/glued/melted together for ease of use. As soon as those are done, you are ready to play!</p><p> </p><p> </p><p>I hope you enjoy printing, painting, and playing as much as I enjoyed designing this 3D Catan set, and as always, I would love to hear your comments and advice.</p><p> </p><p>Thanks!</p><p>-Ricky</p><p> </p><p> </p>
With this file you will be able to print Magnetic Catan Board with your 3D printer. Click on the button and save the file on your computer to work, edit or customize your design. You can also find more 3D designs for printers on Magnetic Catan Board.