Magnetic Fume System for xTool M1 Laser Cutter
prusaprinters
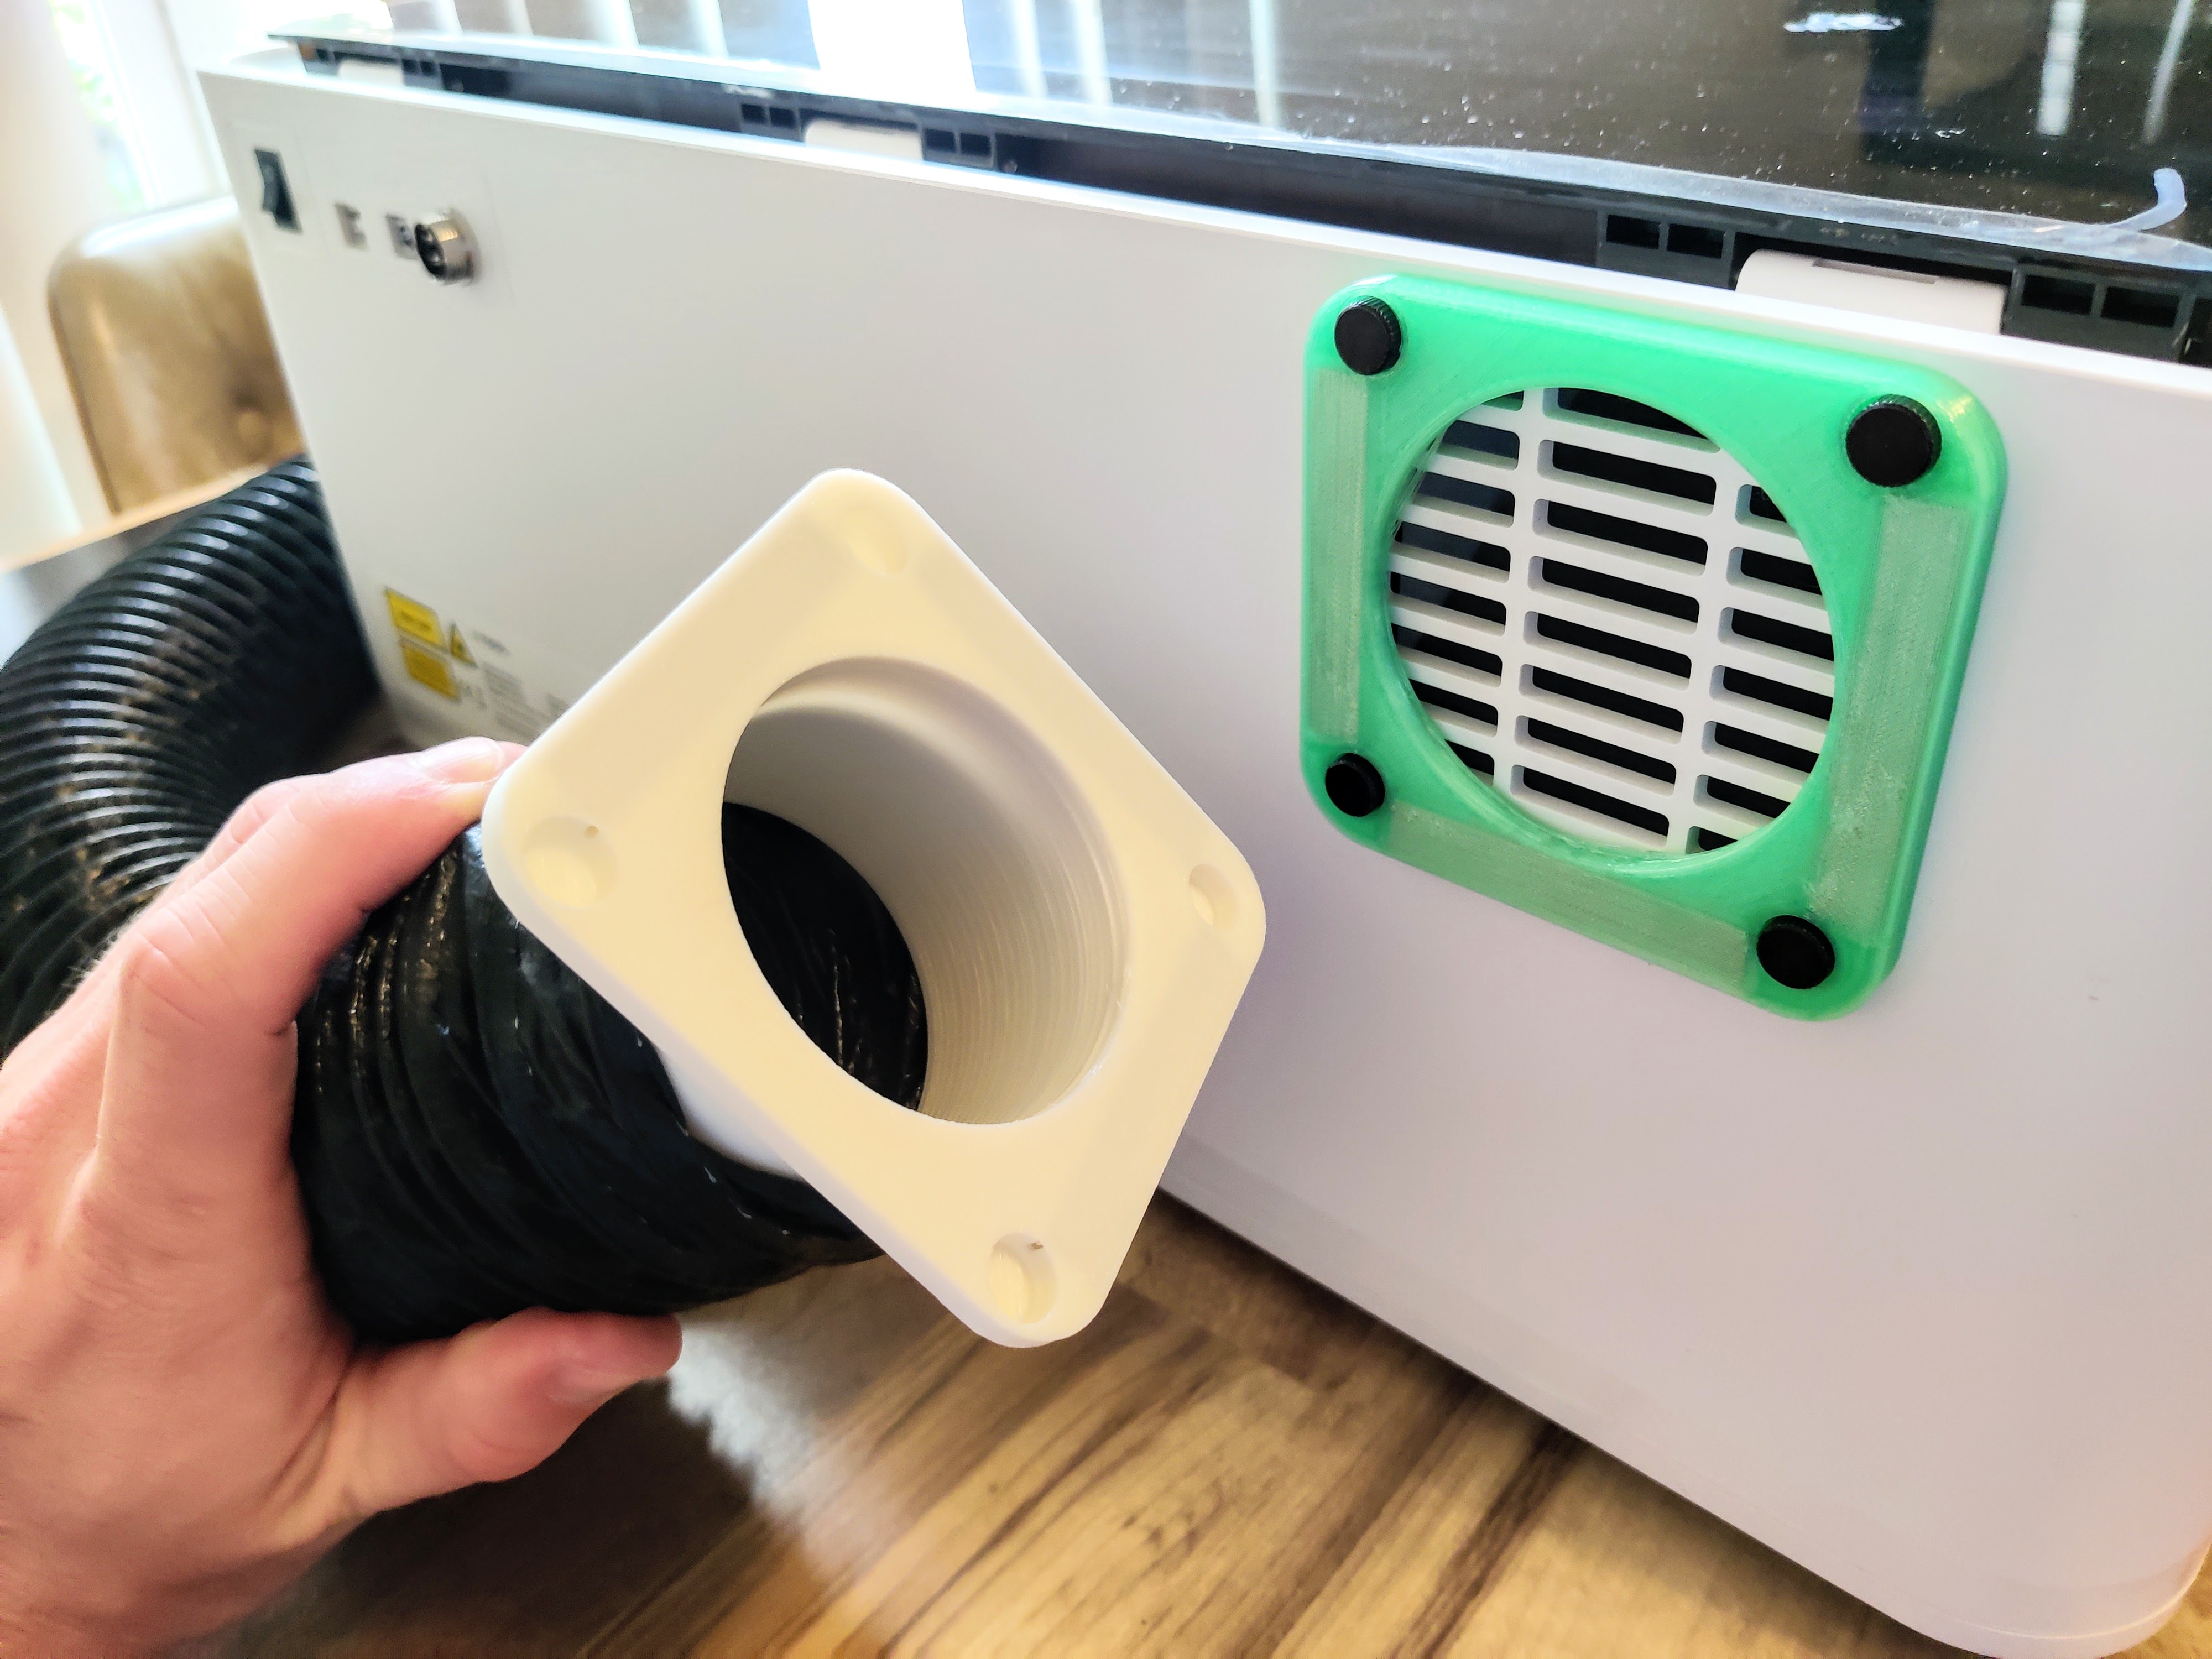
<p>I made this magnetic fume extraction setup for my <a href="https://www.xtool.com/products/pre-order-xtool-m1-worlds-first-desktop-hybrid-laser-blade-cutting-machine">xTool M1 </a>hybrid laser and blade cutting machine. This makes it easier to move the machine around, and allows me to add a second fume extraction fan. I still wasn't satisfied with the strength of this spare 70mm x 15mm fan I had laying around, so I might make another version of the window piece that uses a larger stronger fan to extract even more smoke. Feel free to comment with any requests or suggestions. </p><p>The piece that attaches to the machine uses the original thumbscrews to connect to the M1. It only has 3 magnets so that it doesn't stick up above the machine, but trust me 3 magnets is more than enough to hold these in place. </p><p><strong>Magnets</strong></p><p>The pair of parts that attach to the machine needs 3 magnets per piece (6 total), and the other end uses up to 4 magnets per piece (8 total). Uses 60mm x 10mm x 3mm bar magnets from Amazon: “<a href="https://www.amazon.com/gp/product/B07DFZH4WT">LOVIMAG Powerful Neodymium Bar Magnets, Rare Earth Metal Neodymium Magnet - 60 x 10 x 3 mm, Pack of 24</a>” (Need 14 magnets total among the 4 pieces)</p><p>If you're using the “Exposed Magnets” file you'll need to glue them in. I've used super glue with magnets on PLA with some success before, but 2-part epoxy works much better. You also might want to cover the magnet with electrical tape or some other kind of tape just so there isn't quite as much pulling force between the two magnets. </p><p><strong>Slicing Tips</strong></p><p>For the embedded magnet versions you'll need to pause the print immediately before the layer that it bridges over the magnet hole, insert the magnets, then resume the print. The easiest way to do this is to use<a href="https://help.prusa3d.com/article/color-change_1687"> Prusaslicer and put in a color change</a> at that layer. </p><p>The first time I tried to print a file with embedded magnets the slicer tried to bridge the gap longways, which doesn't work well because the filament doesn't stick to the magnets and bunched up and made a blob. If you're using Prusaslicer go to <i>Print Settings, Infill, </i>and change <i>Bridging angle</i> to 45 degrees. This is an “Advanced” setting so in the top right make sure <i>Advanced</i> or <i>Expert</i> is selected. </p>
With this file you will be able to print Magnetic Fume System for xTool M1 Laser Cutter with your 3D printer. Click on the button and save the file on your computer to work, edit or customize your design. You can also find more 3D designs for printers on Magnetic Fume System for xTool M1 Laser Cutter.