Magnetic Labels for Button Box
thingiverse
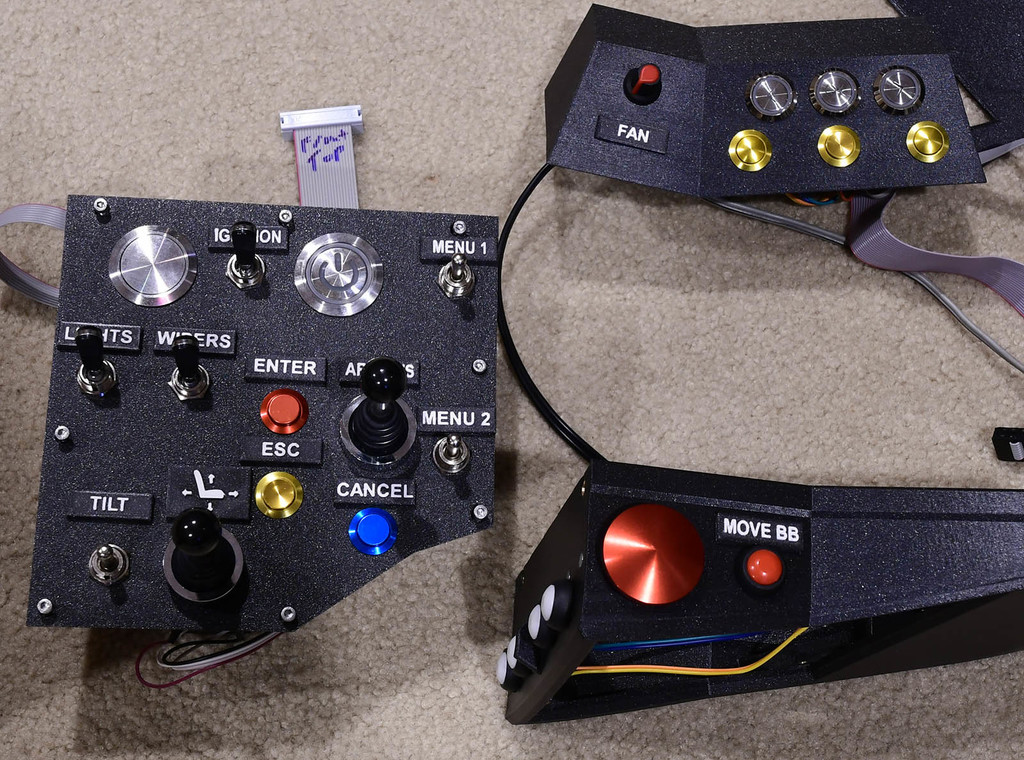
1/12/21 Added 2 new labels. 1/11/21 Added 8 new labels. 1/9/21 Added 6 new labels. 1/4/21 Initial 14 labels These labels use 5x2mm Neodymium magnets like these. N52 N50 Round Disc Neodymium Magnets https://www.ebay.com/itm/183326142804 The holes are sized so that they need a little persuasion with a small hammer. The Blank label is important. Print it! First carefully hammer two magnets in the SAME ORIENTATION into the Blank label. That is now your MASTER Label. Keep it safe! Now put two new magnets on the smooth side. Line those magnets up with the holes of another label. Then hammer them in. This guarantees that all of your labels will be interchangeable. It's also important to use the Master Label when situating the magnets in the panels. 1. Put the Master Label on the outside of the Panel with magnets towards the panel near where the magnets are going in. Position them over the holes. 2. Drive them in from the back of the panel opposite the Label on the front. 3. Use hot glue or anything else to make the magnets stay put on the inside of the panels. You do not want these falling out and sticking to your controls. The small notches next to the magnet holes are to allow you to remove a magnet from a label you are no longer using. The holes are 20mm OC and for 3D printing I've found about 0.5mm skin coat on my panels allows me to hide the magnets, but they are still strong.
With this file you will be able to print Magnetic Labels for Button Box with your 3D printer. Click on the button and save the file on your computer to work, edit or customize your design. You can also find more 3D designs for printers on Magnetic Labels for Button Box.