Magnetic Stir Plate - PC Fan & PWM Speed Controller
thingiverse
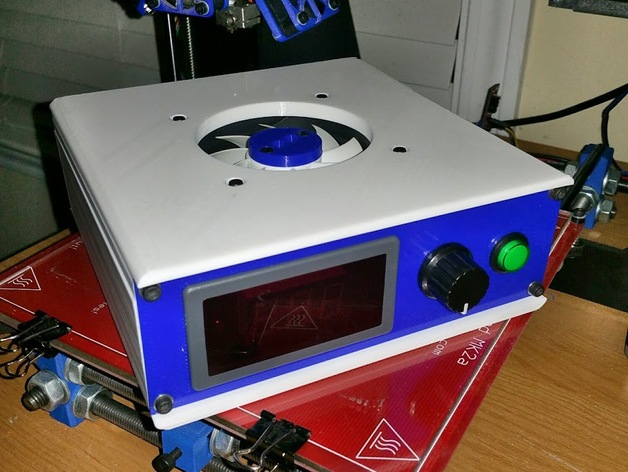
This is a DIY Magnetic Stir Plate. I personally will use this for making yeast starters for home brewing beer, while others employ it to make E Liquid for ecigs. The magnetic puck on the pc fan spins a magnetic stir bar that can be placed in any flat bottomed container. The stir bar spins, creating a vortex which mixes liquids extremely well. Note: Ensure the files are oriented correctly. I simply exported them straight out of the SKP in the orientation they were in. I utilized an 80mm fan, PWM speed controller, and some tiny .7" x .11" neo magnets. Note: This is a rather large print... The top piece took me 7.5 hours, main body took 12.5 hours, front and rear plates took 1 hour each, and the magnet puck takes about 15 minutes. I printed with 3 perims, .25 layer height (.3 first layer), 40% infill, 35 mm/s perims, 40/mm/s infill, on a DIY i3 with e3dv6. Fan: http://amzn.to/2lh3rBo Controller: http://www.ebay.com/itm/141645156384 Power Supply: http://amzn.to/2lh3hdc Power Supply Jack: http://www.ebay.com/itm/271757190320 Magnets: http://www.homedepot.com/p/MASTER-MAGNETICS-0-7-in-Neodymium-Rare-Earth-Magnet-Discs-3-per-Pack-07047HD/202526369 Stir Bar Kit: http://amzn.to/2lh4gdw I used M3 x 40mm socket cap machine screws, nuts, and washer for the fan, and M3 x 22 socket cap machine screws and washers to mount the front and rear plates. I personally used binding posts in the rear plate to connect some little banana plug leads to my bench top PSU. Feel free to request any kind of changes to the rear plate for various power options, or the front plate for different types of controllers and displays. CHANGELOG: 3/12/2016 - The stir plate is complete and I have tested to make sure the fan works, etc... but I have not tested it out with a erlenmeyer flask, stir bar, and liquids yet. My flask should arrive late next week, and I will upload video of the test when complete. 3/17/2016 - I got my 5L flask in today and tested the stir plate. The magnets I was using were too small, at least for my biggest stir bar. It kept throwing the bar to the outside. I ran to home depot and bought some .7" DIA x .11" thick rare earth super magnets and remixed my magnet puck. I still had issues with the biggest stir bar, but then I tried the second largest stir bar and it worked extremely well. I got a decent vortext at 25% on the PWM controller, and it just got better all the way up to 100%. I also added some little rubber feet to the bottom of the stir plate for vibration dampening. I would also like to note that I didnt even glue the magnet puck to the fan. The magnets are strong enough to stick to the fan magnetically. 7/23/2016 - I remixed the rear plate to fit a 5mm 12v jack. See parts list above. 8/2/2016 - I modified the top plate by adding a .25mm support layer for the socket cap screw head recess holes so that they print cleaner. Take a hobby knife and cut them out. 8/29/2016 - I modified the front and rear plates to making them .25mm short on top and bottom. Thread on HomebrewTalk.com: http://www.homebrewtalk.com/showthread.php?t=575715
With this file you will be able to print Magnetic Stir Plate - PC Fan & PWM Speed Controller with your 3D printer. Click on the button and save the file on your computer to work, edit or customize your design. You can also find more 3D designs for printers on Magnetic Stir Plate - PC Fan & PWM Speed Controller.