Majora's Mask "HD-Mini" (3mm LEDs)
thingiverse
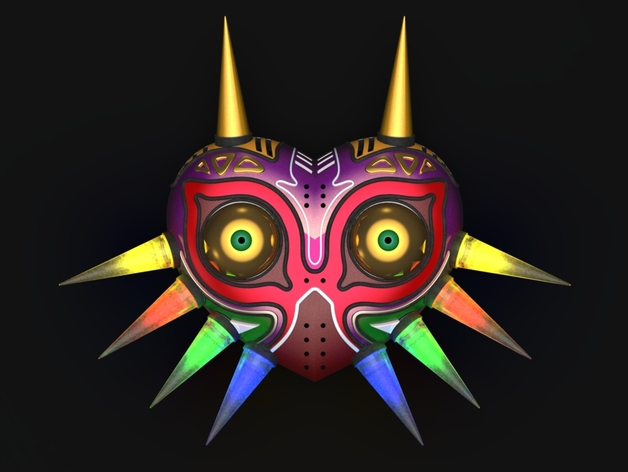
Mini Majora's Mask in High-Definition, with LED Horns!"HD-Mini" Desktop Version, with 3mm LEDs I have not yet finished this build, so any maker who accepts the quest to create this mask must be brave, adventurous and willing to expose your printer to certain death. You are hereby warned that you do so at your own risk and peril. The quest reward for your dangerous journey is a "Mini" sized Mask of Majora. The holder of the mask is warned never to place it upon their head... TEST PRINT: My legacy (version 2) test print can be viewed here: http://www.thingiverse.com/make:142834 UPDATE: I've optimized the model (Version 3) for directly installing LEDs into the mask. UPDATE: I've uploaded a desk stand and a wall mount (both are two part assemblies). Refer to the 6th render to determine part placement. For desk stand, you can route an Android power cable through the base to keep the mask powered, there are spots for a zip tie at the top and bottom of the desk stand. Instructions NOTE: These instructions have not yet been fully tested!Proceed with caution... Majora's Mask in High-Definition, now with LED Horns!"HD-Mini" Desktop Version, with 3mm LEDs You will need to print the following items: ONE HORN SET Qty 1, "3mmLED-Horn-Set-v2.stl", Transparent ABS/PLA/etc. XYZ Print Dimensions: (83mm,99mm,63mm)http://www.thingiverse.com/download:1424350 AND ONE MASK Single piece mask.... Qty 1, "3mmLED-Mask-Single-v3.stl", Opaque ABS/PLA/etc. XYZ Print Dimensions: (162mm,134mm, 48mm)http://www.thingiverse.com/download:1424297 OR separate left and right pieces plus small pins... Qty 1, "3mmLED-Mask-Left-v3.stl", Opaque ABS/PLA/etc. XYZ Print Dimensions: (134mm,48mm, 81mm)http://www.thingiverse.com/download:1424318 Qty 1, "3mmLED-Mask-Right-v3.stl", Opaque ABS/PLA/etc. XYZ Print Dimensions: (134mm,48mm, 81mm)http://www.thingiverse.com/download:1424342 Qty 4, "3mmLED-Small-Pin-v3.stl", Opaque ABS/PLA/etc. XYZ Print Dimensions: (3mm,3mm, 5mm)http://www.thingiverse.com/download:1424354 You will need to purchase the following items: Qty 6, 3mm Purple/UV LED (Eye Brow) ($0.96ea)http://goo.gl/yC7VWT Qty 2, 3mm Amber LED (Top Horn) ($0.46ea)http://goo.gl/CnexgQ Qty 2, 3mm Yellow LED (Side Horn) ($0.49ea)http://goo.gl/CA4J4h Qty 2, 3mm Red LED (Side Horn) ($0.39ea)http://goo.gl/e78EEj Qty 2, 3mm Green LED (Side Horn) ($0.44ea)http://goo.gl/6i3jRJ Qty 2, 3mm Blue LED (Side Horn) ($0.40ea)http://goo.gl/qzQzfx Qty 8, 3mm Red LED (Mouth) ($0.49ea)http://goo.gl/9dJeGT Qty 2, 3mm Orange LED (Nose) ($0.33ea)http://goo.gl/UwK111 Qty 2, 3mm Green LED (Eyes) ($0.33ea)http://goo.gl/lj78di Qty 1, Adafruit Pro Trinket - 3V 12MHz ($9.95 ea)http://www.adafruit.com/products/2010 Qty 1, Adafruit Pro Trinket LiIon/LiPoly Backpack ($4.95 ea)http://www.adafruit.com/products/2124 Qty 1, Lithium Ion Polymer Battery - 3.7v 2500mAh ($14.95 ea)http://www.adafruit.com/products/328 Glue, Solder, Soldering Iron and optionally paints and brush. Optional Hardware for Wall-Mount / Desk-Mount stands: Qty 1 (pack of 25), M2x6 Metric Screw ($10.95ea)http://www.mcmaster.com/#91239a704/=ykc2qm Qty 1, 1.3mm Hex Allen Key ($0.20)http://www.mcmaster.com/#6958a23/=ykc3ko ** Note: You can just glue the two stand pieces together if you don't wish to use/purchase the screw hardware. PRINT ORIENTATION STRATEGY: Mask halves (left and right) printed in the vertical orientation benefits Good for users that may have a smaller print bed Good for users with low warp materials Good to push z height layer lines towards the outside of mask, preserving better quality towards the center of the mask and reducing post print clean up.http://goo.gl/QPnXrahttp://goo.gl/rEOyPA Single mask printed in the horizontal orientation benefits Good for users with a larger print bed Good for users who may have warping issues, as gluing the two halves together may become difficult if warping is to high.http://goo.gl/bVKjA7 SUPPORT GENERATION STRATEGY: Overall, the mask "almost" prints well without the need for supports. However, there are still a few problem areas that do need support, regardless if you are printing the single horizontal piece or the two separate left and right pieces vertically. In either case, I would recommend generating support, with a low threshold of 15 degrees (in relation to the print bed). This will prevent a lot of unnecessary support from being generated, and will ensure the main trouble areas are supported. Refer to the photo for example. Recommended Slic3r 1.2.9 config files are available for ABS/PLA for users that have a 0.4mm nozzle. Just import the config file into Slic3r, and then re-select your own personal printer from the "printers" drop down box. The configuration assumes you have a heated bed (if you don't, just disable that on the filament screen). ASSEMBLY: There are four small guide pins to temporarily hold the mask together (3mmLED-Small-Pin-v3.stl). These pins should just give you a snug fit, but still allow the mask halves to be easily separated. Depending on the tolerance of your printer; the pins may be too tight to easily insert into the holes. Don't force the pins, as you won't be able to easily separate and re-attach the two halves while applying glue. Scale the four pins down just a bit (95%?), re-print, and retry. It will only take a few minutes to reprint the 4 small pins. Now that you have good alignment, separate the two halves leaving the guide pins in place in one of the mask halves. Now grab your favorite glue and apply an appropriate amount along the seam. Now firmly press the two mask halves together and clamp until dry. If you want glowing horns, you will need to print the horns using a clear or translucent material. Cut a piece of Aluminum foil to 6mm x 12mm. Use a small piece of scotch tape to secure the foil to the outer surface of the 6mm long light pipe (bottom/center of the horn). The shiny side should be facing inward. Next, insert a "large-guide-pin" into the base of the horn. Now press the horn and its guide pin into one of the masks horn sockets. The 54mm horn goes in the bottom socket, followed by 55.8mm horn, and so on until you get to the 62.4mm horn on the top of the mask. (Glue the horns in place only if they are loose). The large guide pins have an outside diameter of 12.6mm and the inside diameter of the horn socket is 12mm. So you should have a tight fit (use pliers if needed to compress the guide clip as you insert it into the horn). If the fit is to tight, sand the guide clip down. Now grab your 3mm LEDs, insert them into the LED holes from the rear side of the mask, and secure with a drop or two of Super-Glue. Refer to the color rendering for color placement of the lower four horns. The top two horns should be amber. The 'mouth' LEDs are red, the 'nose' LEDs are orange, and the 'eyebrow' LEDs are Purple/UV. You can of course substitute any color you wish. The 'horn' LEDs will all be much brighter clear LEDs to help illuminate the horns, while the 'face' LEDs are generally less bright tinted LEDs to make them not so overpowering since they will be directly facing the viewer (the Purple/UV LEDs are the exception, as they are clear). Electronic wiring instructions to follow soon after print is done. :-) In essence, you will connect the battery to the charger, connect the charger to the Trinket Pro, connect all of the negative leads of the LEDs together, and then connect to the ground pin of the Trinket Pro. Each 'pair' of LED's (corresponding left and right side) should be connected to a unique output pin on the Trinket Pro There are 14 LED pairs; 5 Horn pairs 1 Eye pair 1 Nose pair 4 Mouth pairs 3 Eyebrow pairs I believe the Trinket can power the LEDs directly without current limiting resistors due to internal current limiting on the pin, but you should verify this first. You should be able to find plenty of code examples on Google to get the LEDs up and running. Sorry, but I wont be posting code to drive the LEDs. Adafruit.com is another great place to find sample code and examples. DESK STAND: Print the two "Desk Stand" parts, and then glue them together, or use the recommended 2mmx6mm metric screws from McMaster. The mask can be quickly removed from the desk stand and replaced, as the mask just rests on three prongs. There are corresponding sockets on the rear side of the mask. Again, I have not yet fully assembled this thing, so no guarantees that anything will work. The mask could potentially vanish into thin air during assembly. :-)
With this file you will be able to print Majora's Mask "HD-Mini" (3mm LEDs) with your 3D printer. Click on the button and save the file on your computer to work, edit or customize your design. You can also find more 3D designs for printers on Majora's Mask "HD-Mini" (3mm LEDs).